
What's Your Little Secret?
....continuing on with the challenge, this is day 28 of 31...for all 31, go here
It seems as though everyone has a trick, or little secret as to how they keep their upholstery clean...here is mine

I wanted one of these Bissell mini cleaners for the longest time. Would I really use it? Does it really work? Yes and Yes!
With two kids, a husband, and Buster

Things can get pretty dirty around here. This is my favorite solution
So, that's my secret...what is yours?
This is not a sponsored post. It is my honest opinion. In fact, Bissell, call me!
It seems as though everyone has a trick, or little secret as to how they keep their upholstery clean...here is mine
I wanted one of these Bissell mini cleaners for the longest time. Would I really use it? Does it really work? Yes and Yes!
With two kids, a husband, and Buster
Things can get pretty dirty around here. This is my favorite solution
 |
| Pet & Stain |
So, that's my secret...what is yours?
This is not a sponsored post. It is my honest opinion. In fact, Bissell, call me!







Upholstery 101 (week 5)
.....continuing on with the challenge, this is day 26 of 31....for all 31, go here
If you are new to upholstery 101, start here.
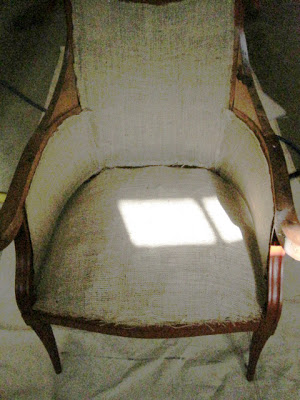
So, this is where we left off

Since then, I added burlap to the inside arms. The same way I did the back
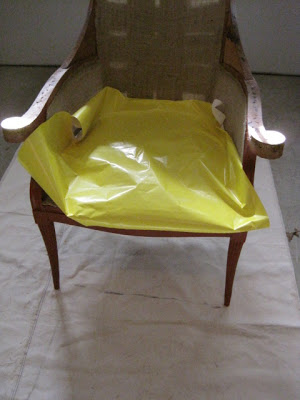
With a pen, pencil, marker, crayons.....trace the inside area onto the paper and cut the template

Re-install the edge-roll that was saved from the original chair. The purpose of this is to help keep stuffing, horsehair, foam into shape. It is also there to give a finished look to the front edge of the chair
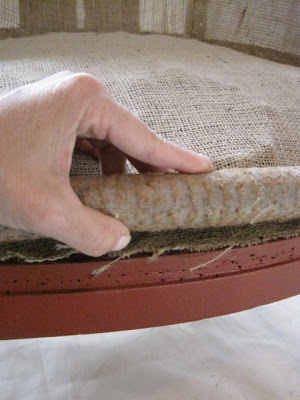
You want to make sure that the middle of the roll covers the edge of the chair

Once you like the position, tack it down
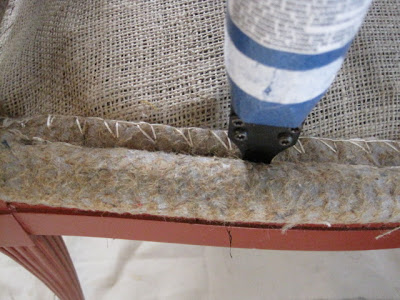
Place the template back on the chair. The foam should meet the front end of the edge-roll. I will add 1" to the front of this template
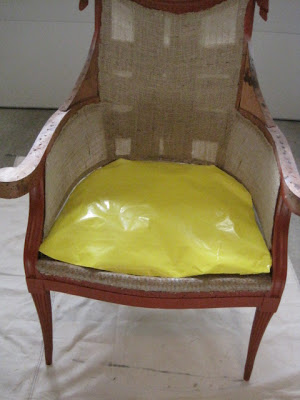
Place the template on the foam and trace around it. Note, it is much better to cut it too large, and trim to fit!
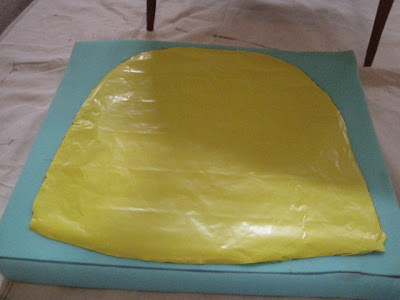
I am sure that you have seen people cutting foam with a turkey carver, well that is because it works the best. However, again...if this is only a one time thing for you, use what you have
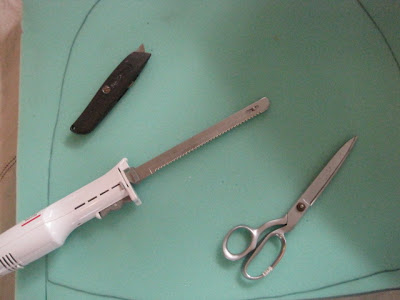
Once the foam is cut, I like to bevel the edge all the way around with a razor blade. If you are looking for a crisp square edge, then don't do this
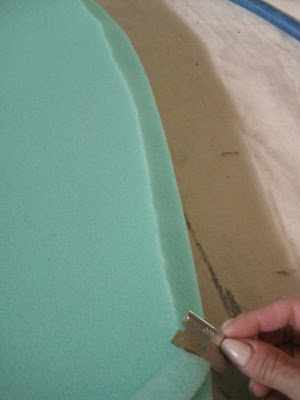
On the FRONT EDGE only, I flip the foam and bevel the underside
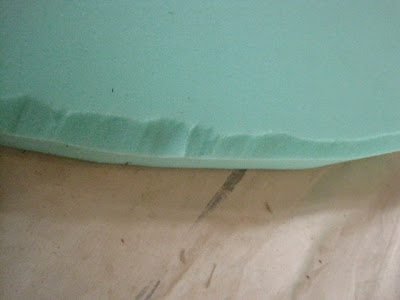
Don't worry about imperfections...it will be fine
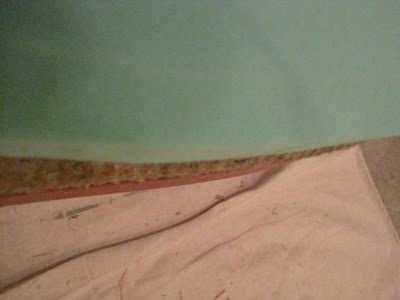
The under bevel helps allow the foam to sit nicely on top of the edge-roll. The top is beveled too, the photo is not showing it. Next, place a sheet of dacron (batting) onto the foam. This is what will help hold the foam into shape and take some of the pressure off of the fabric
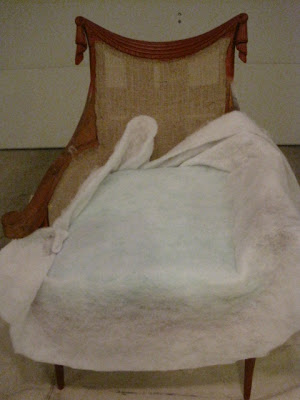
Again, I like to work off of the bolt, but if it is easier for you, trim a piece that is manageable for you. FIRMLY pressing down on the foam, staple along the edge into the wood frame. Be extra careful not to staple into the finished area

Trim off excess

You can see that it is looking softer along the front edge. Tuck the dacron all around the chair, and push and staple....I had my son sit on the foam while I stapled the back. It was not possible to push down and staple from that angle
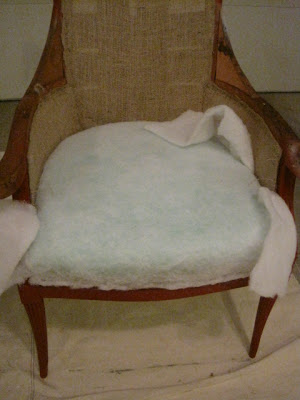
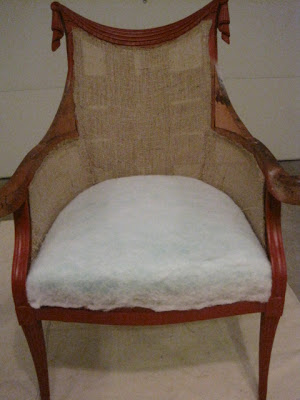
Here is the seat, slowly gaining it's shape back
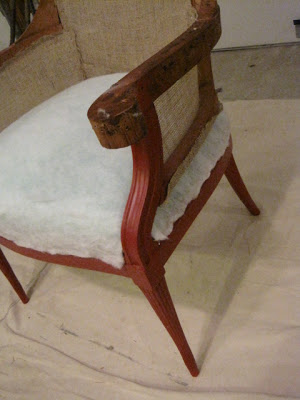
Here is a side view
If you are new to upholstery 101, start here.
So, this is where we left off
Since then, I added burlap to the inside arms. The same way I did the back
I can't find my craft paper, so I am using wrapping paper to make a template for the foam
With a pen, pencil, marker, crayons.....trace the inside area onto the paper and cut the template
Re-install the edge-roll that was saved from the original chair. The purpose of this is to help keep stuffing, horsehair, foam into shape. It is also there to give a finished look to the front edge of the chair
You want to make sure that the middle of the roll covers the edge of the chair
Once you like the position, tack it down
Place the template back on the chair. The foam should meet the front end of the edge-roll. I will add 1" to the front of this template
Place the template on the foam and trace around it. Note, it is much better to cut it too large, and trim to fit!
I am sure that you have seen people cutting foam with a turkey carver, well that is because it works the best. However, again...if this is only a one time thing for you, use what you have
Once the foam is cut, I like to bevel the edge all the way around with a razor blade. If you are looking for a crisp square edge, then don't do this
On the FRONT EDGE only, I flip the foam and bevel the underside
Don't worry about imperfections...it will be fine
The under bevel helps allow the foam to sit nicely on top of the edge-roll. The top is beveled too, the photo is not showing it. Next, place a sheet of dacron (batting) onto the foam. This is what will help hold the foam into shape and take some of the pressure off of the fabric
Again, I like to work off of the bolt, but if it is easier for you, trim a piece that is manageable for you. FIRMLY pressing down on the foam, staple along the edge into the wood frame. Be extra careful not to staple into the finished area
Trim off excess
You can see that it is looking softer along the front edge. Tuck the dacron all around the chair, and push and staple....I had my son sit on the foam while I stapled the back. It was not possible to push down and staple from that angle
Here is the seat, slowly gaining it's shape back
Here is a side view
I will l repeat these steps for the inside back of the chair. Note, since my foam is so thick, I will look at the chair tomorrow, and possibly add another layer of dacron over this one if the seat is not holding the shape.
Thanks for joining me. Hope to see you again, next Wednesday. If you have a DIY upholstery project, I would love to hear about it!
Just Sit on IT!
......continuing with the challenge, this is day 25 of 31....for all 31, go here
While preparing for tomorrow's upholstery tutorial, I realized that I did not tell you enough about foam.
How much cush for you tush?
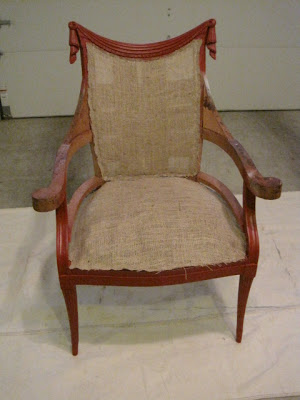
It is very scientific....not really, you just SIT ON IT! Let me show you. Here is the chair with just springs and burlap
Starting with 1" High Density foam
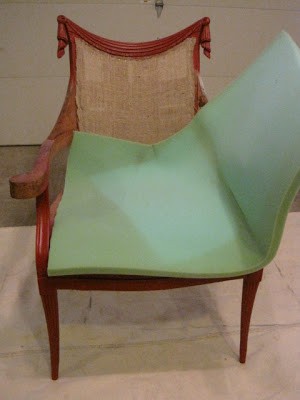 Too hard
Next up, 2"
 Better, still a bit hard for my derriere
The Papa Bear, 3"
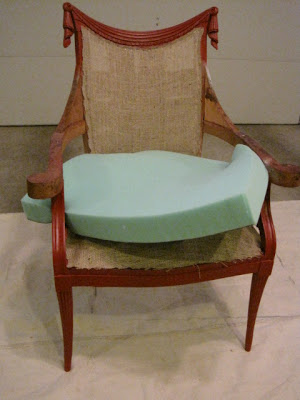 Yes!
Yes!
The foam will have a layer of dacron, so I'll test it that way....
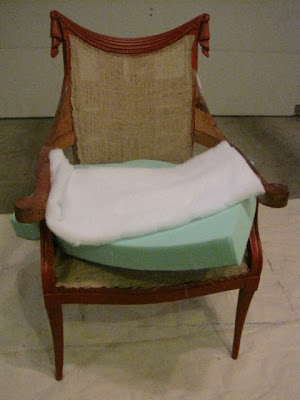 It is a plush seat, my personal preference.
Same method for the back
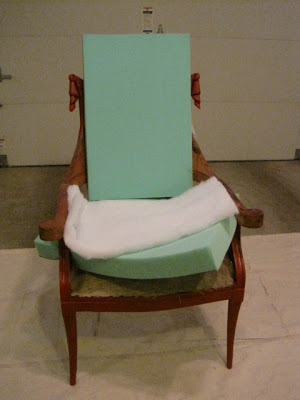 This is the winning combo; a 3" High Density foam for the seat, with a 2" High Density foam for the back.....your bum may have a different preference.
Do you prefer a plush chair, or a firm chair?
While preparing for tomorrow's upholstery tutorial, I realized that I did not tell you enough about foam.
How much cush for you tush?
It is very scientific....not really, you just SIT ON IT! Let me show you. Here is the chair with just springs and burlap
Starting with 1" High Density foam
Next up, 2"
The Papa Bear, 3"
The foam will have a layer of dacron, so I'll test it that way....
Same method for the back
Do you prefer a plush chair, or a firm chair?
Or, you can do this....
....continuing with the challenge, this is day 24 of 31....for all 31, go here
I have heard from a few of you that making piping for upholstery....is not easy. I think that is very accurate. It is NOT beyond your ability, though.
However, there is always another way. If you were not aware, ready-made piping is widely available in a rainbow of colors

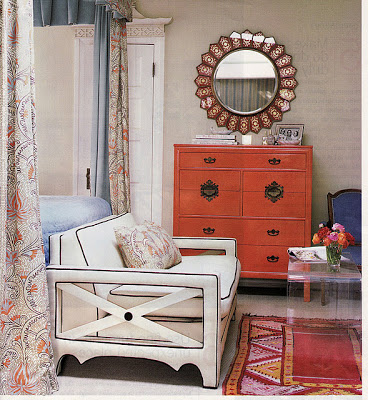
So, you can do this
or this
This one makes me smile
Mod & hip
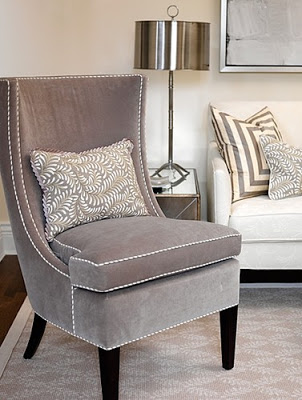
So glam, love this
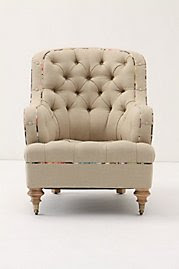
Do they ever make a mistake?
I have heard from a few of you that making piping for upholstery....is not easy. I think that is very accurate. It is NOT beyond your ability, though.
However, there is always another way. If you were not aware, ready-made piping is widely available in a rainbow of colors
So, you can do this
 |
| Source |
or this
 |
| Source |
This one makes me smile
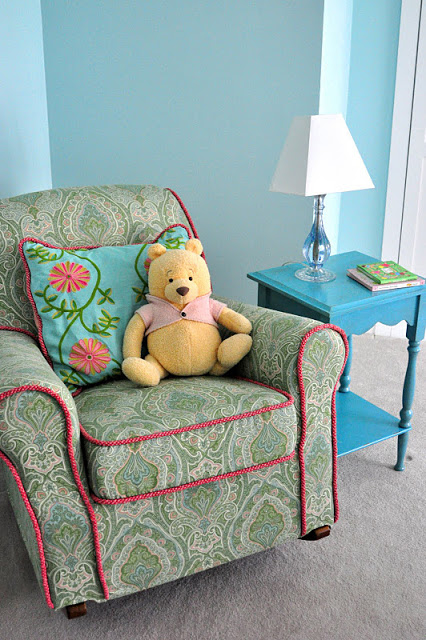 |
| Source |
Mod & hip
 |
| Source |
So glam, love this
 |
| Source |
Do they ever make a mistake?
Let's Nail This Down!
...continuing with the challenge, this is day 23 of 31....for all 31, go here
My friend, Nicole, (one of the first bloggers I met when I started) you should check out her blog, asked about nail heads. She wanted to know if there was a trick to keeping them from breaking? Since I have had this happen to me.....I certainly did not know the secret.
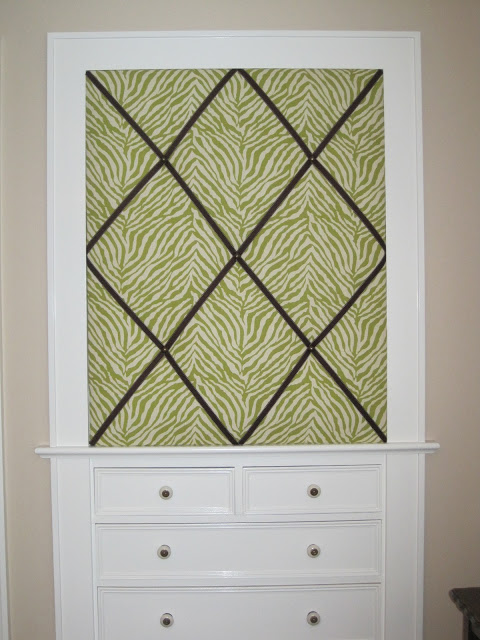
When I made this memo board for my daughter, I used nail-heads at all the cross sections. I broke so many, that I cut off the nail end and used hot glue to attach the tops on some spots. Since it is upholstered with batting under the fabric, in the places I glued the nail-heads; first I used my staple gun to indent the fabric....and then glued on top of that spot
I was curious enough to research this even further. So a google search said to use a rubber mallet instead of a hammer.
Now I was DETERMINED to find a solution. Here is my un-scientific experiment
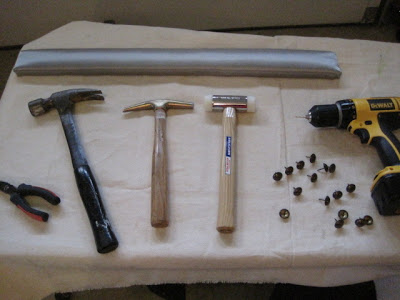
I upholstered a piece of hard wood with batting and gray fabric. Then, I lined up the testing tools
First up, applying nail-heads with a hammer

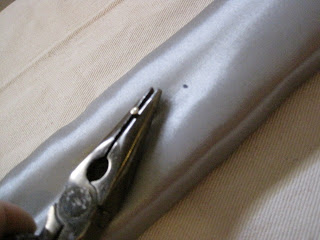
all the nail-heads were held in place with needlenose pliers. Here are three with a hammer
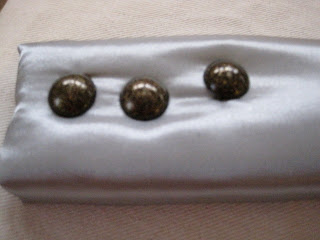
All three started in a straight line. However, as you can see, although they did not break...they Bent
Next up, the tack hammer. I marked three dots, to ensure a straight line
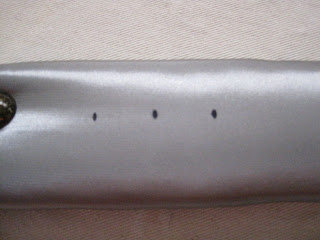
and the three
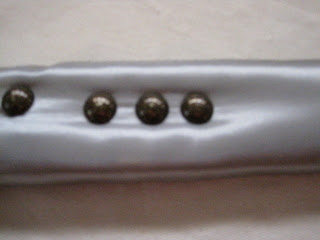
Looks great, nothing broke, or moved much. Let's compare the hammer on the left to the tack hammer on the right
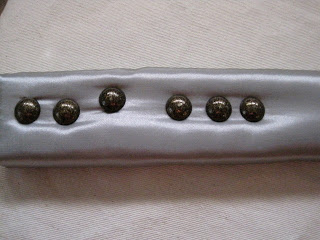
Next up, the "googled" choice, the rubber mallet
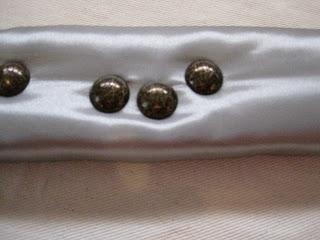
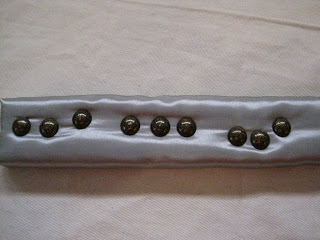
almost the same as the hammer. Here are the results thus far..(L to R) hammer, tack hammer, rubber mallet
Finally, the one my gut told me would work. The one I suggested to Nicole. To pre-drill a hole and then insert the nail head
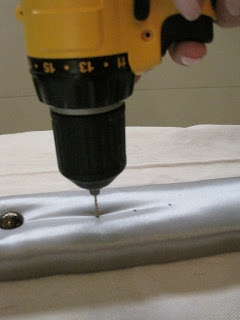
BIG MISTAKE! My gut was wrong. The spinning drill bit was pulling and bunching up the batting. A quick improvise, to start the hole with a small nail,remove the nail, and then insert the nail head
and the final review

It is a tie between the tack hammer and starting the hole with a small nail before inserting the nail head. If anyone has an opinion on this...please share.
The other day, The Nate Show told us about glue-on nail-heads. I can't find them. Does anyone know where to buy them?
My friend, Nicole, (one of the first bloggers I met when I started) you should check out her blog, asked about nail heads. She wanted to know if there was a trick to keeping them from breaking? Since I have had this happen to me.....I certainly did not know the secret.
When I made this memo board for my daughter, I used nail-heads at all the cross sections. I broke so many, that I cut off the nail end and used hot glue to attach the tops on some spots. Since it is upholstered with batting under the fabric, in the places I glued the nail-heads; first I used my staple gun to indent the fabric....and then glued on top of that spot
I was curious enough to research this even further. So a google search said to use a rubber mallet instead of a hammer.
Now I was DETERMINED to find a solution. Here is my un-scientific experiment
I upholstered a piece of hard wood with batting and gray fabric. Then, I lined up the testing tools
First up, applying nail-heads with a hammer
all the nail-heads were held in place with needlenose pliers. Here are three with a hammer
All three started in a straight line. However, as you can see, although they did not break...they Bent
Next up, the tack hammer. I marked three dots, to ensure a straight line
and the three
Looks great, nothing broke, or moved much. Let's compare the hammer on the left to the tack hammer on the right
Next up, the "googled" choice, the rubber mallet
almost the same as the hammer. Here are the results thus far..(L to R) hammer, tack hammer, rubber mallet
Finally, the one my gut told me would work. The one I suggested to Nicole. To pre-drill a hole and then insert the nail head
BIG MISTAKE! My gut was wrong. The spinning drill bit was pulling and bunching up the batting. A quick improvise, to start the hole with a small nail,remove the nail, and then insert the nail head
and the final review
It is a tie between the tack hammer and starting the hole with a small nail before inserting the nail head. If anyone has an opinion on this...please share.
The other day, The Nate Show told us about glue-on nail-heads. I can't find them. Does anyone know where to buy them?