


Uncommon Supplies (Day 9 of 31)
...and this is day 9 of the challenge, for all 31 days, go here
I got a question the other day about where to buy springs? I realized that I have not told you my most useful tip...
Go to the local, small shop, nice guy, upholsterer. Yup, believe it or not, It has been my experience that these type of places love (or find it majorly amusing) that a "mere mortal man/woman" is going to tackle such an artful, skillful, renaissance craft.
I have never had any of them refuse to sell me an odd-ball supply! In fact, I have only done it a few times, but in one case....he gave it to me for free! Don't expect it and always be prepared and offer to pay for an item. While you are there, you will almost always see an item being worked on....ask questions...tell him your concerns about how to handle a step....ask for advice on a specific issue.
This is my approach.....
I think I'm in over my head. My husband and I have a bet, he is sure that I cannot upholster this (show picture)___________before ____________. I know I could never do a job as professional as yours, but I really want try! I need a (show him item you need) ___________,will you sell me one?

Why would the local upholsterer be so kind and generous to someone who only wants to buy one small piece of High Density foam, a unique hinge, 22 inches of a tack strip.....he knows you will probably be back!Not back for more parts, but rather back for him to just finish the job, or better yet, give him your next job because you found this too hard and not worth the effort. By the way, if you do find it not worth the effort, at almost any point in the process you can hire a professional to finish it!
For on-line sources, here are a few that I have either tried....or would definitely try.
DIY Upholstery Supply, use the phone number and call if you are not sure. Better yet, use the "ask the expert" option.
Gary's Upholstery Products, I have purchased from this site. The site takes a bit more clicking to figure out exactly what you are looking for, but has most everything.
Ebay, I have purchased staples from this ebay seller.
If you know of any other sources, I would love to hear about it. Hope to see you tomorrow!
I got a question the other day about where to buy springs? I realized that I have not told you my most useful tip...
Go to the local, small shop, nice guy, upholsterer. Yup, believe it or not, It has been my experience that these type of places love (or find it majorly amusing) that a "mere mortal man/woman" is going to tackle such an artful, skillful, renaissance craft.
I have never had any of them refuse to sell me an odd-ball supply! In fact, I have only done it a few times, but in one case....he gave it to me for free! Don't expect it and always be prepared and offer to pay for an item. While you are there, you will almost always see an item being worked on....ask questions...tell him your concerns about how to handle a step....ask for advice on a specific issue.
This is my approach.....
I think I'm in over my head. My husband and I have a bet, he is sure that I cannot upholster this (show picture)___________before ____________. I know I could never do a job as professional as yours, but I really want try! I need a (show him item you need) ___________,will you sell me one?
Why would the local upholsterer be so kind and generous to someone who only wants to buy one small piece of High Density foam, a unique hinge, 22 inches of a tack strip.....he knows you will probably be back!Not back for more parts, but rather back for him to just finish the job, or better yet, give him your next job because you found this too hard and not worth the effort. By the way, if you do find it not worth the effort, at almost any point in the process you can hire a professional to finish it!
 |
| Tack Strip |
For on-line sources, here are a few that I have either tried....or would definitely try.
DIY Upholstery Supply, use the phone number and call if you are not sure. Better yet, use the "ask the expert" option.
Gary's Upholstery Products, I have purchased from this site. The site takes a bit more clicking to figure out exactly what you are looking for, but has most everything.
Ebay, I have purchased staples from this ebay seller.
If you know of any other sources, I would love to hear about it. Hope to see you tomorrow!
I can't do this (Day 8 of 31)
....continuing with the challenge, this is day 8. For all 31 days, go here
My upholstery conversation today, is about what I covet and would never try to do myself...
I love a chesterfield sofa. I love the shape, the tufting, covered buttons, carved feet...I would never try to upholster one of these myself. I think I would lose my vision, my patience...and eventually my mind. For me, this would be the time to call in a professional
You had me at the nailheads!
Does this one remind you of anything?
This is perfection
This one makes me smile
Two of a Kind!
What upholstered piece do you dream of?
My upholstery conversation today, is about what I covet and would never try to do myself...
I love a chesterfield sofa. I love the shape, the tufting, covered buttons, carved feet...I would never try to upholster one of these myself. I think I would lose my vision, my patience...and eventually my mind. For me, this would be the time to call in a professional
 |
| source |
You had me at the nailheads!
 |
| Anthropology |
Does this one remind you of anything?
 |
| Apartment Therapy |
This is perfection
 |
| Restoration Hardware |
This one makes me smile
 |
| Source |
Two of a Kind!
 |
| Apartment Therapy |
What upholstered piece do you dream of?
Under the Springs (Day 7 of 31)
This weeks upholstery class was a long one (3posts), and the 7th of 31 for the challenge...for all 31, go here
After you have done all the spring work you need to reinforce the webbing beneeth the springs. You will notice that the springs are sewn to the webbing underneath

When I flipped the chair over, this is what I found
 Two layers of webbing. As I mentioned in the previous post, this chair had been worked on at least once before. The second layer was probably added for reinforcement when the springs were tied a second time.
Since the condition of the top webbing (red) was poor

I am going to remove it using the same method as stripping the chair
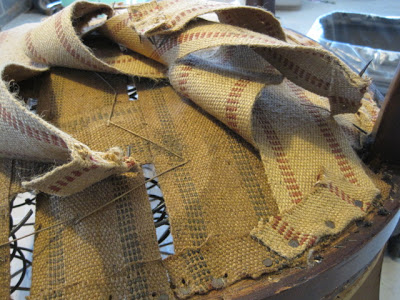 you can see the hand sewing that holds the springs on the first layer
once that top layer is removed, shop-vac the dust, and add a fresh new layer. Here are the supplies I used
 Jute webbing and a web stretcher (a pair of pliers would work)
Staple the strapping with the raw edge facing into the center of the chair
 then, fold the webbing back on itself
 and staple again

next, using the stretcher, stab the webbing

rest the rubber end of the stretcher against the frame of the chair (if you are using a pliers just pull the webbing you do not to scratch or dent the wood frame). Stretch the webbing
 when you have tightened the webbing to your satisfaction, it should be tighter than the current old webbing the goal is to bring back the resistance of the springs for a firmer seat...
staple down
 trim off excess
 fold back over, staple again

continue until one direction is finished

changing direction, start the other way, same as before and weave like a basket

streatch, pull, staple until you are finished
 just for a frame of refference, this is quite tight. You could bounce a quarter on this.
This is how I reinforce my chair. Take what works for you and feel free to improvise for a solution to your specific project. The next installment for this project will be next Wednesday. Hope to see you then.
After you have done all the spring work you need to reinforce the webbing beneeth the springs. You will notice that the springs are sewn to the webbing underneath
When I flipped the chair over, this is what I found
Since the condition of the top webbing (red) was poor
I am going to remove it using the same method as stripping the chair
once that top layer is removed, shop-vac the dust, and add a fresh new layer. Here are the supplies I used
Staple the strapping with the raw edge facing into the center of the chair
next, using the stretcher, stab the webbing
rest the rubber end of the stretcher against the frame of the chair (if you are using a pliers just pull the webbing you do not to scratch or dent the wood frame). Stretch the webbing
staple down
continue until one direction is finished
changing direction, start the other way, same as before and weave like a basket
streatch, pull, staple until you are finished
This is how I reinforce my chair. Take what works for you and feel free to improvise for a solution to your specific project. The next installment for this project will be next Wednesday. Hope to see you then.
Tying Springs (Day 6 of 31)
This is a continuation of gluing the frame....and day 6 of the challenge...for all 31 days, go here
Once your frame is sturdy, you are ready to tackle the springs. I am not an expert in tying springs...so If you are looking for the perfect way to do spring work, I suggest you go to YouTube, where you will find an overload of videos. If, however, you are looking for a perfectly functional way to do spring work....maybe this will work for you
With a shop-vac, I cleaned off the years of dust, and ....whatever. Counting around the circle of one spring, you will see that this is a 4-way tied spring (the amount of knots on one spring)

You will notice that the springs are tied on the top layer

This chair has obviously been re-tied. Notice how old strings are brown in color and not attached to anything. The old strings are tied into the fresh cream ones, so I will trim them, but not remove all of them.

The bottom of the springs are hand sewn to the jute webbing. I will address that later.
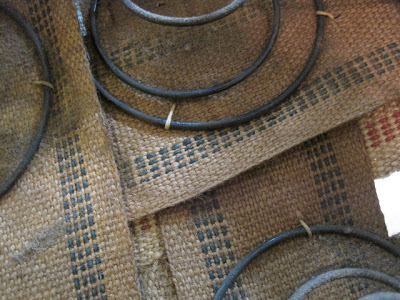
This is the proper way to tie a knot on a spring. I will be honest with you, it is a bit confusing to follow, so some of my springs are not done perfectly, but they are perfectly functional.
This is what an 8-way hand tied spring looks like. 8 knots on one spring. It is the Rolls Royce of industry standards. The goal is for all springs to work as a unit. Each rope pulls on the next spring which will provide for a uniform look to your seat, ottoman, etc.
I used this package of rope

Examining my springs and current rope, I have decided that I will reinforce the current rope to the chair. Working from the top side of the chair, using my staple gun, I apply several staples above the current nails

Next, I tied the rope (as best I could) like the above diagram and stapled down the new rope keeping the tension on the spring as uniform as possible
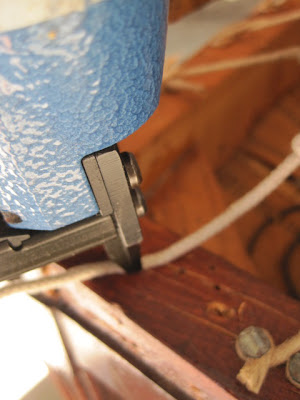
To lock the rope, fold it back on itself and staple again, trim off excess
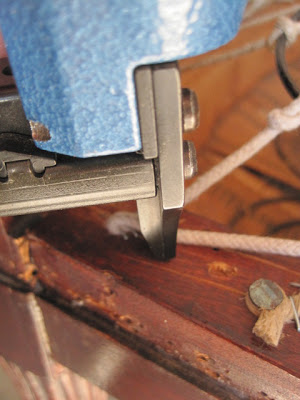
Now you have a secure tied rope on your spring. Continue adding rope where needed. Here is my finished spring work. Note that not all of the springs are 8-way tied. I did what I thought would be perfectly fine....you decide for yourself.
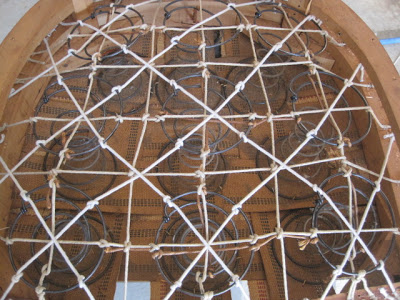 The important thing is that all the springs carry the same amount of pressure and have a uniform look.
Tomorrow, I will show you how I handled the webbing on the bottom of the chair under the springs.
Once your frame is sturdy, you are ready to tackle the springs. I am not an expert in tying springs...so If you are looking for the perfect way to do spring work, I suggest you go to YouTube, where you will find an overload of videos. If, however, you are looking for a perfectly functional way to do spring work....maybe this will work for you
With a shop-vac, I cleaned off the years of dust, and ....whatever. Counting around the circle of one spring, you will see that this is a 4-way tied spring (the amount of knots on one spring)
You will notice that the springs are tied on the top layer
This chair has obviously been re-tied. Notice how old strings are brown in color and not attached to anything. The old strings are tied into the fresh cream ones, so I will trim them, but not remove all of them.
The bottom of the springs are hand sewn to the jute webbing. I will address that later.
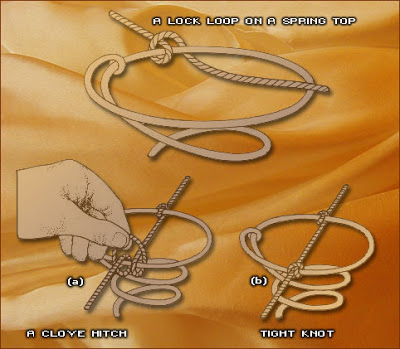
This is the proper way to tie a knot on a spring. I will be honest with you, it is a bit confusing to follow, so some of my springs are not done perfectly, but they are perfectly functional.
 |
| Heritage Upholstery |
This is what an 8-way hand tied spring looks like. 8 knots on one spring. It is the Rolls Royce of industry standards. The goal is for all springs to work as a unit. Each rope pulls on the next spring which will provide for a uniform look to your seat, ottoman, etc.
 |
| Heritage Upholstery |
Examining my springs and current rope, I have decided that I will reinforce the current rope to the chair. Working from the top side of the chair, using my staple gun, I apply several staples above the current nails
Next, I tied the rope (as best I could) like the above diagram and stapled down the new rope keeping the tension on the spring as uniform as possible
To lock the rope, fold it back on itself and staple again, trim off excess
Now you have a secure tied rope on your spring. Continue adding rope where needed. Here is my finished spring work. Note that not all of the springs are 8-way tied. I did what I thought would be perfectly fine....you decide for yourself.
Tomorrow, I will show you how I handled the webbing on the bottom of the chair under the springs.
Upholstery 101 (week 2) (Day 5 of 31)
Welcome back to my upholstery project. This is also day 5 of the challenge. For a list of all 31 days, go here
Last week, we stripped the chair, this week we will evaluate the sturdiness of the chair
Here are the tools I used this week
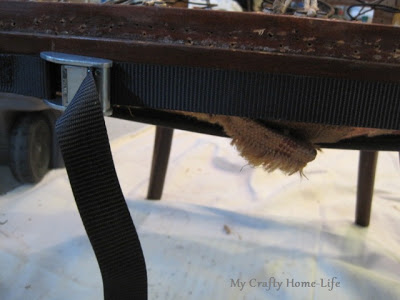
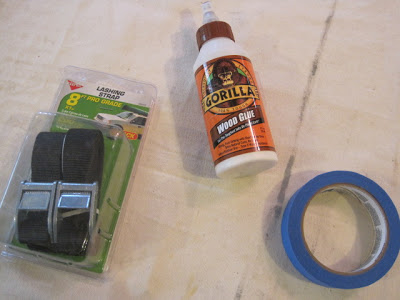 Strapping, the kind used to hold down "stuff" (with a clamp attached), wood glue, and blue tape (also a rubber mallet)
This is where we left off
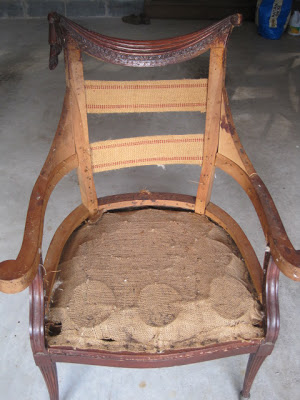
the chair is not sturdy, when I gently rock the frame...it wiggles. Joints are coming undone
You can also see where it needs to be glued
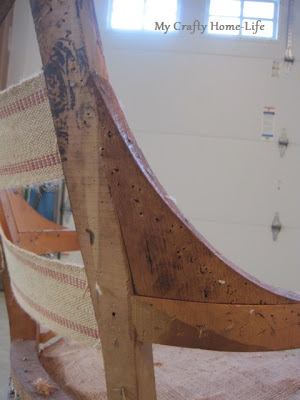 example, the right side looks good
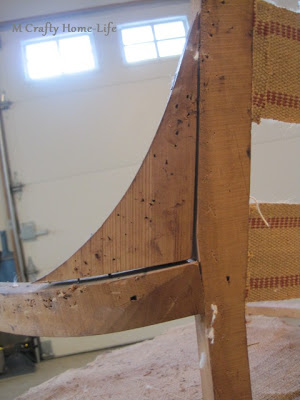 the left side has obvious gaps
Here are my tips for gluing, do what works for you...
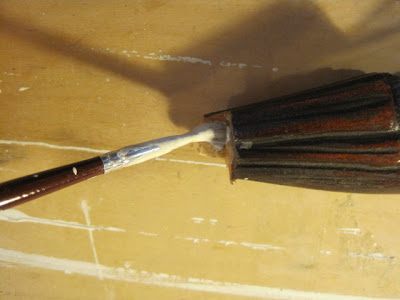
I like to put some glue on a piece of foil

using an old brush, apply the glue into all of the joints
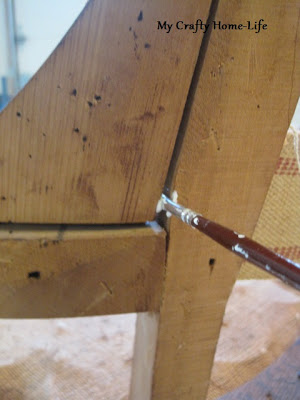
make sure to apply plenty of glue
 this is your chance, go for it
With a damp rag, wipe off the excess glue

Using a rubber mallet, or very gently with a hammer

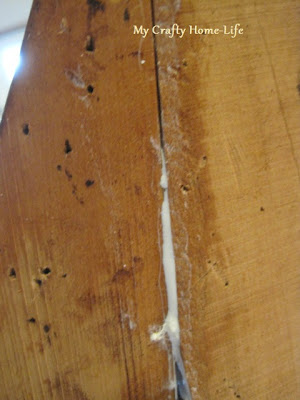 you will know you are successful when excess glue is forced out of the joint
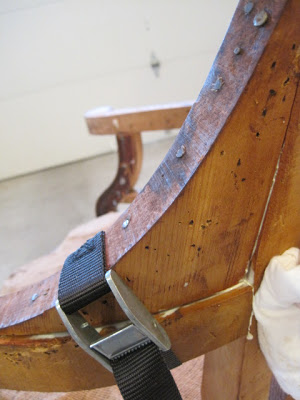 if necessary, use the clamp to hold the joint in place until the glue dries
when replacing broken off pieces, first chip off the old glue

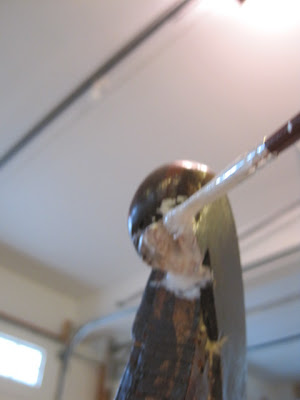

using the blue tape, hold the piece in place till dry

Last week, we stripped the chair, this week we will evaluate the sturdiness of the chair
Here are the tools I used this week
This is where we left off
the chair is not sturdy, when I gently rock the frame...it wiggles. Joints are coming undone
You can also see where it needs to be glued
Here are my tips for gluing, do what works for you...
I like to put some glue on a piece of foil
using an old brush, apply the glue into all of the joints
make sure to apply plenty of glue
With a damp rag, wipe off the excess glue
Using a rubber mallet, or very gently with a hammer
gently "encourage" the pieces back together
when replacing broken off pieces, first chip off the old glue
apply glue to the joint
also apply glue to the piece
make sure the piece has a tight fit squeezing out excess glue, wipe again
using the blue tape, hold the piece in place till dry
repeat the process on all joints needing reinforcement