
Jute Webbing (Day 4)
...continuing on the 31 day challenge.....for all 31 days, go here
On Wednesday, in my continuing upholstery class series, I will be discussing how to glue the structure, reinforce springs, and add or tighten the webbing on your project. So, for today, I thought it would be fun to check other crafty ways you could use upholstery jute webbing
On Wednesday, in my continuing upholstery class series, I will be discussing how to glue the structure, reinforce springs, and add or tighten the webbing on your project. So, for today, I thought it would be fun to check other crafty ways you could use upholstery jute webbing
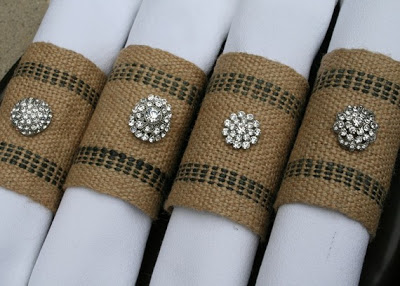 |
| on Etsy |
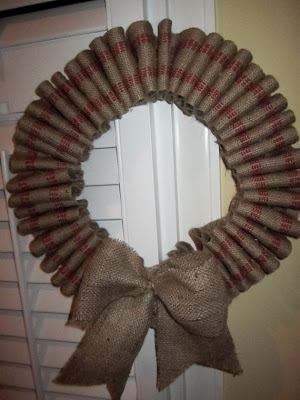 |
| on Etsy |
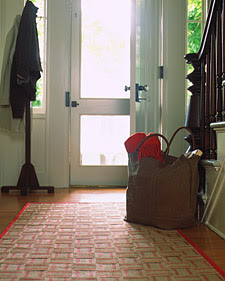 |
| Martha |
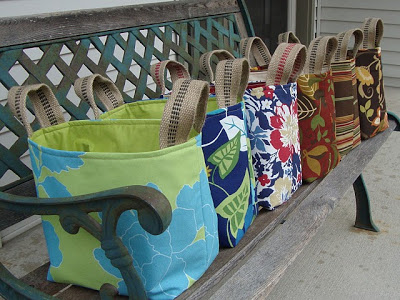
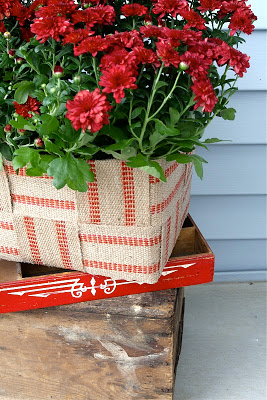
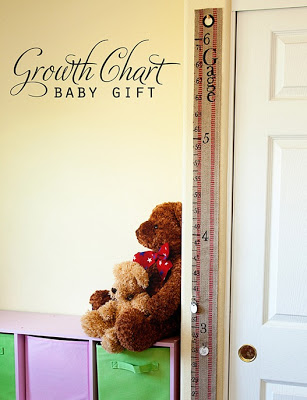
All of the above sites either sell it, or teach you how to create it.....see you tomorrow~
Foam for Upholstery (Day 3 of 31)
This is Day 3 of the challenge....for all 31 days, go here
Today, I would like to talk about foam. Here are my thoughts in a nutshell...

*not sure how old the old foam is....replace it
*fairly new chair/seat, just want a fresh fabric...replace the foam
*afraid to take the foam off....do it
* foam feels like it is fine....replace it anyway
Why you may ask? Because foam deteriorates over time. You will never regret replacing the foam. You may, however, regret NOT replacing the foam.
Now density...
To High Density, or not to High Density foam?....that is the question
As a rule, anything you will sit on, or put your feet on, in general...should be High Density.
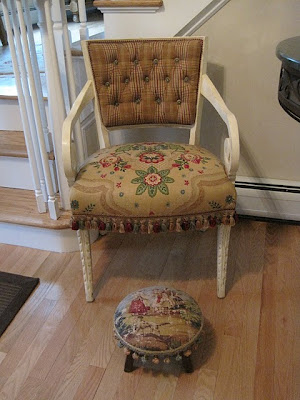
This seat bottom is High Density. The tufted back, is not. The footstool has horsehair (never used)
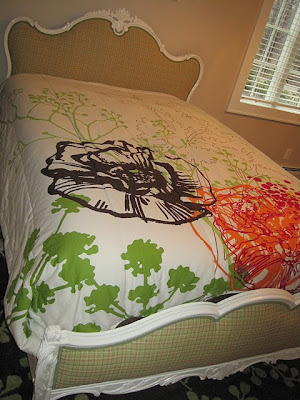 On the headboard and foot-board, I used mattress pad foam like this

On the headboard, I doubled it (keeping smooth sides facing out) and the foot-board is a single layer (smooth side against fabric). This is a great alternative to conventional foam for crafty projects. The sheets are large and economical.
So, you get the idea. Foam can be purchased at many fabric stores. Jo-Ann Fabrics has a large selection...and they always have a coupon. Last Spring, I purchased outdoor foam here when I updated my front porch.
I will do a future post on cutting foam. What are your experiences with foam?
Today, I would like to talk about foam. Here are my thoughts in a nutshell...
*not sure how old the old foam is....replace it
*fairly new chair/seat, just want a fresh fabric...replace the foam
*afraid to take the foam off....do it
* foam feels like it is fine....replace it anyway
Why you may ask? Because foam deteriorates over time. You will never regret replacing the foam. You may, however, regret NOT replacing the foam.
Now density...
To High Density, or not to High Density foam?....that is the question
As a rule, anything you will sit on, or put your feet on, in general...should be High Density.
This seat bottom is High Density. The tufted back, is not. The footstool has horsehair (never used)
On the headboard, I doubled it (keeping smooth sides facing out) and the foot-board is a single layer (smooth side against fabric). This is a great alternative to conventional foam for crafty projects. The sheets are large and economical.
So, you get the idea. Foam can be purchased at many fabric stores. Jo-Ann Fabrics has a large selection...and they always have a coupon. Last Spring, I purchased outdoor foam here when I updated my front porch.
I will do a future post on cutting foam. What are your experiences with foam?
Upholstery, and other fabric Sources (Day 2 of 31)
This is Day 2 of the challenge....For all 31 days, go here
Fabric is a HUGE topic. In fact, I cannot do it all in one post, so I will have future discussions on this, check back. For now, I am going to share with you MY experience BASED ON PRICE...
I am a fabricjunkie collector

I gave some of this away for a recent charity garage sale so my collection is a bit lighter. Never the less, If I get enough "followers", I will have a fabric give-away at the end of the 31 days!
What everyone always wants to know...where do you get the best deals? I have seen many of the blog posts/links/ads; some are good, but most just don't do it for me...how about you? I have also read about people finding yards and yards for almost nothing....again, not me....how about you?
Because I live close to NY, I have been to Mood and many of the other stores in that area. The selection is good, but again, fair prices, nothing to get too excited about. For example
Since price is so subjective, this is a good place to start. I don't find the above fabrics rediculis in prices, however, they are also not enough of a bargin for me to buy them....how about you?
I have purchased from Calico Corners, they have 20% off maybe about once a month, and about 2 times a year, they have a 25% off (sign up on their e-mails); however, I still find their prices a bit high. I find the best deal at Calico to be the rolls of discontinued fabrics usually at 50-70% off.
Jo-ann Fabrics is always having a sale...so don't pay full price there...ever! For example
Better, and I would certainly not reget a purchase at that price. However, we can still do better than that...
This online store here, I'm sure you have seen around. The big mistake most people make...myself included...they don't take the time, or spend the extra few dollars on a SAMPLE! It is impossible to shop by color on a computer screen. The ONLY way to shop for fabric online, is to get a sample. If the "sample" option is not available, take the time to call that 800#...and ask. The deals
Fabric is a HUGE topic. In fact, I cannot do it all in one post, so I will have future discussions on this, check back. For now, I am going to share with you MY experience BASED ON PRICE...
I am a fabric
I gave some of this away for a recent charity garage sale so my collection is a bit lighter. Never the less, If I get enough "followers", I will have a fabric give-away at the end of the 31 days!
What everyone always wants to know...where do you get the best deals? I have seen many of the blog posts/links/ads; some are good, but most just don't do it for me...how about you? I have also read about people finding yards and yards for almost nothing....again, not me....how about you?
Because I live close to NY, I have been to Mood and many of the other stores in that area. The selection is good, but again, fair prices, nothing to get too excited about. For example
 |
| mood $45/yd |
 |
| mood $45/yd |
 |
| mood $35/yd |
I have purchased from Calico Corners, they have 20% off maybe about once a month, and about 2 times a year, they have a 25% off (sign up on their e-mails); however, I still find their prices a bit high. I find the best deal at Calico to be the rolls of discontinued fabrics usually at 50-70% off.
Jo-ann Fabrics is always having a sale...so don't pay full price there...ever! For example
 |
| $20/reg $40 |
 |
| $25/ reg $50 |
 |
| $25/ reg $50 |
This online store here, I'm sure you have seen around. The big mistake most people make...myself included...they don't take the time, or spend the extra few dollars on a SAMPLE! It is impossible to shop by color on a computer screen. The ONLY way to shop for fabric online, is to get a sample. If the "sample" option is not available, take the time to call that 800#...and ask. The deals
 |
| $16/yd |
 |
$16/yd |
 |
| $20/yd |
getting even better
...I have also purchased samples here, but when it arrived, I did not like the color in person...I'm learning from my own mistakes.
...I have also purchased samples here, but when it arrived, I did not like the color in person...I'm learning from my own mistakes.
So, for me, the best price/value is eBay! I love eBay, and have had mostly positive experiences. My most recent fabric purchase was here, and this is what I bought

I found this seller to be extremely nice. They will send a swatch for a small fee....if you ask. I negotiated shipping (send a message in "ask seller question"), and got a tiny bit of a "package price" for both pieces. Here is the perfect example I was telling you. In person, these are vibrant and beautiful....what do yo see on your monitor? Kinda dull on mine. Equally important, they are heavy in weight...and that will be a whole other fabric topic....be careful when choosing the weight of a fabric for furniture.
Your "win" will never be my "loss", so go out and score a FANTASTIC deal on a piece of fabric...make me proud....and come back and tell me all about it!
there is still more of this one
 |
| it averaged about $10/yd |
Your "win" will never be my "loss", so go out and score a FANTASTIC deal on a piece of fabric...make me proud....and come back and tell me all about it!
31 Days of Upholstery (Day 1)
Hello, and welcome. I'm Linda and I love upholstery projects. For the next 31 days, I will be discussing any/all things related to upholstery. I would love to hear from you, what would you like to contribute/learn? If you have no interest in upholstery, please feel free to click around my site while I finish my obligation to the challenge. For all 31 days, go here
This is where it all begins....the gun. I have tried them all.....here is my experience
The one you see on HGTV
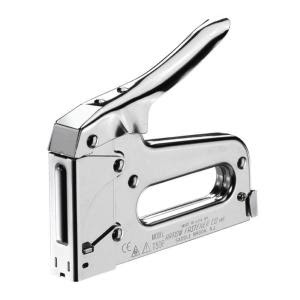 This is about $20 and you will see many television people using this. In my opinion, $20 it too much to charge for this. I, too, started with this. I was never able to staple anything without having to use a hammer after to drive the staples in further.
Next, a much better alternative

An electric staple gun. This will run you $25 - $55, and is worth the extra few dollars for all that extra power. If you don't think that you will do many projects, and just want to finish a set of seats, one or two cornice boxes, etc...this is the one for you!
My personal favorite
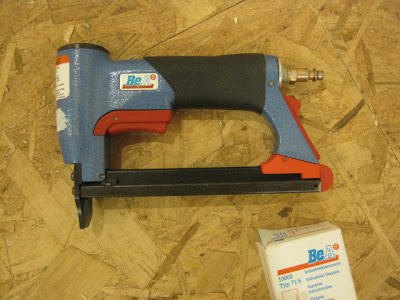 A pneumatic staple gun. You do not need to be brand specific, just graduating from electric to pneumatic is enough. In fact, while researching for this post, I found this

* For (Day 2) go here
This is where it all begins....the gun. I have tried them all.....here is my experience
The one you see on HGTV
Next, a much better alternative
An electric staple gun. This will run you $25 - $55, and is worth the extra few dollars for all that extra power. If you don't think that you will do many projects, and just want to finish a set of seats, one or two cornice boxes, etc...this is the one for you!
My personal favorite
a pneumatic staple gun for only $30 from Home Depot. Is it the best quality or brand? Probably not, but it is way better than an electric one!
Don't forget, a pneumatic gun needs a compressor to run it!! To read more about my upholstery tools, go here.
* For (Day 2) go here
What Have I Done?
Well, It seemed like a good idea at the time....I hope I won't regret it.....I hope you will find it interesting? What am I talking about? The 31 Day of Change Challenge(and it's not to late to join in my pain journey....that's what!
I have committed to blogging for 31 days STRAIGHT on one topic! October 1st, that's Saturday for everyone who is as bad with dates as I am... What's my topic? I'm so glad you asked...
I even made my own button. We know that Wednesday's will be easy, I will continue my on-line upholstery class. As for the rest, one day at a time....I guess.
Day 1 The Upholstery Gun
Day 2 Fabric Sources
Day 3 Foam
Day 4 Jute webbing Crafty Projects
Day 5 Making your frame sturdy
Day 6 Tying Springs
Day 7 Under the Springs
Day 8 I Can't do this
Day 9 Uncommon Supplies
Day 10 Crafty Upholstery
Day 11 Inspirational Upholstery
Day 12 Paint the frame
Day 13 Chic painted frames
Day 14 MacKenzie-Childs
Day 15 Plaids
Day 16 Stripes
Day 17 Upholster...Anything!
Day 18 How Much Fabric?
Day 19 Upholstery 101 (week4)
Day 20 Who did it?
Day 21 Go, Dog! Go.
Day 22 Making Piping
Day 23 Let's Nail this down
Day 24 Or, you can do this
Day 25 Just Sit on It
Day 26 Upholstery 101 (week 5)
Day 27 Transportation
Day 28 What's Your Little Secret?
Day 29 Got Paint
Day 30 Technical Difficulties
Day 31 They Entertained Me!
I hope I won't bore you...and please feel free to suggest ANYTHING about upholstery that you would like to know!
On another note...have you ever seen a white deer?



I have committed to blogging for 31 days STRAIGHT on one topic! October 1st, that's Saturday for everyone who is as bad with dates as I am... What's my topic? I'm so glad you asked...
I even made my own button. We know that Wednesday's will be easy, I will continue my on-line upholstery class. As for the rest, one day at a time....I guess.
Day 1 The Upholstery Gun
Day 2 Fabric Sources
Day 3 Foam
Day 4 Jute webbing Crafty Projects
Day 5 Making your frame sturdy
Day 6 Tying Springs
Day 7 Under the Springs
Day 8 I Can't do this
Day 9 Uncommon Supplies
Day 10 Crafty Upholstery
Day 11 Inspirational Upholstery
Day 12 Paint the frame
Day 13 Chic painted frames
Day 14 MacKenzie-Childs
Day 15 Plaids
Day 16 Stripes
Day 17 Upholster...Anything!
Day 18 How Much Fabric?
Day 19 Upholstery 101 (week4)
Day 20 Who did it?
Day 21 Go, Dog! Go.
Day 22 Making Piping
Day 23 Let's Nail this down
Day 24 Or, you can do this
Day 25 Just Sit on It
Day 26 Upholstery 101 (week 5)
Day 27 Transportation
Day 28 What's Your Little Secret?
Day 29 Got Paint
Day 30 Technical Difficulties
Day 31 They Entertained Me!
I hope I won't bore you...and please feel free to suggest ANYTHING about upholstery that you would like to know!
On another note...have you ever seen a white deer?
she is actually an albino...and apparently quite rare.
she lives across the street from my home, in the woods.
all her offspring are totaly normal in color. She is a bit crazy, or brave...she just stares at me and waits for me to go back in the house so she can continue eating her way through my garden.
Upholstery 101 (week 1)
Hello, and welcome. If you are new here, this is the first of a series of posts following my upholstery project. I hope you will join along, find a project, and dig in.....and if you only want to watch, that's OK too! For Week 2 go here; Week 3 go here; Week 4 go here; Week 5 go here; Week 6 go here; Week 7 go here; Week 8 go here; Week 9 go here; Week 10 go here; The Finale go here!

Every Wednesday, until it is finished, I will share a step-by-step tutorial of re-upholstering this chair
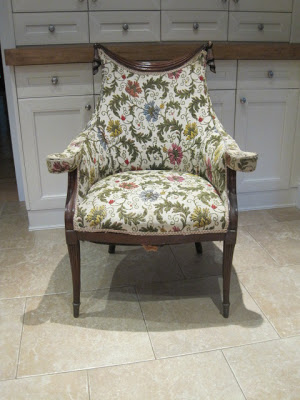
so let's begin.....
This week, I used these tools
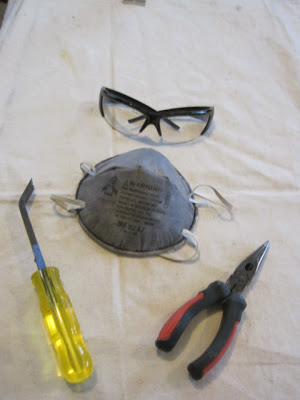
a nail puller, safety glasses, a dust mask, razor blades (not shown) and a pair of needle-nose pliers
Before you start...take lots of pictures to reference back to later.
Stripping the chair. Using a combination of puller and pliers, remove trim, fabric, nails and/or staples
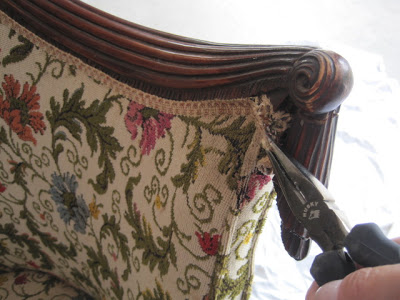
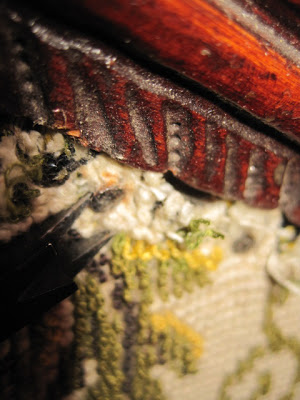
go slow, try not to rip the fabric too much you will need some of the pieces for a pattern when cutting your new fabric. Take pictures along the way and also take notes of the order pieces come off. You will most likely re-upholster in the reverse order.
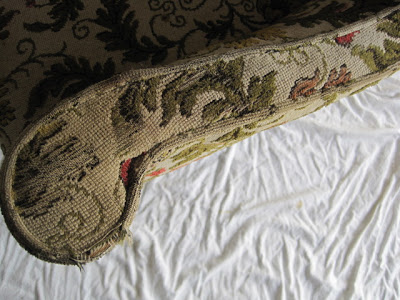
Note: arm has piping and is under stuffed
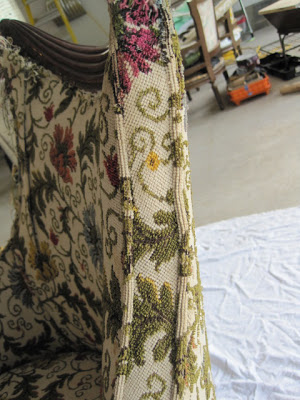
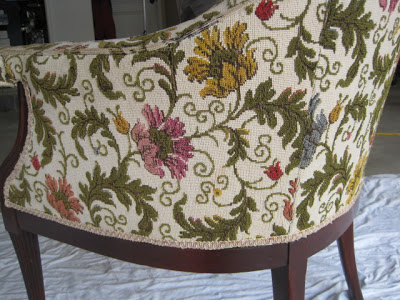
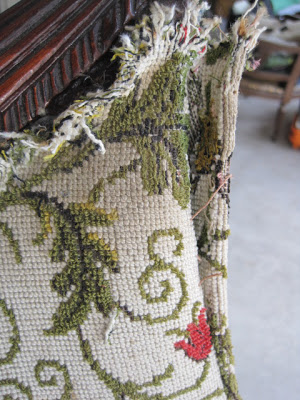
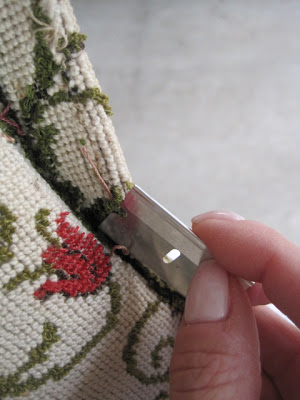 I used a razor blade (oops, not in my tools photo) to cut the hand sewing.
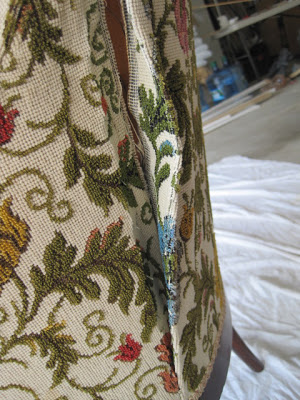
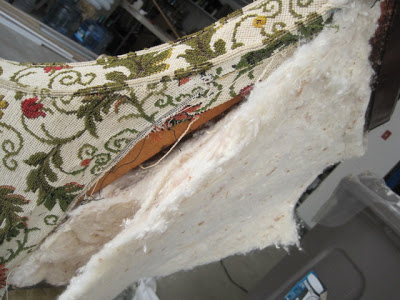
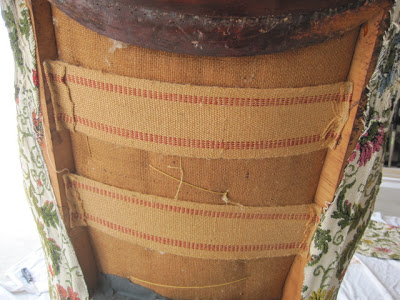 the reason why the back has no support. Not enough strapping, and set on the inside
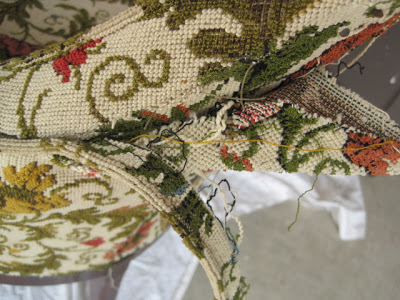
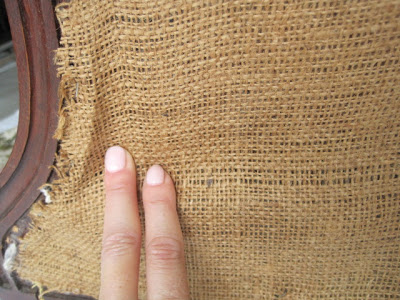 when you get to the "insides" of the chair, decide if the webbing/burlap has enough integrity and is doing the job. In this case, the burlap has too much give and should be replaced.
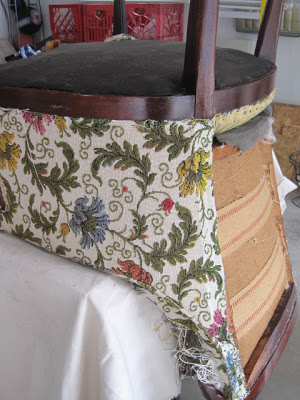 flip the chair over to get into hard to reach areas. Yes, remove the black fabric to examine the springs
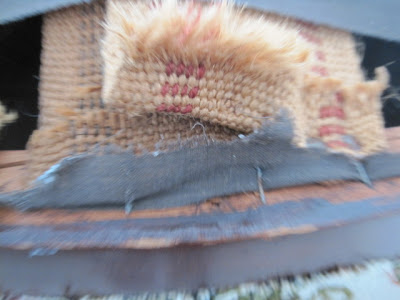 In this case, I can see that the webbing on the bottom of the chair needs to be re-attached...but I knew there was a problem with the support, because the seat sagged when I sat in it
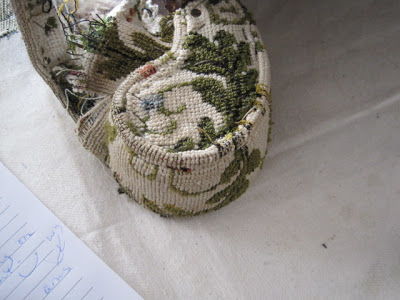 under the arm
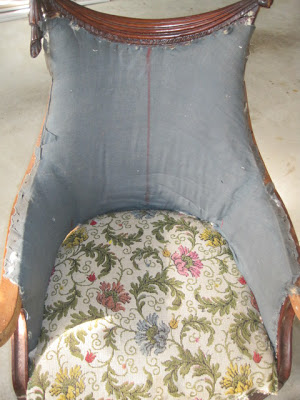 Note, the finished inside fabric was in 3 pieces....maybe because of pattern, maybe because there was not enough, maybe they liked the look. However, since the lining is one solid piece, I will consider making my finished chair with one piece, no seems. Yes, this gray fabric is coming off, I need to get to the stuffing
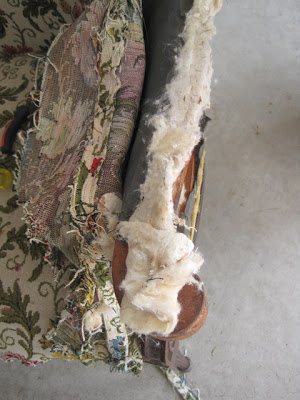 Note, the reason why the arms were not soft, batting has worn down over time
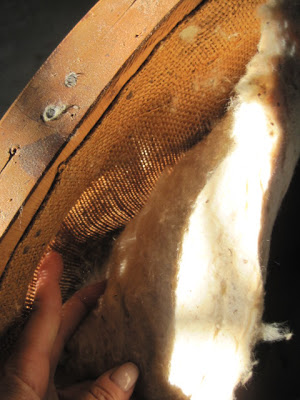 the inside back of my chair, no support, need to fix that, I will be adding foam as well as batting for the finished chair
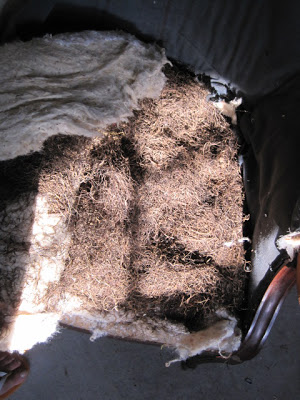 horsehair for the seat covered with batting. I have used horsehair and it is messy. It does have a more authentic look, I will be using foam & batting
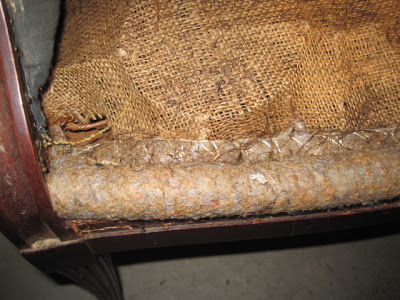 this edge roll is perfectly fine, I will remove it and save it for the new chair. However, as you can see, the burlap needs to be replaced
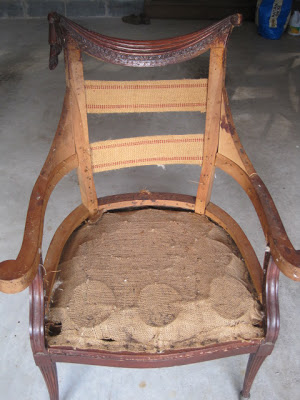
and here you are...a completely stripped chair. You may notice that one of the tassels along the top came off in the process. It was very loose and needs to be glued.
Every Wednesday, until it is finished, I will share a step-by-step tutorial of re-upholstering this chair
so let's begin.....
This week, I used these tools
a nail puller, safety glasses, a dust mask, razor blades (not shown) and a pair of needle-nose pliers
Before you start...take lots of pictures to reference back to later.
Stripping the chair. Using a combination of puller and pliers, remove trim, fabric, nails and/or staples
go slow, try not to rip the fabric too much you will need some of the pieces for a pattern when cutting your new fabric. Take pictures along the way and also take notes of the order pieces come off. You will most likely re-upholster in the reverse order.
Note: arm has piping and is under stuffed
Note: side has piping on both sides
Note: back has 3 pieces
Note: sides are hand sewn together...I probably will not put it back together this way. It is not necessary with today's products available....but I will be flexible, and make that decision at the time.
open side seam all the way down the back
I SAVED all the fabric scraps/pieces, I THREW OUT all of the batting, horsehair, nails, trim and burlap.
Next time, I will examine the overall sturdiness of the chair....until then