
Semi Home-Made Piping
I needed some maroon/burgundy piping, and if you read my post yesterday, you can guess which room I will use it in. During my 31-day's series, I shared with you how to make custom piping. I also shared the wide assortment of ready-made piping that is available. Well, I forgot to mention another option, semi home-made piping. OK, I made the name up....but that's what it is! Here is what you need;
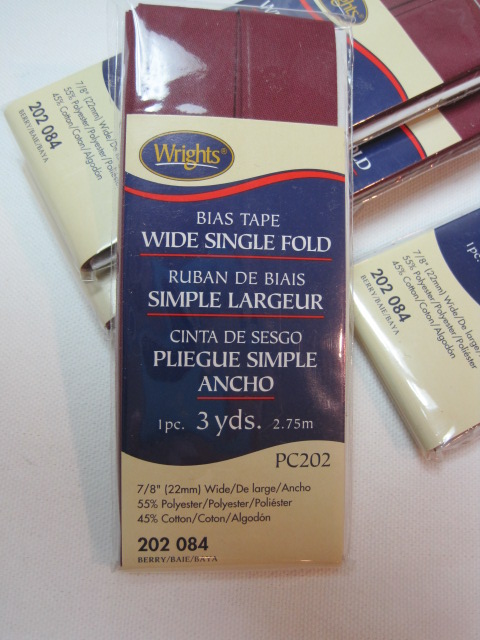
Several packages of wide bias tape (the less folds, the better)
Now, how to make it...
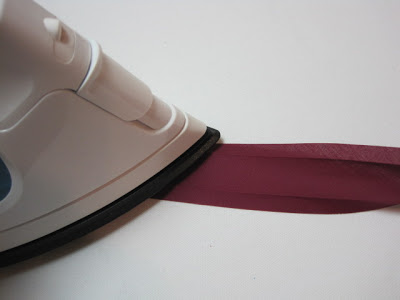
Press open all the bias tape. Note, be careful with your iron setting. There is a high polyester content, so keep it low.
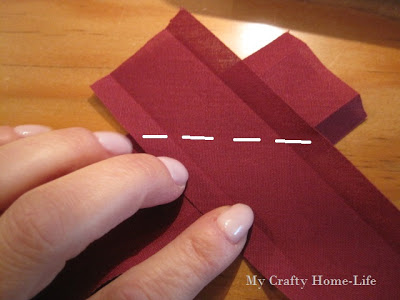
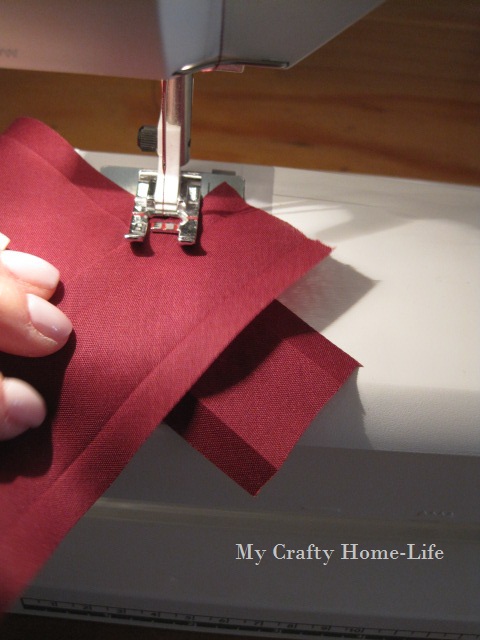
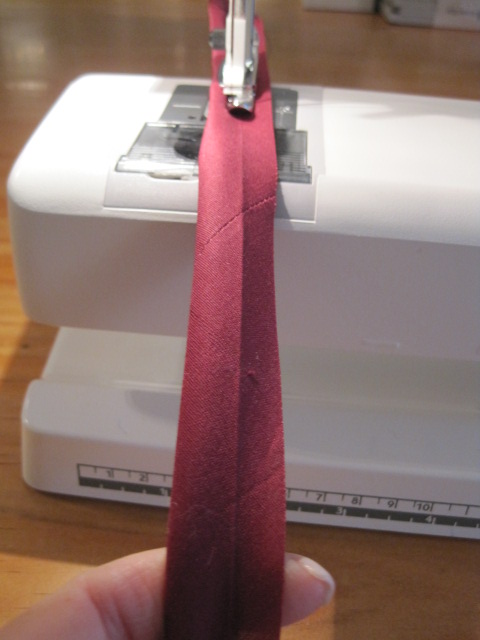
To make one continuous length of piping, you will need to join all the strips together. Bias tape (hence the name) is cut on a bias, so you will need to sew the strips together on the bias. This will alow the strips to have some give and also keep your seams less bulky. With right sides together, and allowing an overhang on both pieces, sew along the white line (corner to corner)
Remember to take a few stitches backward so your stitches will be locked in place

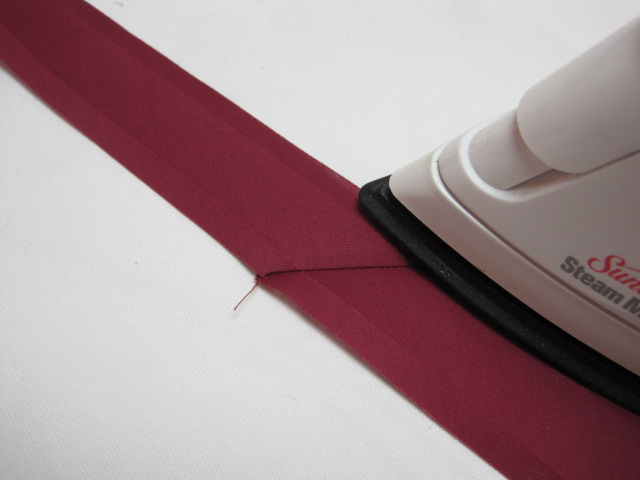
Press it open
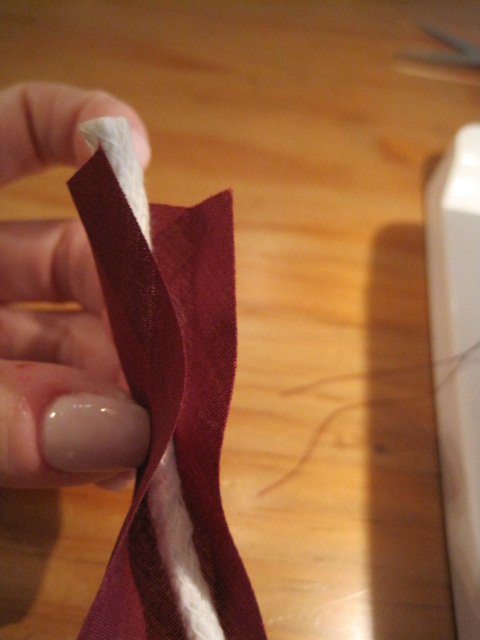
Place the cording inside the bias tape and fold over
Using a zipper foot, position the needle of the sewing machine as close to the cording as possible
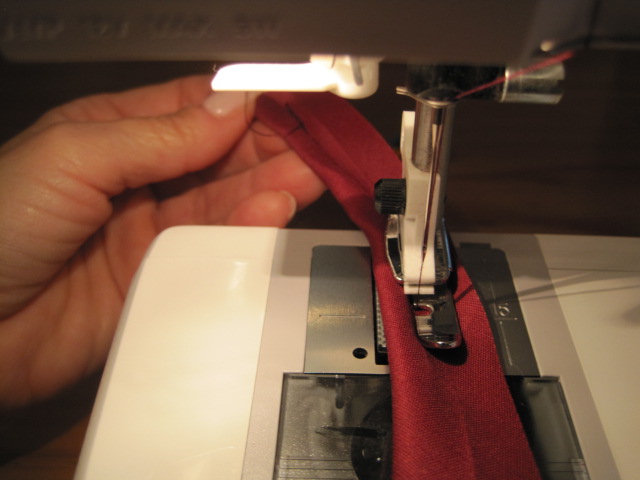
Here is the trick to getting it tight; give a slight pull on the bias tape while sewing. You will need to pull from the top (behind the needle) as well as the bottom. This slight stretch of resistance will give you a nicer finished product.
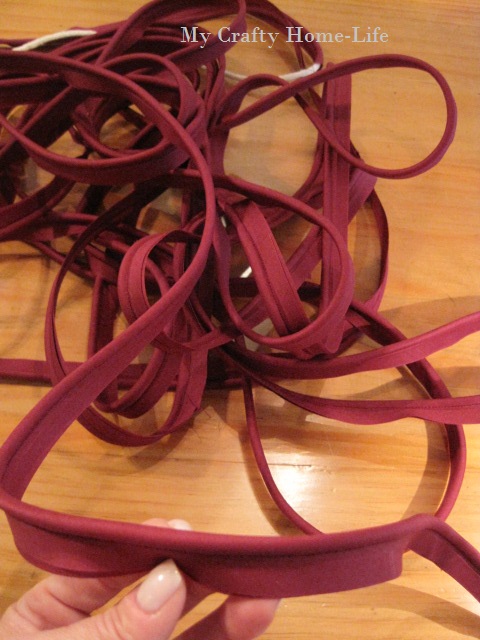
13 yards later
You have piping the color and width you wanted. Now think of all the fun things you can do with contrast piping. Are you tackling any projects before the New Year?
***Linking to Addicted 2 Decorating***
Several packages of wide bias tape (the less folds, the better)
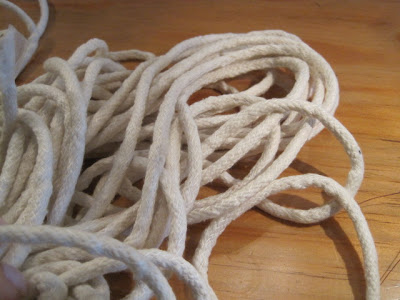
Cording the width and length you desire
Press open all the bias tape. Note, be careful with your iron setting. There is a high polyester content, so keep it low.
To make one continuous length of piping, you will need to join all the strips together. Bias tape (hence the name) is cut on a bias, so you will need to sew the strips together on the bias. This will alow the strips to have some give and also keep your seams less bulky. With right sides together, and allowing an overhang on both pieces, sew along the white line (corner to corner)
Remember to take a few stitches backward so your stitches will be locked in place
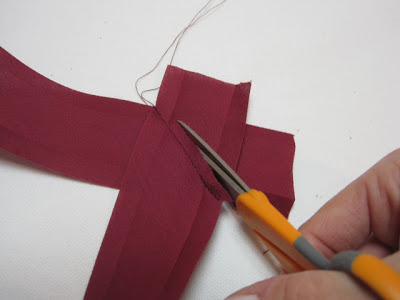
Go all the way to the corner, and back-stitch, again
Trim off the excess
Place the cording inside the bias tape and fold over
Using a zipper foot, position the needle of the sewing machine as close to the cording as possible
Here is the trick to getting it tight; give a slight pull on the bias tape while sewing. You will need to pull from the top (behind the needle) as well as the bottom. This slight stretch of resistance will give you a nicer finished product.
13 yards later
You have piping the color and width you wanted. Now think of all the fun things you can do with contrast piping. Are you tackling any projects before the New Year?
***Linking to Addicted 2 Decorating***