
Upholstery 101 (week 11) The Finale!
Hello, and welcome back...in case you are new here...this is an on-going upholstery series. To start at the beginning, go here.
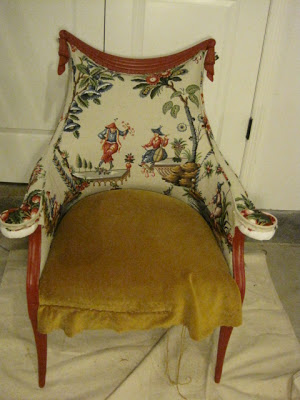
First, the chair
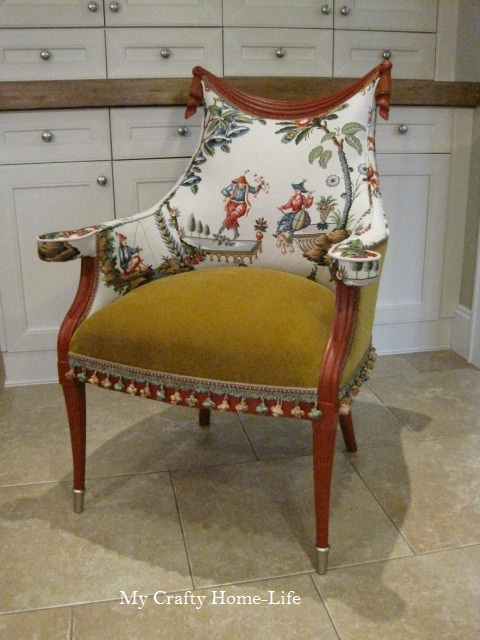
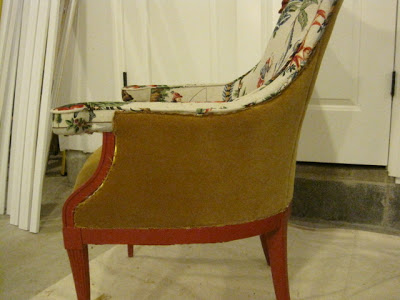
It's done! This is like skipping the meal, and going to dessert first...now here are my last steps
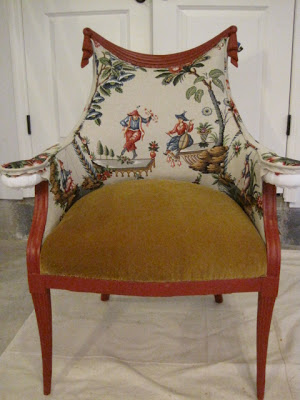
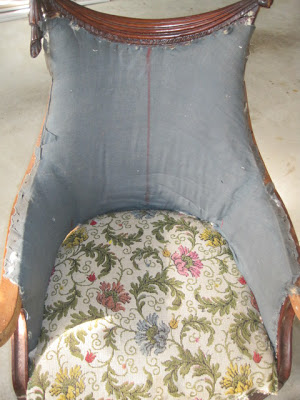
This is where I started
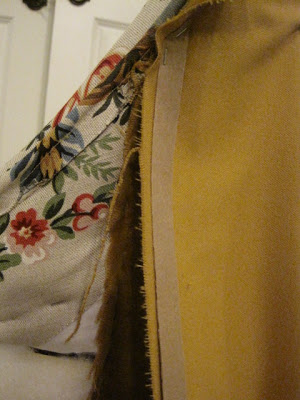
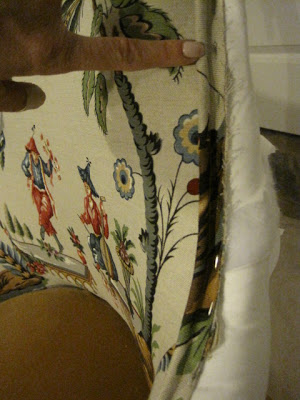
To finish the inside arms, I placed a strip of fabric, just like I did the top arm piece here

...using the cardboard strip again, make a fold on the left
...and bring down
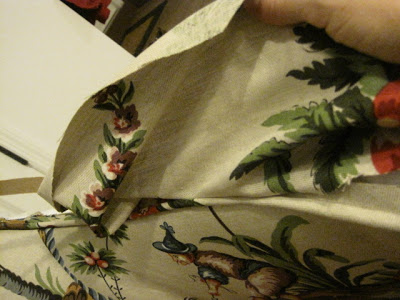
Just like the lining done here, fold and staple under the arm
This is what it looks like. The other end will get covered with finished fabric
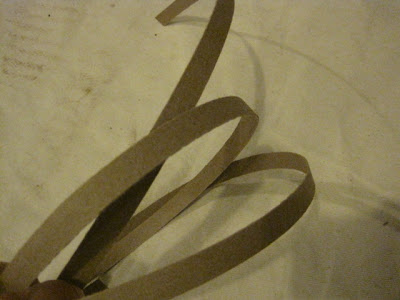
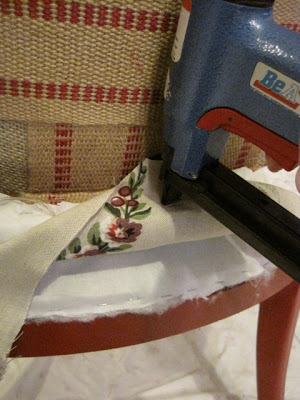
For the side, a light-weight piece of cardboard works great. I used yellow poster-board so that you could see it clearly....it doesn't matter...it won't show. Tack it in place. This keeps the batting in place.
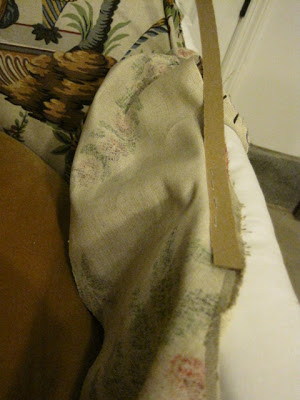
...I added a layer of batting, stapling under the arm...

...then flipping it into place, and tacking it all around
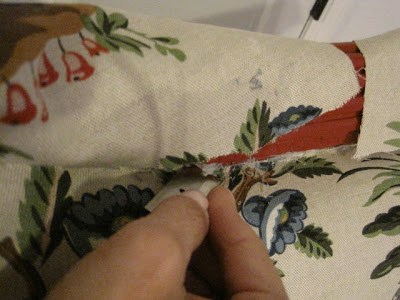
For the back of the chair...and to "finish piping"....this works great for pillows too...cut one end bluntly. Open the seam on the piping
exposing the cording....leaving plenty of material, cut the cording to meet exactly with the blunt edge
Fold under the extra material...

...and wrap it around the blunt edge piece. This is the most professional way to finish piping on a pillow, cushion....whatever! In this case, staple it into place
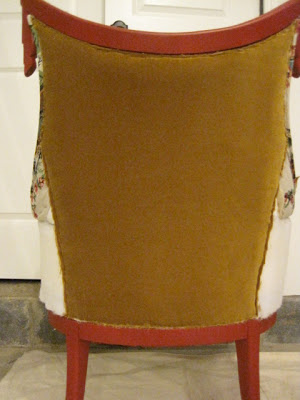
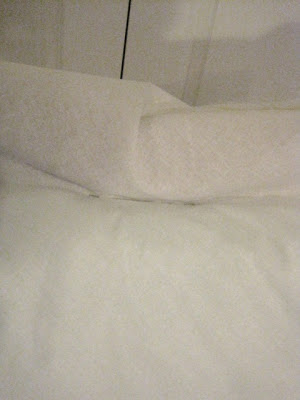
I used a light weight piece of foam for the back...tack, tack
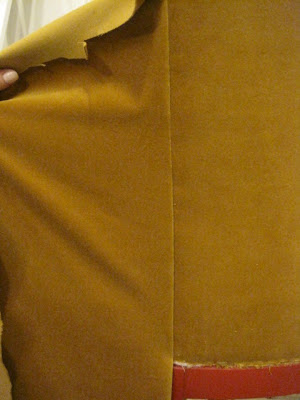
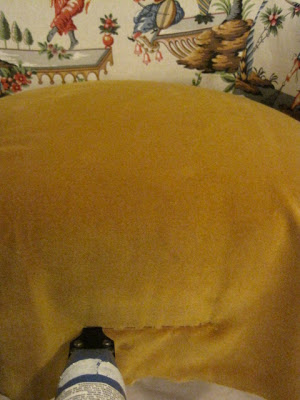
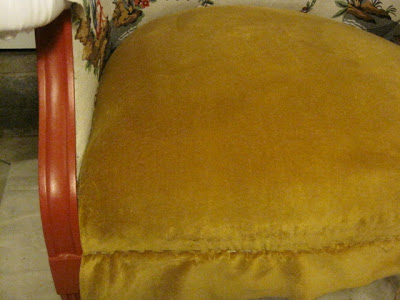
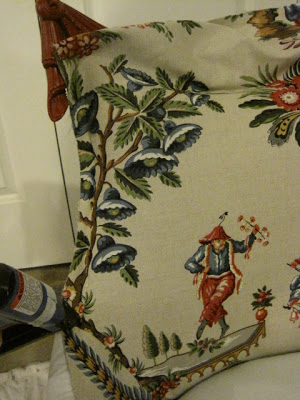
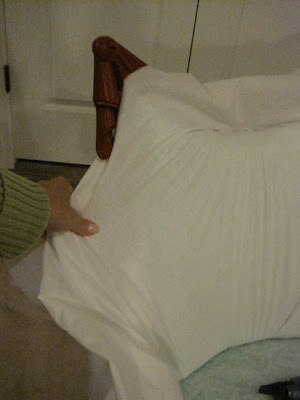
Keeping with my Mckenzie-Childs inspiration, I am using camel velvet for the back and sides. Like you have seen so many times, tack the top, bottom,
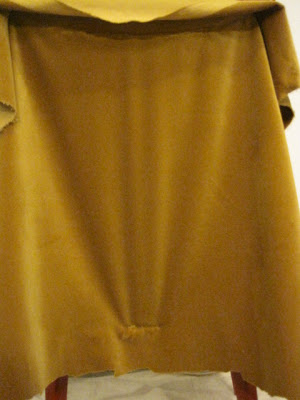
side to side...pulling at each point
 Trim
Trim
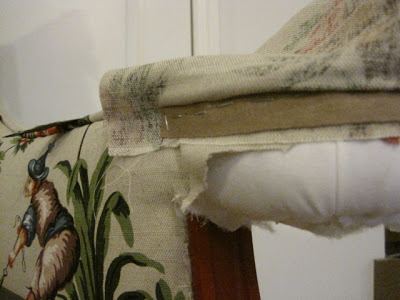
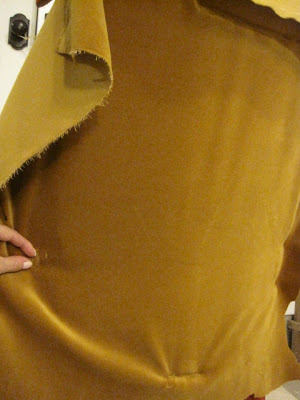
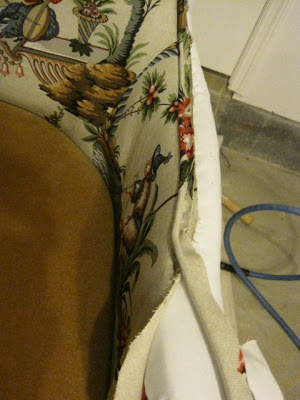
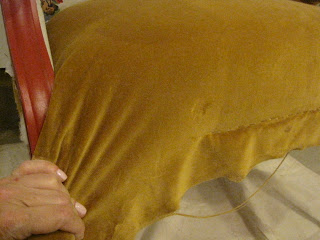
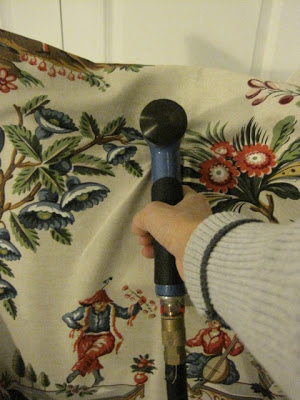
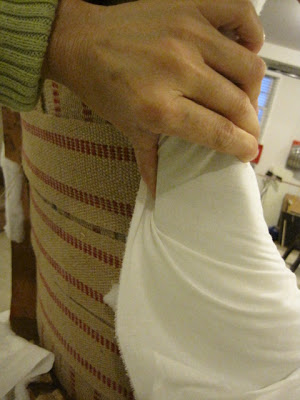
For the sides, with right sides together, I put a few pins in at the top to hold the fabric in place
more cardboard stripping following the staple line (and covering all the top staples) that was made on the back piece
Staple all the way down, should look like stitches

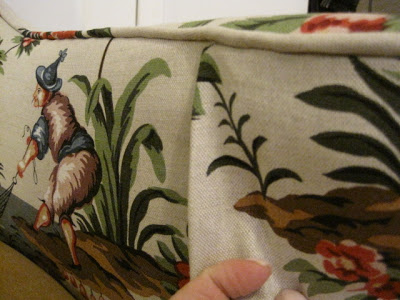
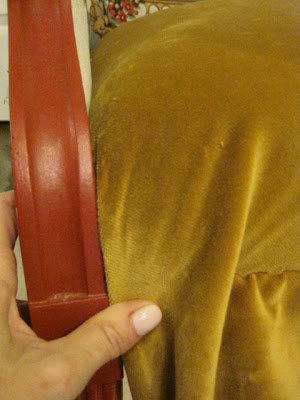
Fold over, to reveal the finished back seam
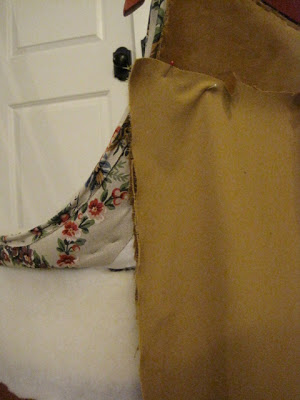
Working top and bottom, pull and staple

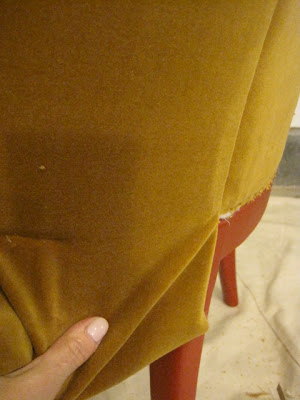
Keep pressure on the fabric to work out any wrinkles
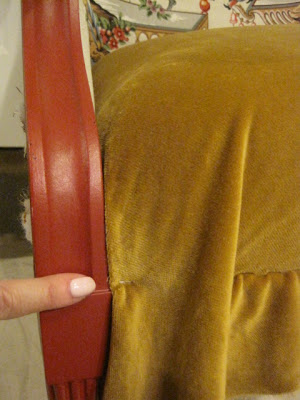
Trim...add whatever type fringe, gimp, or welting you desire...like I did in this post
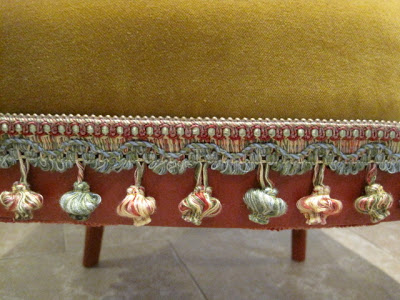
Make sure to hide all the staples, and embellish where it is needed
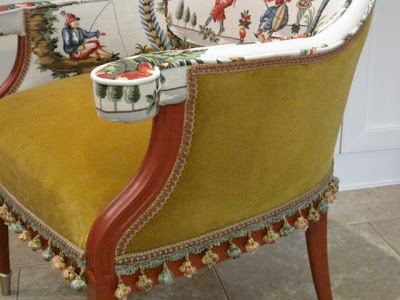
...and admire your results

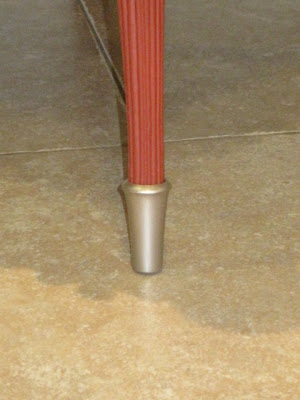
Especially those cute brass(?) feet Ididn't polish here

The end...Class is dismissed! Now I am onto my basement. What are you working on?
First, the chair
It's done! This is like skipping the meal, and going to dessert first...now here are my last steps
This is where I started
To finish the inside arms, I placed a strip of fabric, just like I did the top arm piece here
...using the cardboard strip again, make a fold on the left
...and bring down
Just like the lining done here, fold and staple under the arm
This is what it looks like. The other end will get covered with finished fabric
For the side, a light-weight piece of cardboard works great. I used yellow poster-board so that you could see it clearly....it doesn't matter...it won't show. Tack it in place. This keeps the batting in place.
...I added a layer of batting, stapling under the arm...
...then flipping it into place, and tacking it all around
For the back of the chair...and to "finish piping"....this works great for pillows too...cut one end bluntly. Open the seam on the piping
exposing the cording....leaving plenty of material, cut the cording to meet exactly with the blunt edge
Fold under the extra material...
...and wrap it around the blunt edge piece. This is the most professional way to finish piping on a pillow, cushion....whatever! In this case, staple it into place
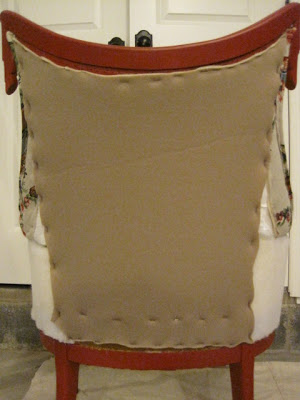
I used a light weight piece of foam for the back...tack, tack
Keeping with my Mckenzie-Childs inspiration, I am using camel velvet for the back and sides. Like you have seen so many times, tack the top, bottom,
side to side...pulling at each point
For the sides, with right sides together, I put a few pins in at the top to hold the fabric in place
more cardboard stripping following the staple line (and covering all the top staples) that was made on the back piece
Staple all the way down, should look like stitches
Fold over, to reveal the finished back seam
Working top and bottom, pull and staple
Keep pressure on the fabric to work out any wrinkles
Trim...add whatever type fringe, gimp, or welting you desire...like I did in this post
Make sure to hide all the staples, and embellish where it is needed
...and admire your results
Especially those cute brass(?) feet I
The end...Class is dismissed! Now I am onto my basement. What are you working on?
Upholstery 101 (week 10)
Hello, and welcome back...in case you are new here...this is an on-going upholstery series. To start at the beginning, go here.
Today will NOT be the last post....I don't know what I am doing I was not sure how to handle the arms, so this week was a lot of trial, and luckily not too many errors!
I decided to use Mackenzie-Childs as my upholstery influence for this chair. On the seat, and probably the back, I am using a camel colored velvet I had in my hoarding collection. Velvet fabric has a nap (a specific texture), and working with it is not hard, you just need to take the an extra step or two when you cut it. For more information on cutting fabrics with a nap, go here.
Jumping in...I placed a piece of the fabric loosely over the seat, tucking all around and making cuts like the lining

Using the piping that I made (now this is the part that I am experimenting...not sure how to finish the arms), I decided to staple it along the top inside edge of the chair. I started at the inside portion where the side fabric would also get stapled to the front side...

The staples do not need to be close together, this is only for holding the piping into position
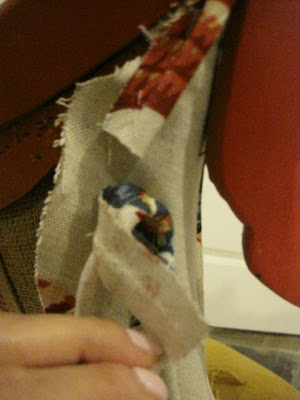
Here goes the next part of my experiment, I placed the arm piece long that same edge, folding it over (right sides together) along the inside arm. It is how you would put the pieces together with the piping sandwiched between if you could magically sew them while on the chair
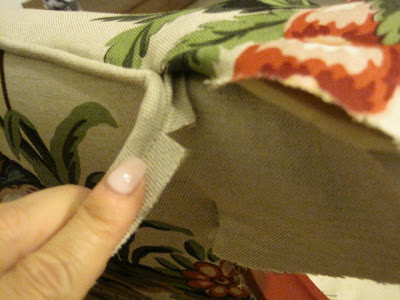
Using cardboard stripping (a common upholstery supply)
I placed the tack stripping along that seam (this is the magical sewing..only using staples) and stapled
...making sure that the staples are close together, like stitches. When the fabric is folded back over, it looks like this
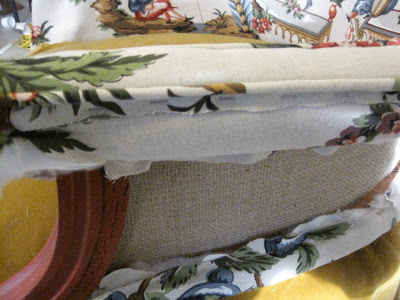
Once I folded the fabric over, I felt it could use a thin layer of foam/fabric (sold at most craft stores). I lightly tacked it in place (maybe a staple every 3" very close to the edge). I trimmed it while it was on the chair
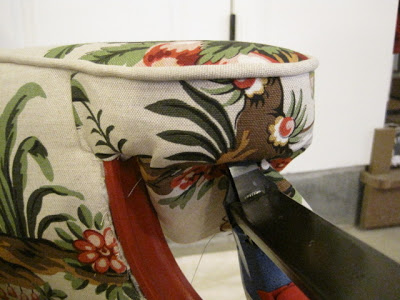
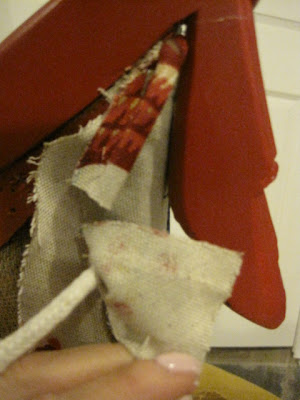
Now, back to the experiment...the rest of the arm. I could not keep applying the piping all the way around the arm in the same fashion....each piece covers the edges of the next piece...until you finish it with a gimp, double-welting, or fancy trim.
So I made a slit in the piping (careful not to cut into the finished roll) where the inside arm starts around the circle of the arm...I also slit the fabric at the same place
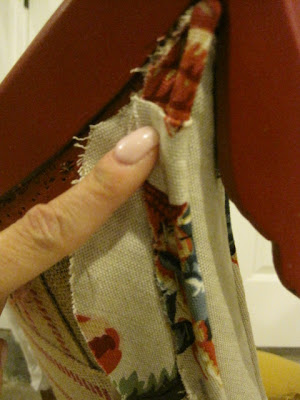
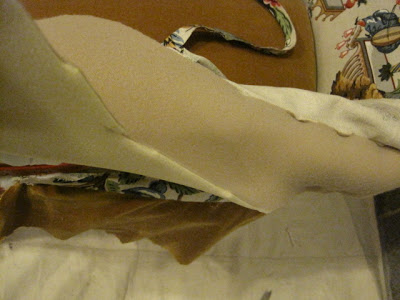
Now I am stapling the fabric and piping down the onto the side of the arm (no longer under).

When you examine these photos, you can see that it would not have been possible to tuck it all under, the way the inside piece was done
Also, note that the piping was tacked along the edge. Again, this is to hold it in place...more staples to come. Moving onto the seat....you have seen me do this many times....just like the seat in the Tobi Fairley chair...and then cutting when you are done

A few staples in the front to hold it
CORNERS ON THE FRONT.... This is the difficult part....I promise you will get better with practice!!! Remembering that the staples you put in may need to be re-positioned from time to time....working from the front center out....pull the fabric at a downward angle toward the arm....
At the arm, tuck under and trim off unseen bulky fabric and fold and tuck until you have a fold that you are happy with...I like this fold, and can adjust the rest of the front
So I tacked it into position

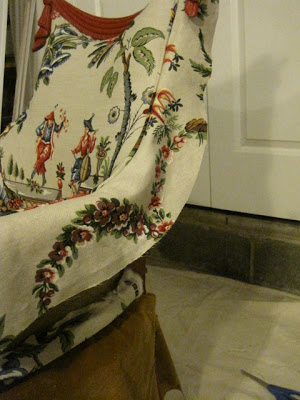
This is where you can see the nap of the fabric, it needs to be brushed out...the marks are not permanent. Here is the chair with a finished corner...you can predict how the other corner will get worked, and maybe re-worked!
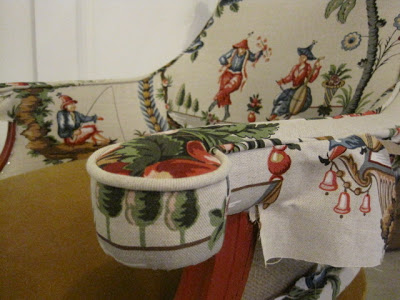
I want to point out that the circular ends of the arms are charming, and commanding for your attention....I tried to cut the fabric for the arms with this in mind. I wanted both circles to have red berries and similar patterns on them. If you have a project that has a prominent feature, try to cut out your fabric with that feature in mind.
Hope to see you next Wednesday for what MUST be the Finale! Is anyone trying this at home?
Today will NOT be the last post....
I decided to use Mackenzie-Childs as my upholstery influence for this chair. On the seat, and probably the back, I am using a camel colored velvet I had in my
Jumping in...I placed a piece of the fabric loosely over the seat, tucking all around and making cuts like the lining
Using the piping that I made (now this is the part that I am experimenting...not sure how to finish the arms), I decided to staple it along the top inside edge of the chair. I started at the inside portion where the side fabric would also get stapled to the front side...
...I stopped at the top tassel
Here goes the next part of my experiment, I placed the arm piece long that same edge, folding it over (right sides together) along the inside arm. It is how you would put the pieces together with the piping sandwiched between if you could magically sew them while on the chair
Using cardboard stripping (a common upholstery supply)
I placed the tack stripping along that seam (this is the magical sewing..only using staples) and stapled
...making sure that the staples are close together, like stitches. When the fabric is folded back over, it looks like this
Once I folded the fabric over, I felt it could use a thin layer of foam/fabric (sold at most craft stores). I lightly tacked it in place (maybe a staple every 3" very close to the edge). I trimmed it while it was on the chair
Now, back to the experiment...the rest of the arm. I could not keep applying the piping all the way around the arm in the same fashion....each piece covers the edges of the next piece...until you finish it with a gimp, double-welting, or fancy trim.
So I made a slit in the piping (careful not to cut into the finished roll) where the inside arm starts around the circle of the arm...I also slit the fabric at the same place
Now I am stapling the fabric and piping down the onto the side of the arm (no longer under).
When you examine these photos, you can see that it would not have been possible to tuck it all under, the way the inside piece was done
Also, note that the piping was tacked along the edge. Again, this is to hold it in place...more staples to come. Moving onto the seat....you have seen me do this many times....just like the seat in the Tobi Fairley chair...and then cutting when you are done
CORNERS ON THE FRONT.... This is the difficult part....I promise you will get better with practice!!! Remembering that the staples you put in may need to be re-positioned from time to time....working from the front center out....pull the fabric at a downward angle toward the arm....
At the arm, tuck under and trim off unseen bulky fabric and fold and tuck until you have a fold that you are happy with...I like this fold, and can adjust the rest of the front
So I tacked it into position
Going back and removing (be careful not to scratch that painted frame) some of the previous staples, re-position and pull the fabric in the opposite direction to work out any wrinkles until it is smooth.
This is where you can see the nap of the fabric, it needs to be brushed out...the marks are not permanent. Here is the chair with a finished corner...you can predict how the other corner will get worked, and maybe re-worked!
I want to point out that the circular ends of the arms are charming, and commanding for your attention....I tried to cut the fabric for the arms with this in mind. I wanted both circles to have red berries and similar patterns on them. If you have a project that has a prominent feature, try to cut out your fabric with that feature in mind.
Hope to see you next Wednesday for what MUST be the Finale! Is anyone trying this at home?
Upholstery 101 (week 9)
Hello, and welcome back....in case you are new here...this is an on-going upholstery series. To start at the beginning, go here.
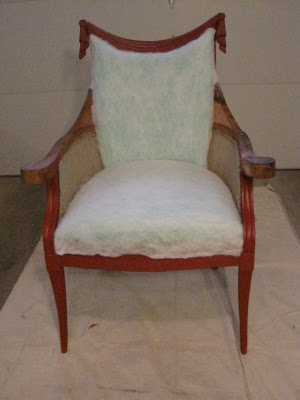
Today is the second to last post for the series......so let's jump in! This is what the chair looked like last time. Since then, I added lining to the other arm and seat bottom


Today is the second to last post for the series......so let's jump in! This is what the chair looked like last time. Since then, I added lining to the other arm and seat bottom
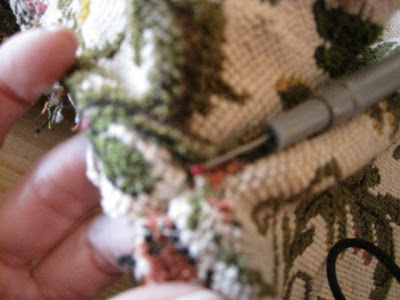
Now is the time to take out the old pieces that were saved
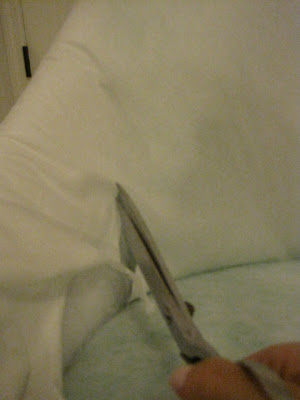
Using a small scissors, and a seam ripper
...open all the seams
Here is the center back. I need to use this for a pattern. Remember how many times you have seen me trim everything....so, where there are no seams....along the top and the bottom, I will cut the new piece several inches longer. This gives extra fabric for pulling
Here is an inside arm piece (I need 2, cut one face up and the other face down) and an arm piece (also 2 cut face up and face down)
Learning from my last mistake, since I added extra padding to the chair, I want to lay the old pieces on the chair to see if I need to make further adjustment to them before cutting
As you can see, the top and bottom of this piece need to be longer. I think the side seams are lining up nicely (always refer to your old photos if you can). For the inside side piece, I need to add length to the outside edge....for pulling and stapling
The arm piece is just a bit too thin...this was an easy prediction based on my previous post
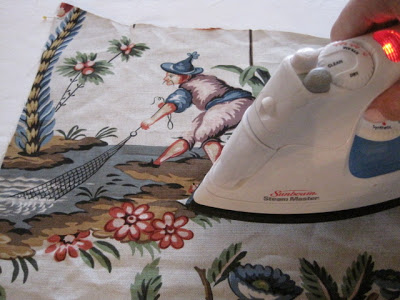
After deciding how I wanted the pattern centered, I cut the back piece. Note, centering an image is a personal preference....I could have centered so many different options. I wanted to have the man, woman, and some of the foliage...if I raised the man and woman higher, I would have a lot of beige at the top of the chair
Keeping in mind, but not making yourself crazy, think about how the right and left pieces will connect (pattern and image). I wanted this fishing dude!
...and a different dude on the other side
Decide how much piping you want....you can use ready made...or make your own
Truth be told, I tried to find ready made and I could not find a color that worked, so I made my own. The next step is an important one...press your fabric. If you try to press your fabric once it is on the chair...you could MELT the dacron batting...I have made that mistake!
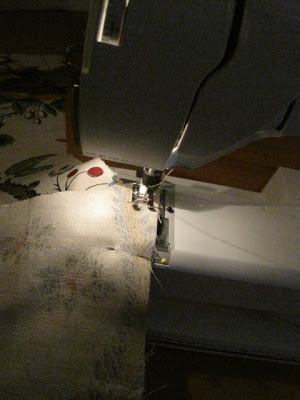
Sew the sides together
Lay it back on the chair, if you are happy with it...go on...if not, now is the time to make changes
A few staples in the center top...keeping pattern layout in mind the entire time
I did a slight deviations from my usual (top, bottom, right, left, repeat), this time, I did an entire side first...
top down to where the seam is...went to the other side...top down to seam
Then, along the top
Trim the top (this is where all that extra fabric came in handy).
Now, I did the bottom back...adjusting tension where needed to keep the pattern aligned
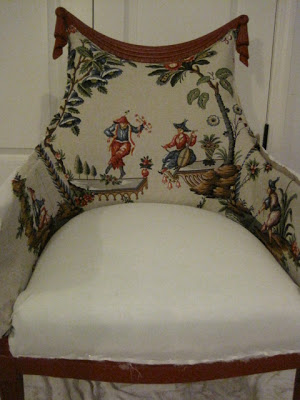
Finished back (note, it was rolled up and over that wood support piece. The bottom seat will be pulled downward where you see the lining
Side arm, also pulled up and over the wood support.....bottom seat will be pulled downward over the lining
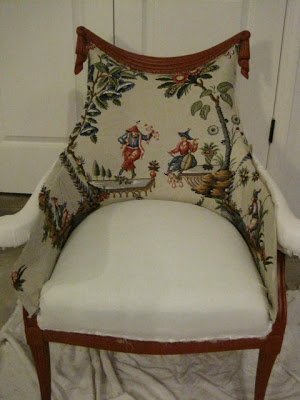
Here is a front view
My little fishing dude
This is a good view to see how many choices there are when you center a pattern...choose what works for you
Next time, the finale...I hope! I am going to be completely honest...I am still not sure how I am going to finish those arms...I can't wait to come back next week and find out!
Tomorrow is Thanksgiving. Have a wonderful and safe Holiday. If you are able, please try to bring something to your local food bank!
Upholstery 101 (week 8)
Hello, and welcome back....in case you are new here....this is an on-going upholstery series. To start at the beginning, go here.
Today's post is all about trial and error....spoiler alert....you will be able to learn from a mistake that I am about to make!
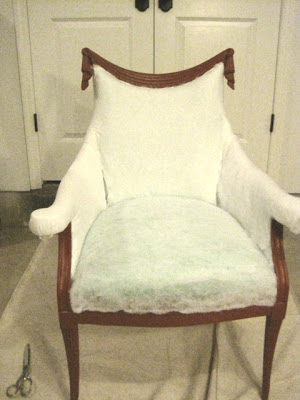
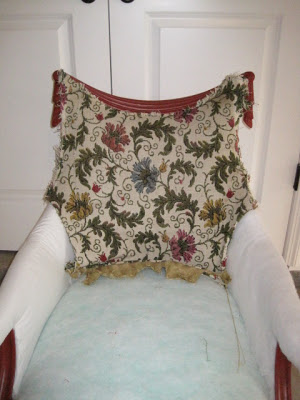
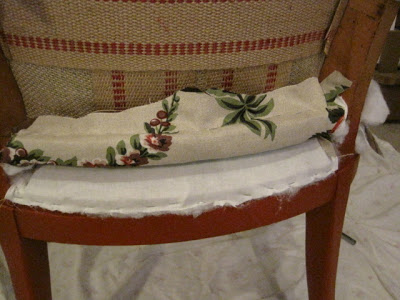
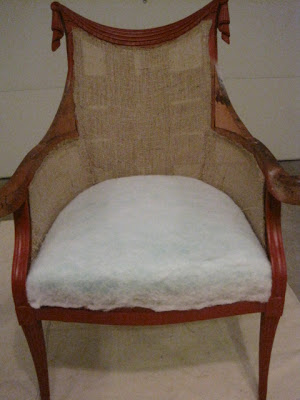
This is what the chair looked like last time

I added batting to the other arm, and this is what the chair looks like now
I want to add the lining. Looking back at the original chair, this is how the lining looked
It was one piece. However, you will also notice that the arms don't have any batting on them, and mine do! Also, take note that the lining is stapled to the top of the arms.....I have padding on my new arms....
Place the lining over the chair, working on the bias for extra give

A few staples center top

A slit to ease and trim lining into shape

Tuck the lining in the same way the batting was done


Make an ease cut so that the lining can be tucked around the frame

....like this

Here is the alteration from the original, I pulled the lining over the padded arms
Staple around the back, just like the batting was done
Shape the top of the chair, working out all of the folds

Staple along the top, trim off the excess

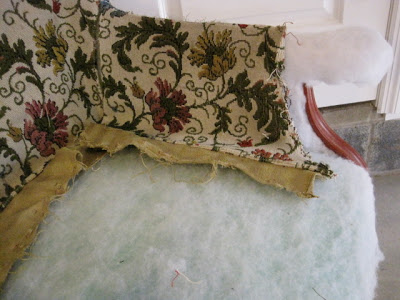
AND TOO MUCH PRESSURE, the lining has ripped! If I stapled along the top of the arm, this probably would not have happened. However, I wanted padded arms. The lesson for me is that when an alteration is made (like dominoes) ....be prepared to alter the steps that follow

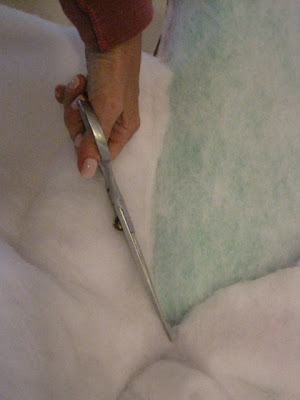
This lining can't be done in one piece. Follow the natural line of the chair, I cut the lining
Cut the other side to match
Drape a new piece over the arm

Cut, tuck, trim

For the end of the arm, it is just a series of pleats and folds all stapled to the bottom of the arm

Here is what the chair looks like now
I need to do the other arm and the seat.....however, trust me, when you start to make mistakes....it is time to take a break and walk away for today! I hope you learned something...I know I did. See you next Wednesday!
Today's post is all about trial and error....spoiler alert....you will be able to learn from a mistake that I am about to make!
This is what the chair looked like last time
I added batting to the other arm, and this is what the chair looks like now
I want to add the lining. Looking back at the original chair, this is how the lining looked
It was one piece. However, you will also notice that the arms don't have any batting on them, and mine do! Also, take note that the lining is stapled to the top of the arms.....I have padding on my new arms....
Place the lining over the chair, working on the bias for extra give
A few staples center top
A slit to ease and trim lining into shape
Tuck the lining in the same way the batting was done
Make an ease cut so that the lining can be tucked around the frame
....like this
Here is the alteration from the original, I pulled the lining over the padded arms
Staple around the back, just like the batting was done
Shape the top of the chair, working out all of the folds
Staple along the top, trim off the excess
AND TOO MUCH PRESSURE, the lining has ripped! If I stapled along the top of the arm, this probably would not have happened. However, I wanted padded arms. The lesson for me is that when an alteration is made (like dominoes) ....be prepared to alter the steps that follow
This lining can't be done in one piece. Follow the natural line of the chair, I cut the lining
Cut the other side to match
Drape a new piece over the arm
Cut, tuck, trim
For the end of the arm, it is just a series of pleats and folds all stapled to the bottom of the arm
Here is what the chair looks like now
I need to do the other arm and the seat.....however, trust me, when you start to make mistakes....it is time to take a break and walk away for today! I hope you learned something...I know I did. See you next Wednesday!
Upholstery 101 (week 7)
Hello everyone! In case you are new, here, this is an on-going upholstery tutorial....to start at the beginning, go here.
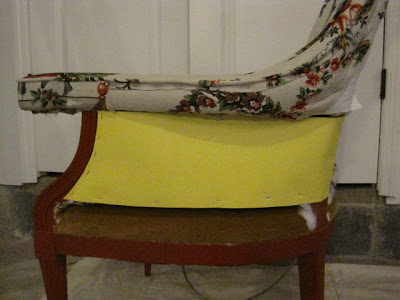
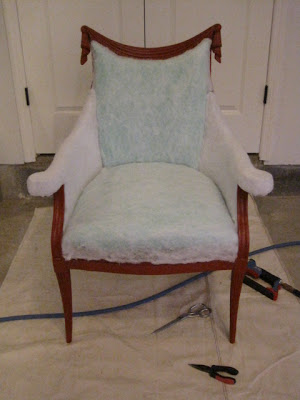
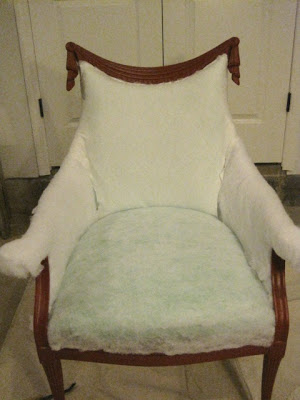
To refresh your memory, this is where we left off
To build-up the center-back of the chair, I applied 2" foam following the same steps as the seat. This is what the chair looks like so far


To refresh your memory, this is where we left off
To build-up the center-back of the chair, I applied 2" foam following the same steps as the seat. This is what the chair looks like so far
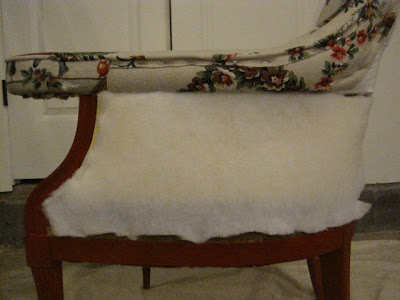
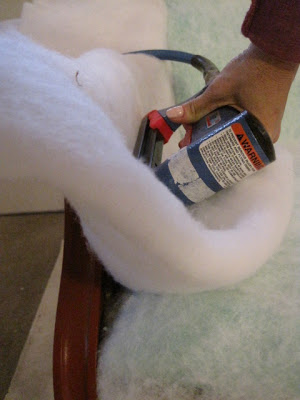
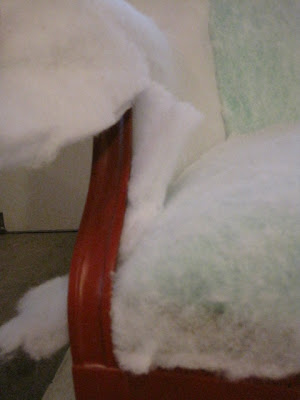
Now for the inside-sides and the arms....using a double layer of dacron (batting)
Tack it into place along the side of the center foam...making sure there is overlap everywhere (it is easy to trim, impossible to add more)
Trim off the extra where it meets the foam
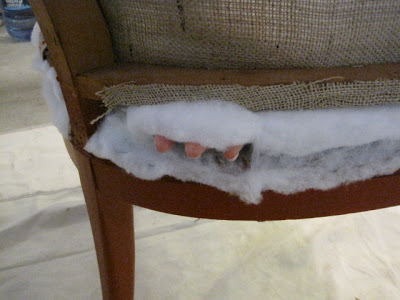
Next, tuck the bottom portion through the frame...
..and out the bottom-side
The front edge of the inside arm needs to be stapled
being extra careful not to nail into the finished frame portion, nail just before it
Here is what it looks like so far
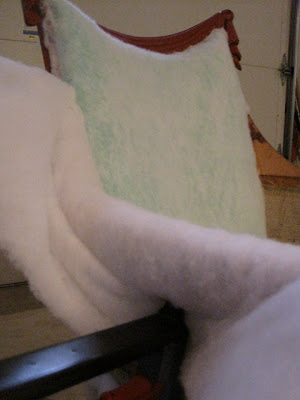
Trim off the excess from the inside edge...now the shaped arm...tuck and fold while stapling under the arm
....work all the way up and down the arm...
....trim off excess
Take the bottom portion of the batting and pull it up around the frame and staple...trim off excess
Here is one arm complete
I will repeat all of this for the other arm. Hope to see you next week!
Oh, wait...come back tomorrow for a SUPER EXCITING post! Here is a hint....it won't be on this blog?
Upholstery 101 (week 5)
.....continuing on with the challenge, this is day 26 of 31....for all 31, go here
If you are new to upholstery 101, start here.
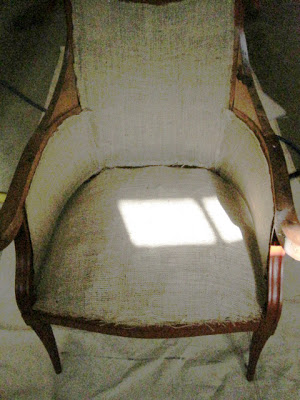
So, this is where we left off

Since then, I added burlap to the inside arms. The same way I did the back
With a pen, pencil, marker, crayons.....trace the inside area onto the paper and cut the template

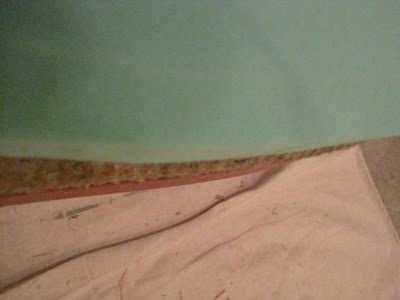
Re-install the edge-roll that was saved from the original chair. The purpose of this is to help keep stuffing, horsehair, foam into shape. It is also there to give a finished look to the front edge of the chair
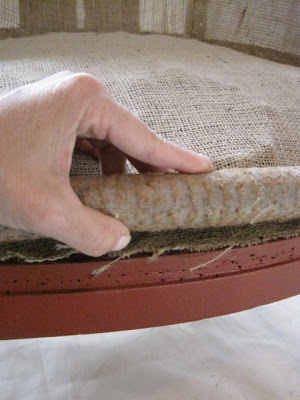
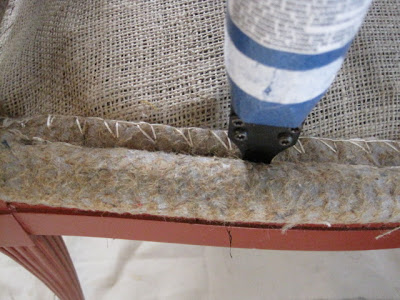
You want to make sure that the middle of the roll covers the edge of the chair

Once you like the position, tack it down
Place the template back on the chair. The foam should meet the front end of the edge-roll. I will add 1" to the front of this template
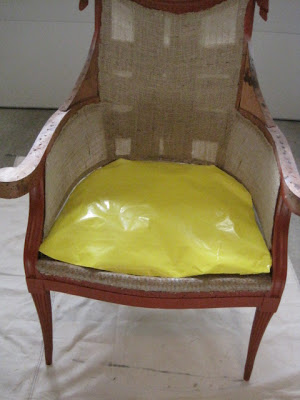
Place the template on the foam and trace around it. Note, it is much better to cut it too large, and trim to fit!
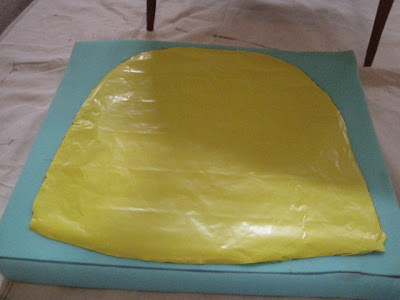
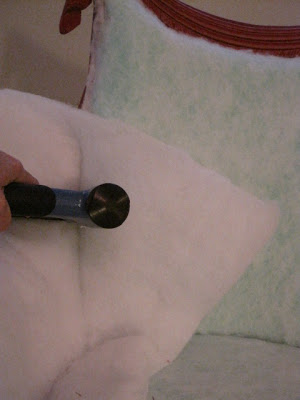
I am sure that you have seen people cutting foam with a turkey carver, well that is because it works the best. However, again...if this is only a one time thing for you, use what you have
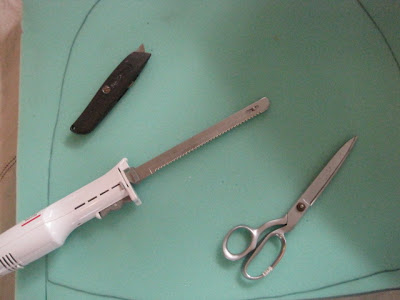
Once the foam is cut, I like to bevel the edge all the way around with a razor blade. If you are looking for a crisp square edge, then don't do this
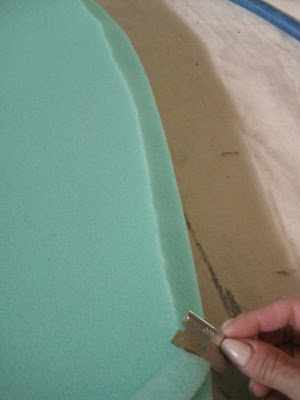
On the FRONT EDGE only, I flip the foam and bevel the underside

Don't worry about imperfections...it will be fine
The under bevel helps allow the foam to sit nicely on top of the edge-roll. The top is beveled too, the photo is not showing it. Next, place a sheet of dacron (batting) onto the foam. This is what will help hold the foam into shape and take some of the pressure off of the fabric
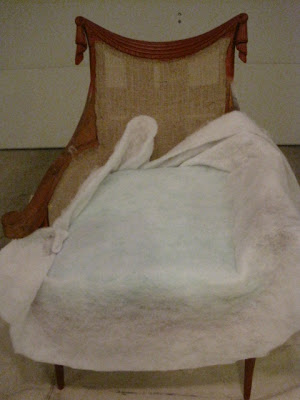
Again, I like to work off of the bolt, but if it is easier for you, trim a piece that is manageable for you. FIRMLY pressing down on the foam, staple along the edge into the wood frame. Be extra careful not to staple into the finished area

Trim off excess

You can see that it is looking softer along the front edge. Tuck the dacron all around the chair, and push and staple....I had my son sit on the foam while I stapled the back. It was not possible to push down and staple from that angle
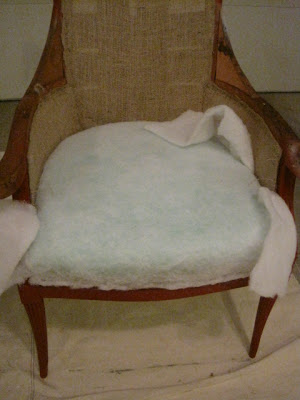
Here is the seat, slowly gaining it's shape back
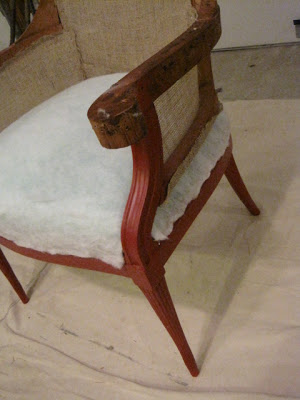
Here is a side view
If you are new to upholstery 101, start here.
So, this is where we left off
Since then, I added burlap to the inside arms. The same way I did the back
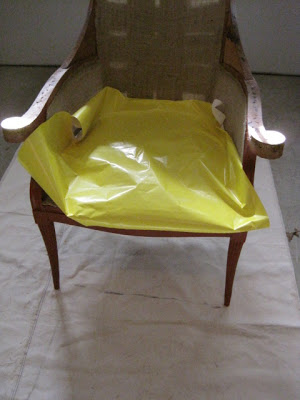
I can't find my craft paper, so I am using wrapping paper to make a template for the foam
With a pen, pencil, marker, crayons.....trace the inside area onto the paper and cut the template
Re-install the edge-roll that was saved from the original chair. The purpose of this is to help keep stuffing, horsehair, foam into shape. It is also there to give a finished look to the front edge of the chair
You want to make sure that the middle of the roll covers the edge of the chair
Once you like the position, tack it down
Place the template back on the chair. The foam should meet the front end of the edge-roll. I will add 1" to the front of this template
Place the template on the foam and trace around it. Note, it is much better to cut it too large, and trim to fit!
I am sure that you have seen people cutting foam with a turkey carver, well that is because it works the best. However, again...if this is only a one time thing for you, use what you have
Once the foam is cut, I like to bevel the edge all the way around with a razor blade. If you are looking for a crisp square edge, then don't do this
On the FRONT EDGE only, I flip the foam and bevel the underside
Don't worry about imperfections...it will be fine
The under bevel helps allow the foam to sit nicely on top of the edge-roll. The top is beveled too, the photo is not showing it. Next, place a sheet of dacron (batting) onto the foam. This is what will help hold the foam into shape and take some of the pressure off of the fabric
Again, I like to work off of the bolt, but if it is easier for you, trim a piece that is manageable for you. FIRMLY pressing down on the foam, staple along the edge into the wood frame. Be extra careful not to staple into the finished area
Trim off excess
You can see that it is looking softer along the front edge. Tuck the dacron all around the chair, and push and staple....I had my son sit on the foam while I stapled the back. It was not possible to push down and staple from that angle
Here is the seat, slowly gaining it's shape back
Here is a side view
I will l repeat these steps for the inside back of the chair. Note, since my foam is so thick, I will look at the chair tomorrow, and possibly add another layer of dacron over this one if the seat is not holding the shape.
Thanks for joining me. Hope to see you again, next Wednesday. If you have a DIY upholstery project, I would love to hear about it!