
A Moment of Blue & White Silence
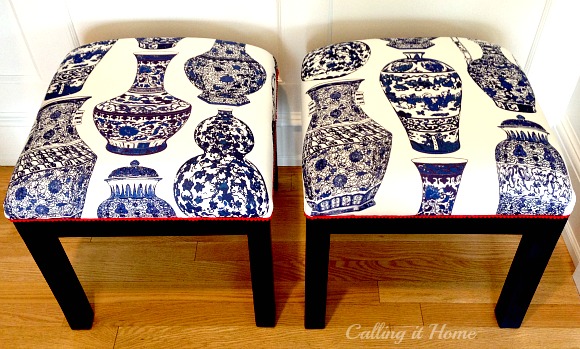
You are looking at the most beautiful custom fabric I have ever seen. It was designed for me by my favorite graphic artist, Jennifer @ The Pink Pagoda. She asked me what my thoughts were for reupholstering my stools. Thoughts? I'm a single item collector... the big picture gets a bit fuzzy for me at times.
Stupid, I'm not...I gave Jennifer complete freedom and control over this one....wouldn't you?
This is her original design. I have no idea what her plans are for selling this? You can visit her Etsy store to see her prints that she does sell on a regular basis. As of now, I have an original one of a kind Pink Pagoda Blue & White fabric design. That's the name I gave it.
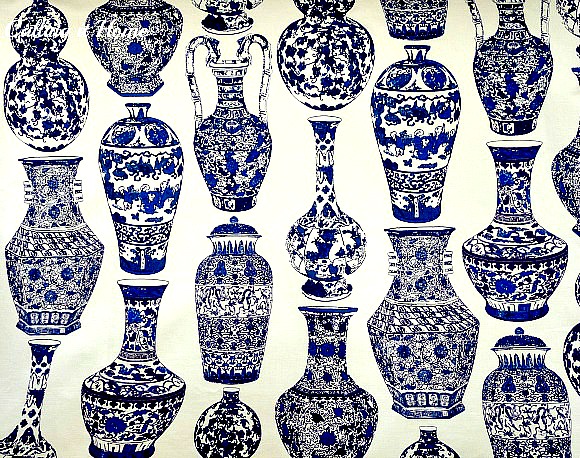
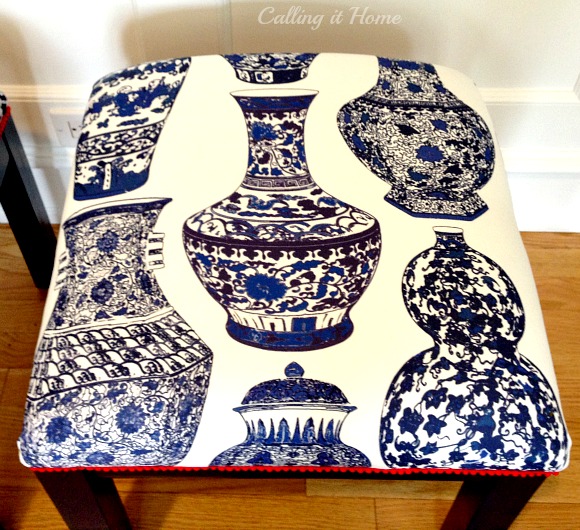
The hardest decision for me was to decide how I wanted to feature this print on my stools. For most upholstery projects, I like to focus on a single item and let the rest of the pattern fall all around it. I selected two different vases to feature.
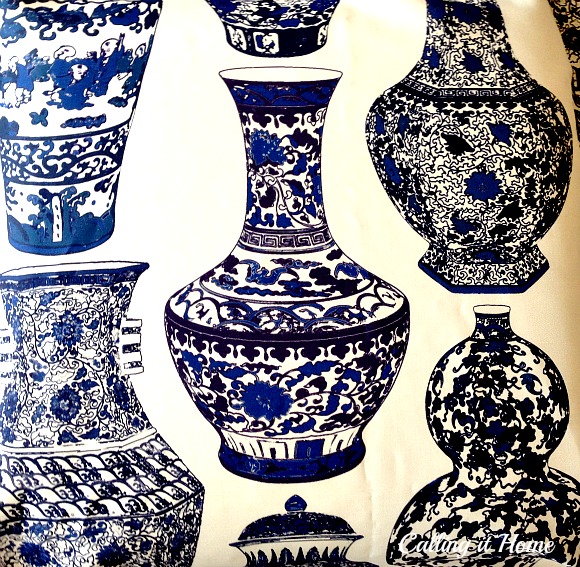
This one
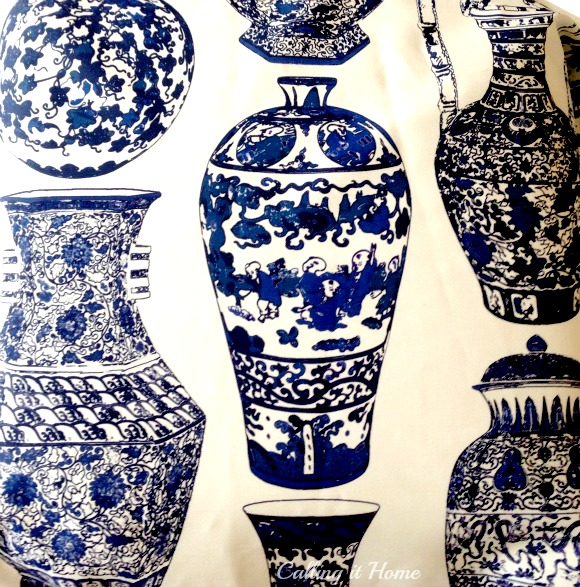
And this one.
I plan on adding some micro-mini pom poms.

Remember what my stools looked like?

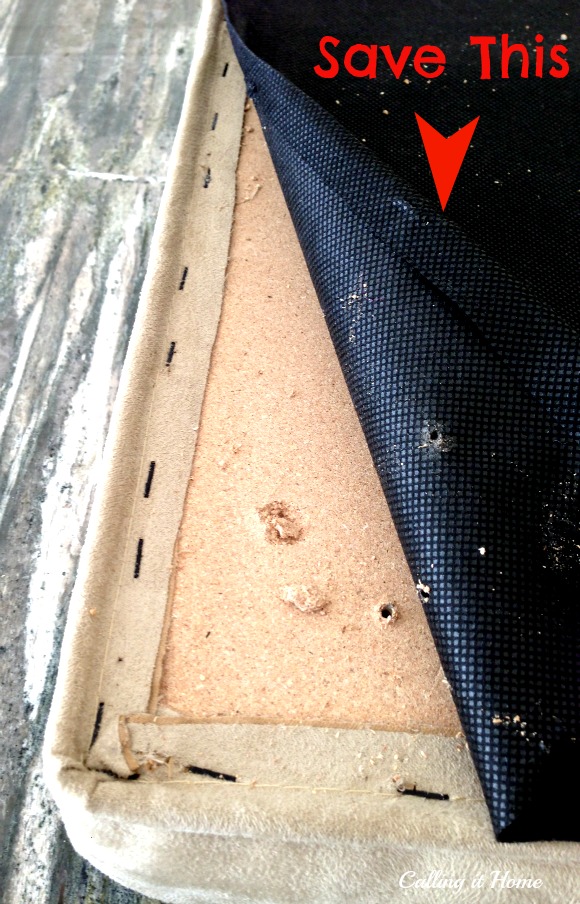
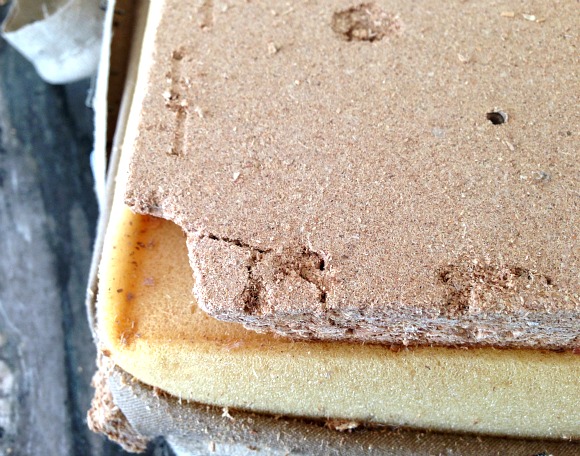
I removed the tops and started to reupholster them. The only thing I saved is the black fabric from the underside.
When I started to remove the staples, thinking I would reuse the wood(?)

I found this mess...crumbling particle board.
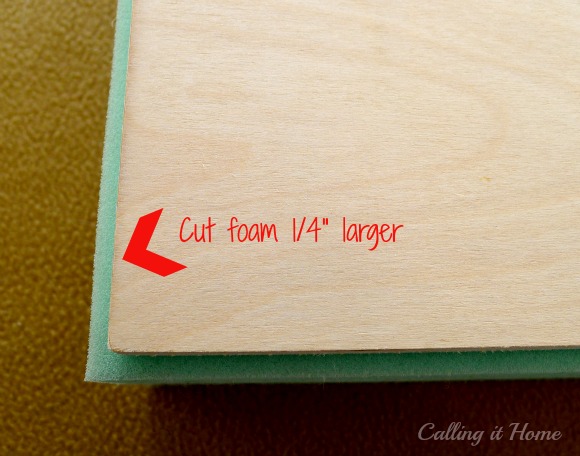
I purchased a new piece of real wood, and took it over to my friend's workshop to cut it to size. One day I'll give you a tour of this workshop. It is through the roof filled with whatever you could possibly need for any project. Nat, the owner of this space, has a big NYC job and can't play out here as much as he would like. So....he actually loves when it gets used! Happy to oblige, Nat.

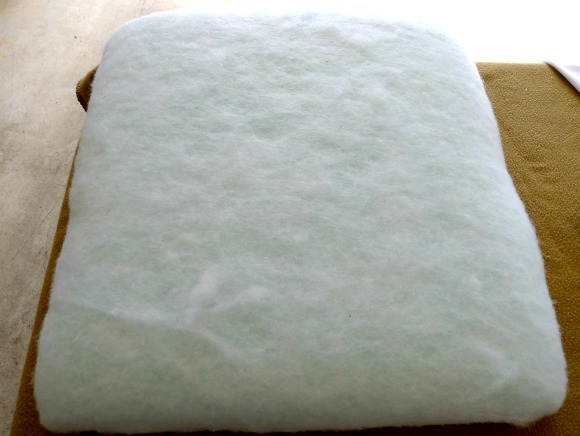
I am using a 3" piece of high density foam. Here are my thoughts about replacing foam.
The batting doesn't need to be super thick, just durable.

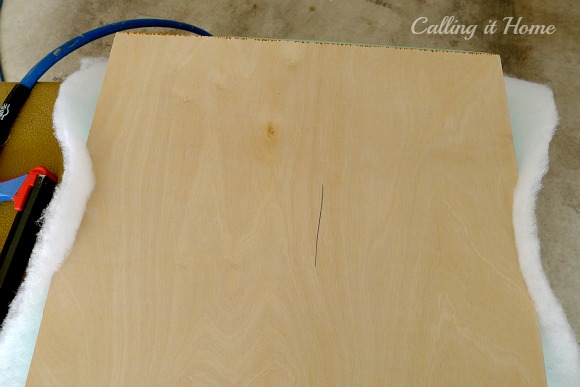
As you can see, the batting is what shapes the foam into place. The number (1) on the wood is because I have two stools, and each one is a bit different in size.
Now you can see that the top has shape to it, but not the final shape. Yes, I see those wonky edges.
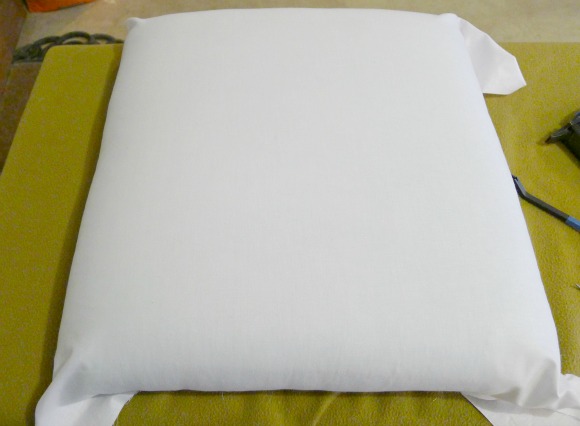
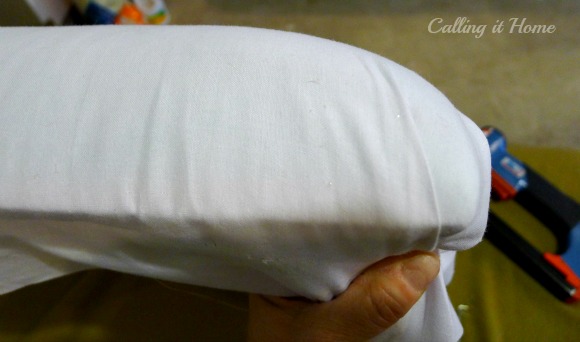
Here is the secret to a smooth finish. I like to put a layer of lining over the batting to help shape the top even further. If you are using heavy upholstery fabric, you can skip this if you would like.

This is where you pull and staple to give the surface a clean shape.
A nice smooth shape.
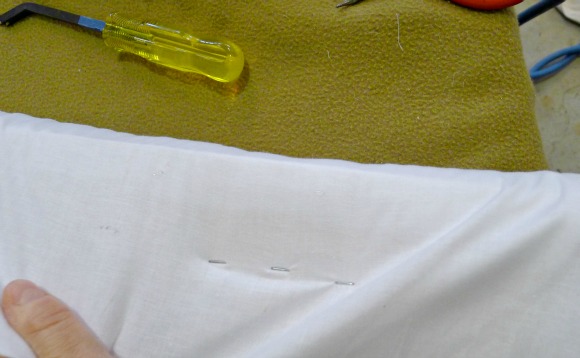
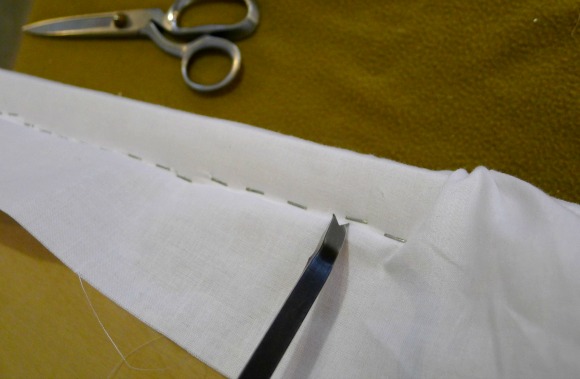
And now for the dreaded corner. I'll show you how I like to do it, but I want you to know it takes a lot of practice getting the look that you like. Be kind to yourself, each time you will get better.
I pick the center of the fabric, and tack it to the underside.
Folding a nice pleat, I pull it in the direction of the corner. I do this about six times or so until I get the fold I like. Then, I staple it down.
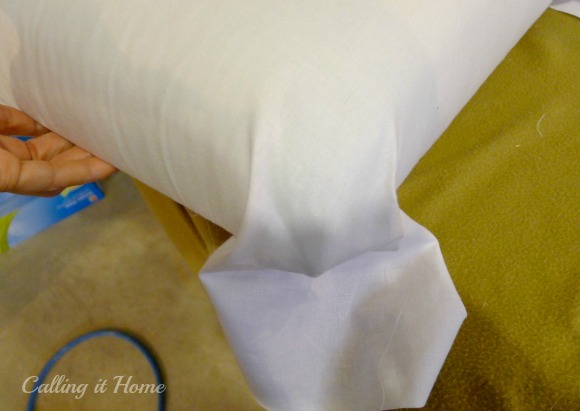
This is the part that I don't see many people doing. I go back and remove as many staples as it takes to have a smooth clean side. The instructor that I learned from would make us take out an entire row of staples if necessary. Professional upholsters do this all the time. Be prepared to staple, remove, and re-staple wherever necessary.
Cut away any bulk that will keep the corners from laying flat.
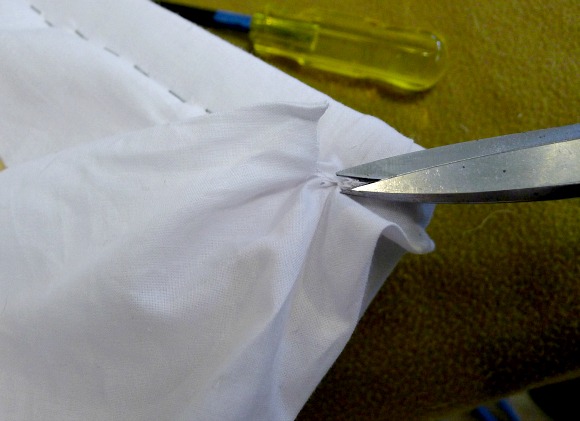
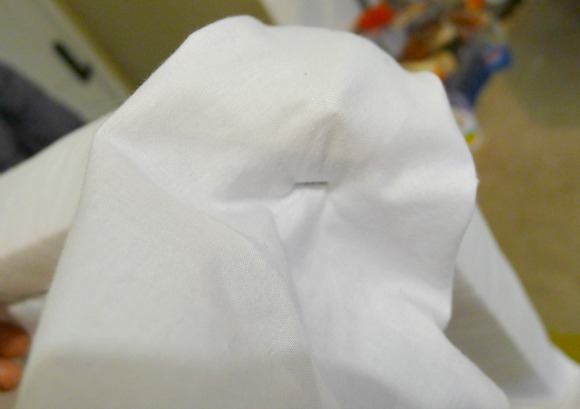
This is what the corner looks like. Three more to go. For more tips on how to center your fabric, etc....you can read the tutorial I did for Tobi Fairley's blog. I still can't get over that one!
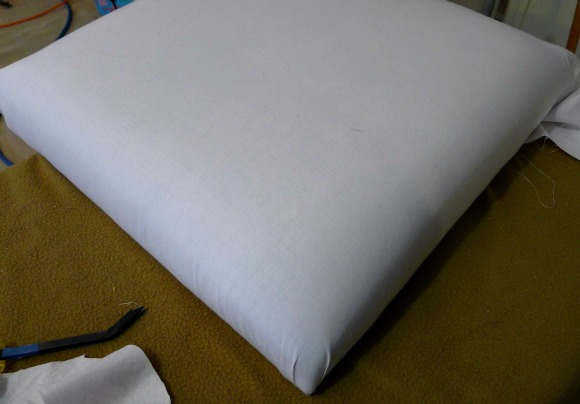
Here they are.
One centered vase.

Another centered vase.
The picture that I would want to see as a DIY'er....the corner.

These stools are so beautiful, I think I could put just these in my entry and call it a day. I may have to. I hope you come back on Wednesday for the final post on the One Room Challenge.
If you still need more upholstery information, you can check out my 31 Days of Upholstery.

Green Goodness

We look forward to this green thing every year. How about you? Do you eat or drink anything different today?
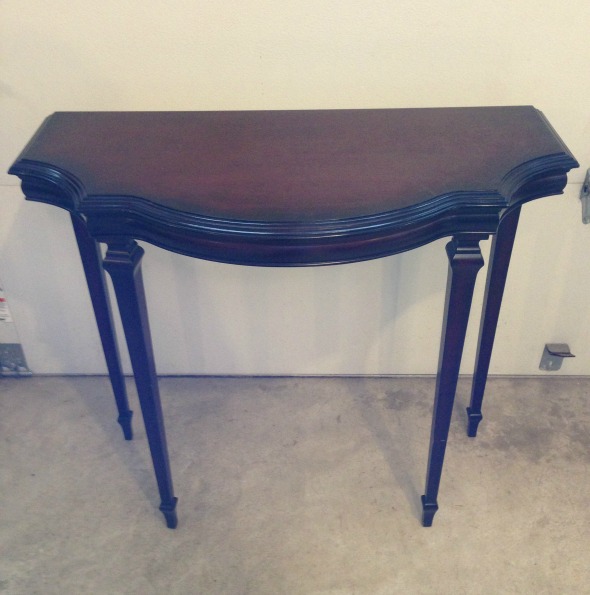
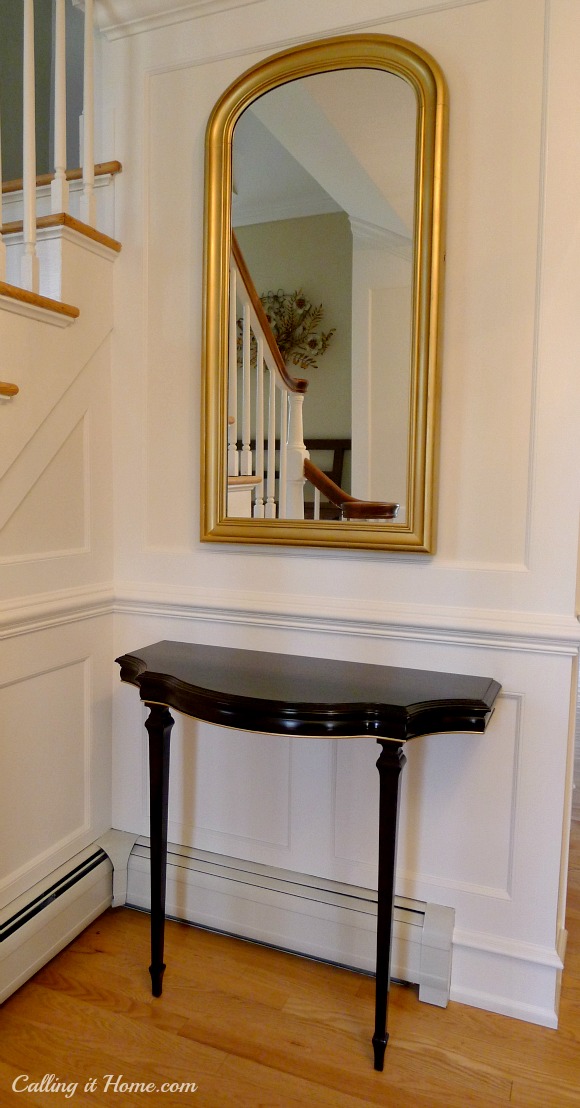
Entry Table Makeover

It started like this.
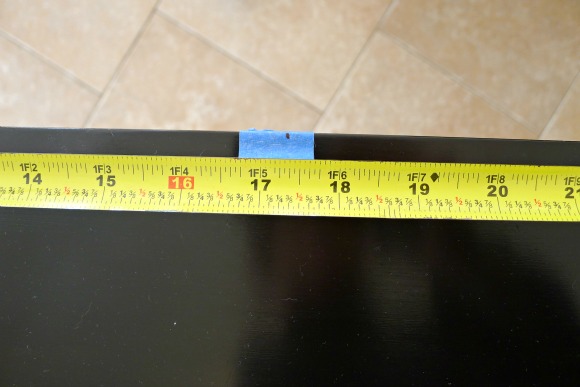
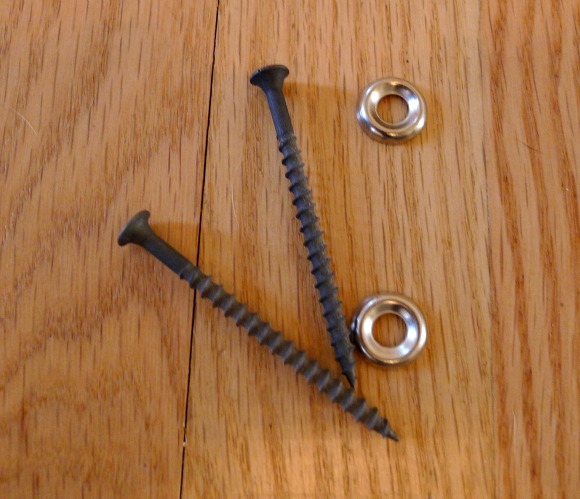
Pre-drill the back of the table
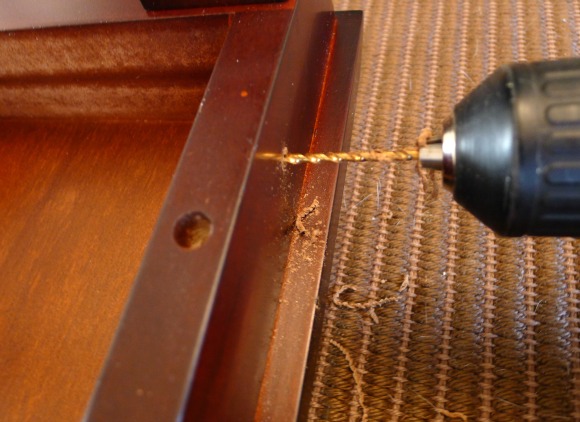
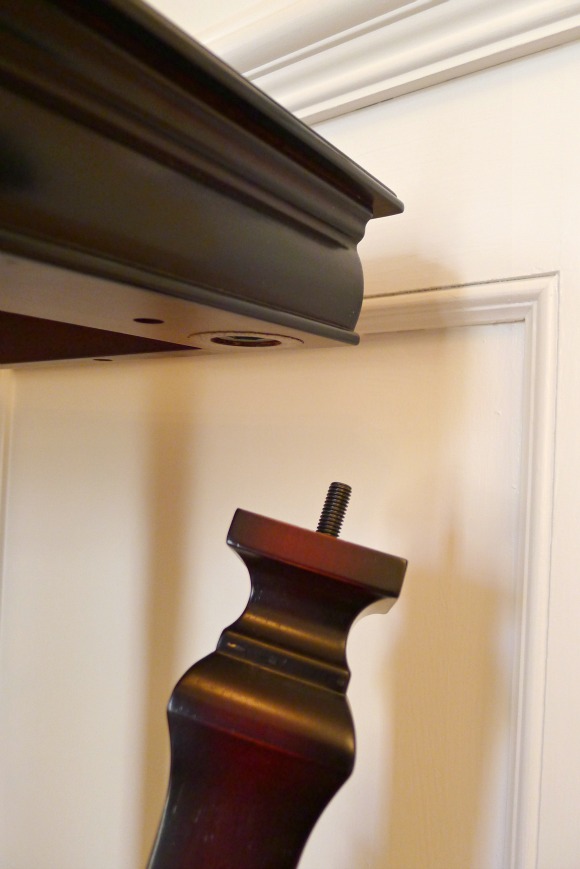
I was prepared to cut off the back legs, but my CL table had removable legs
You can see how red the previous stain was. I didn't use the gel stain on the back legs that were being removed.
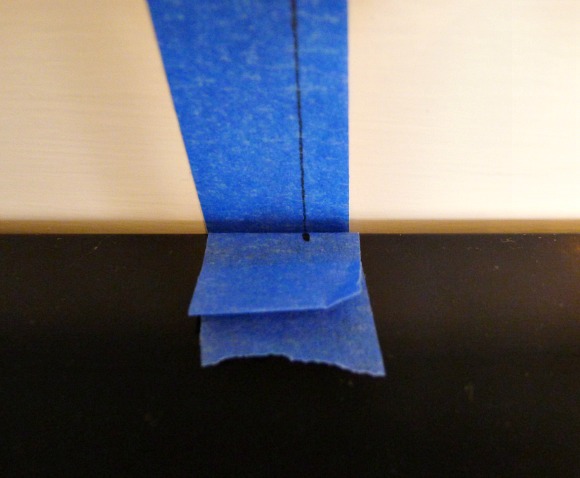
Line the table up with the center of the wall.
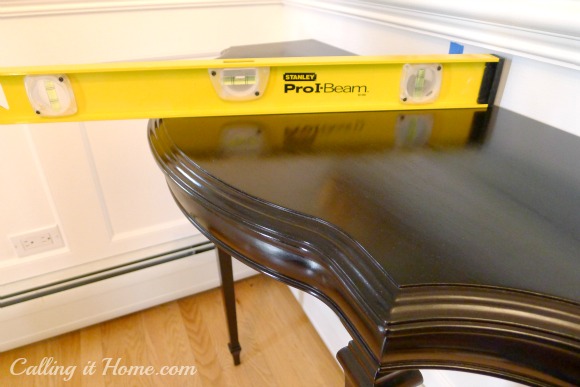
Once the table is in place, throw a level on it before screwing it into the wall.
I used 3" screws and washers to attach the table to the wall.

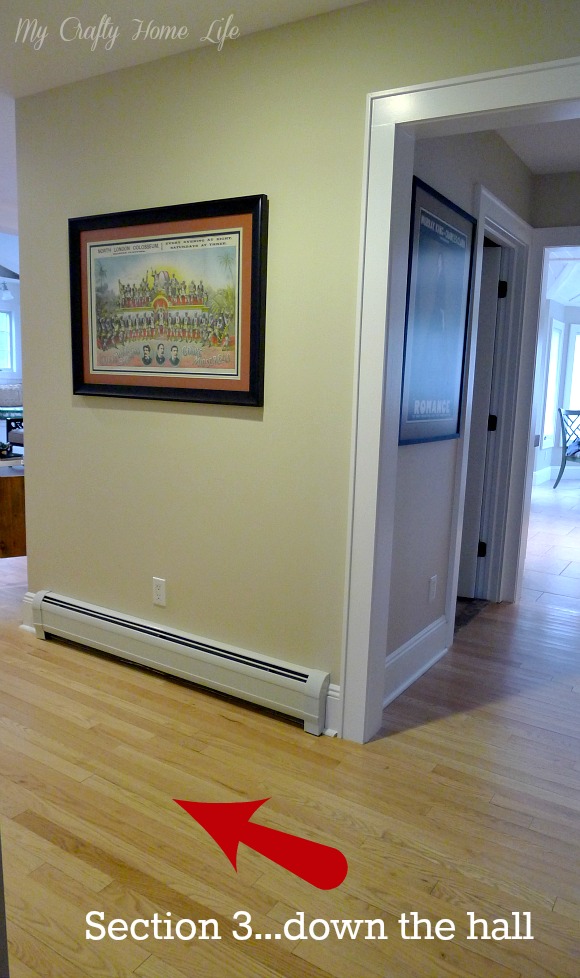
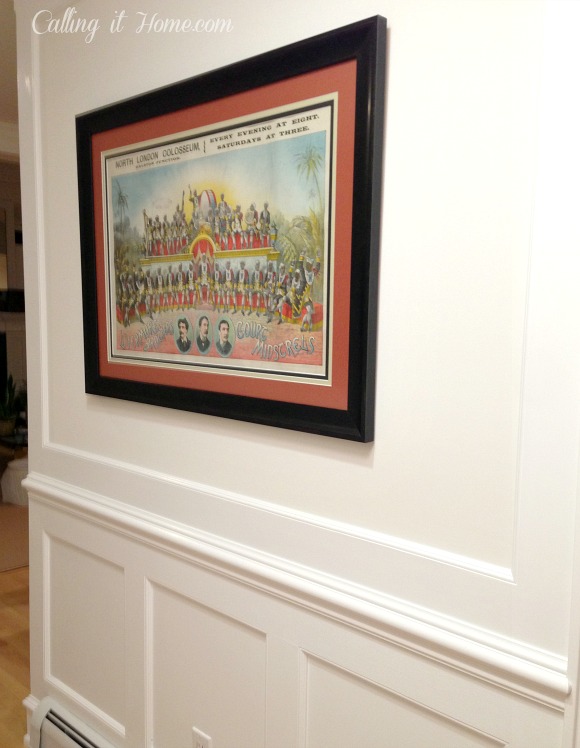
One Room Challenge...Week 6


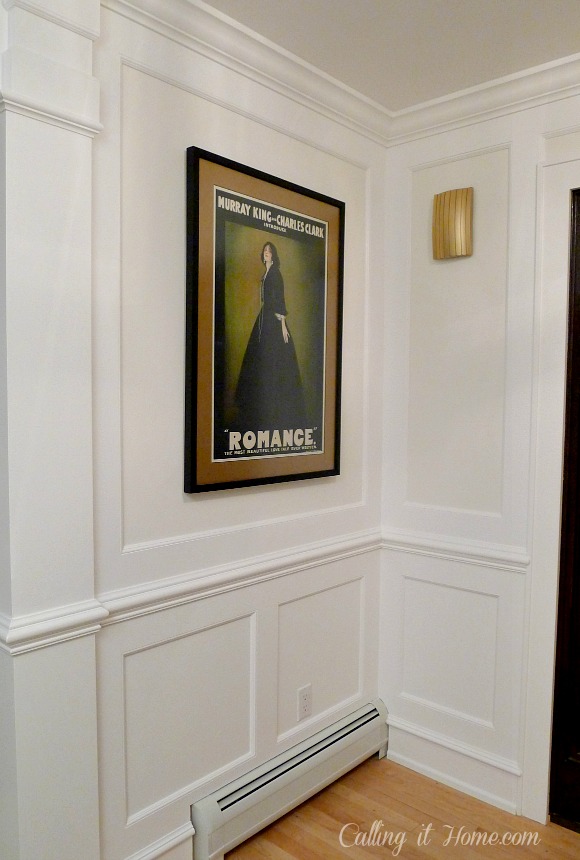
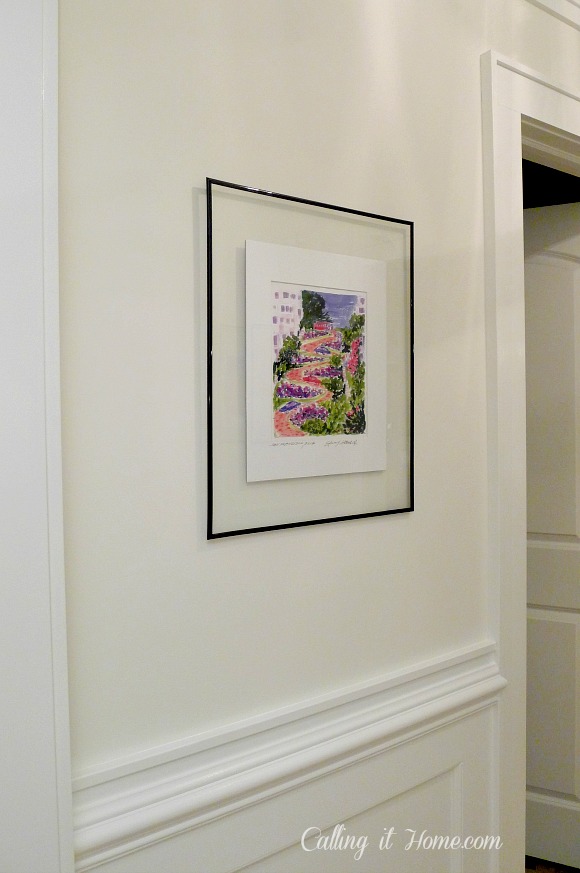
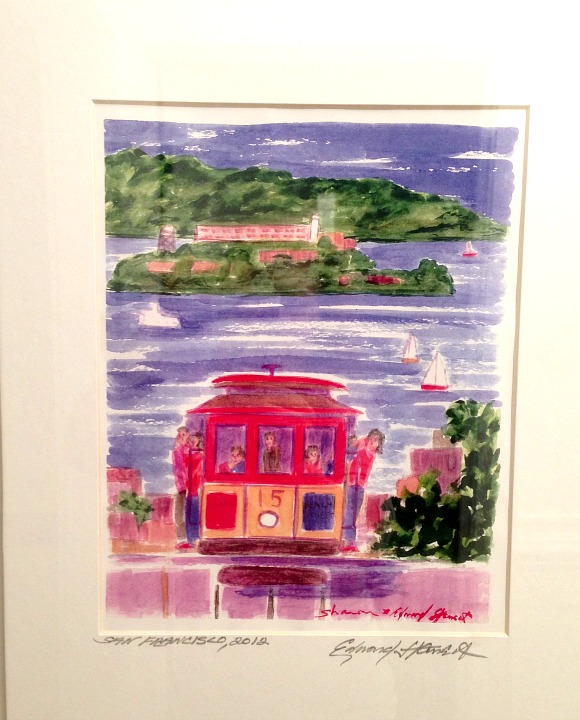
The art on this wall looked so blah,
Last summer we went to San Francisco, and I brought home two watercolors from a local artist. I framed them in a simple black floating frame.


Next week, homework or not...it will be the finale. I hope you come back. Now let's go visit the others ..some of them may be done and celebrating...I know one of them is on vacation #SoJealous!

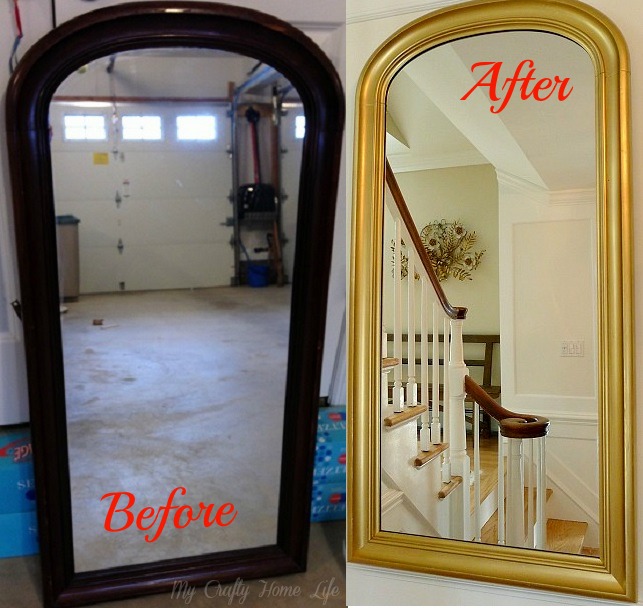
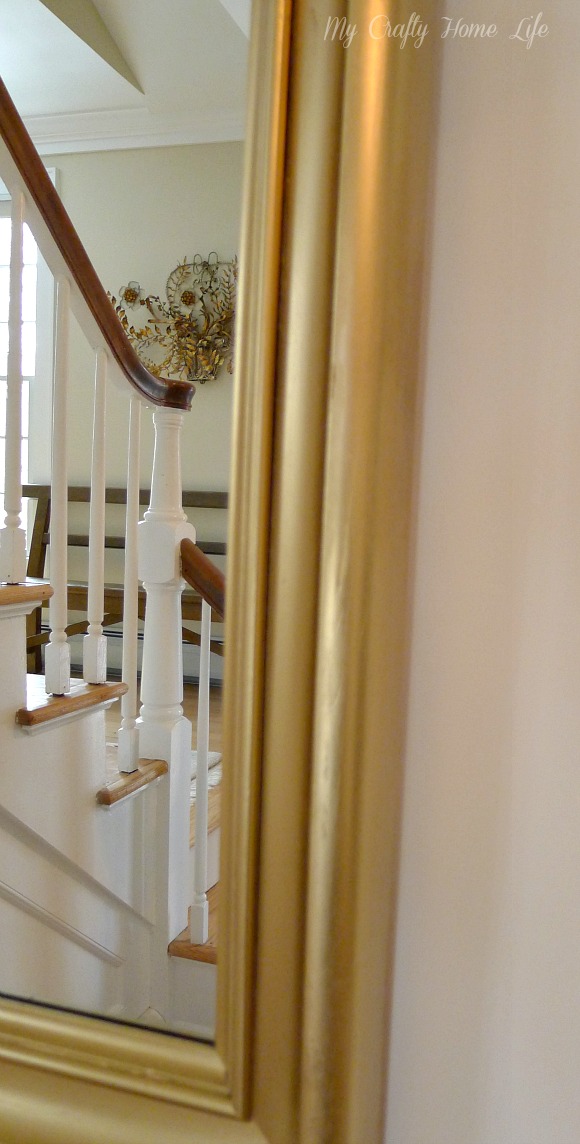
Mirror Makeover
 |
| The Hunted Interior |

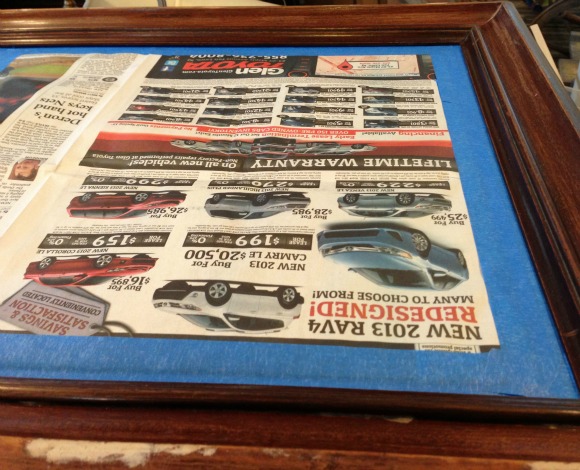
Cover glass with newspaper
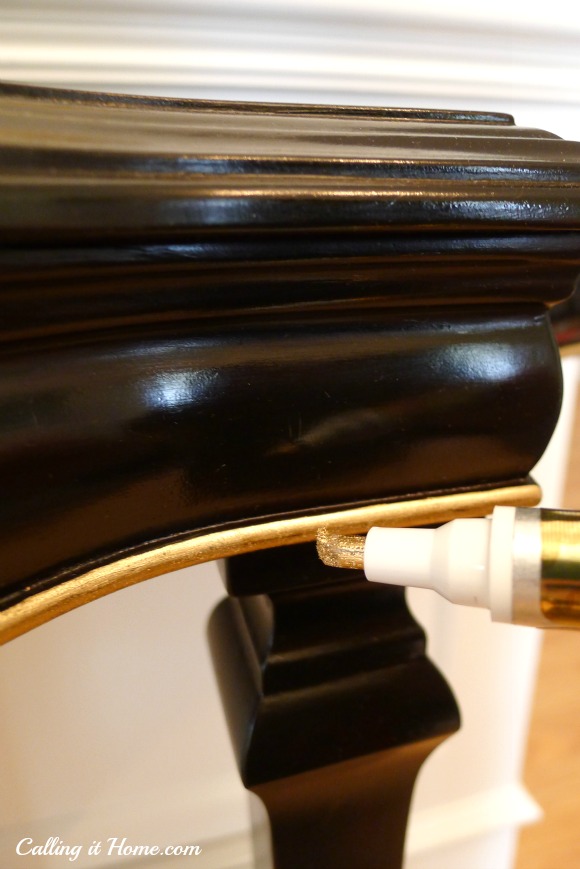
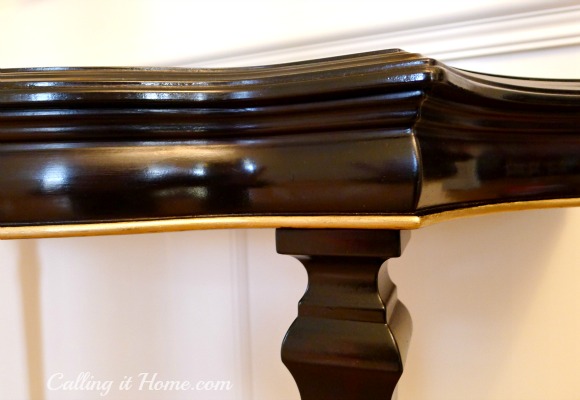
Wipe on rub n buff
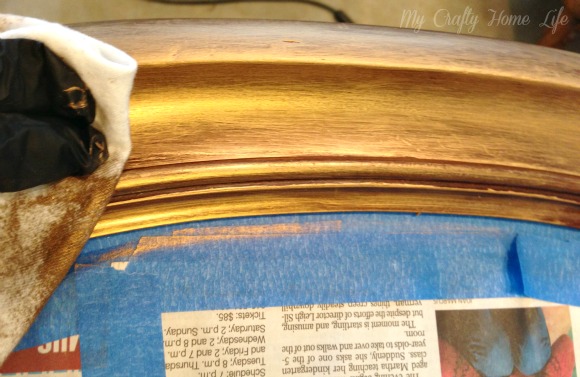
After the rub n buff has dried, spray paint gold over it.
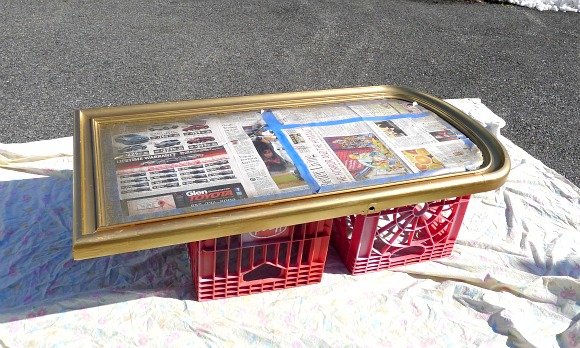

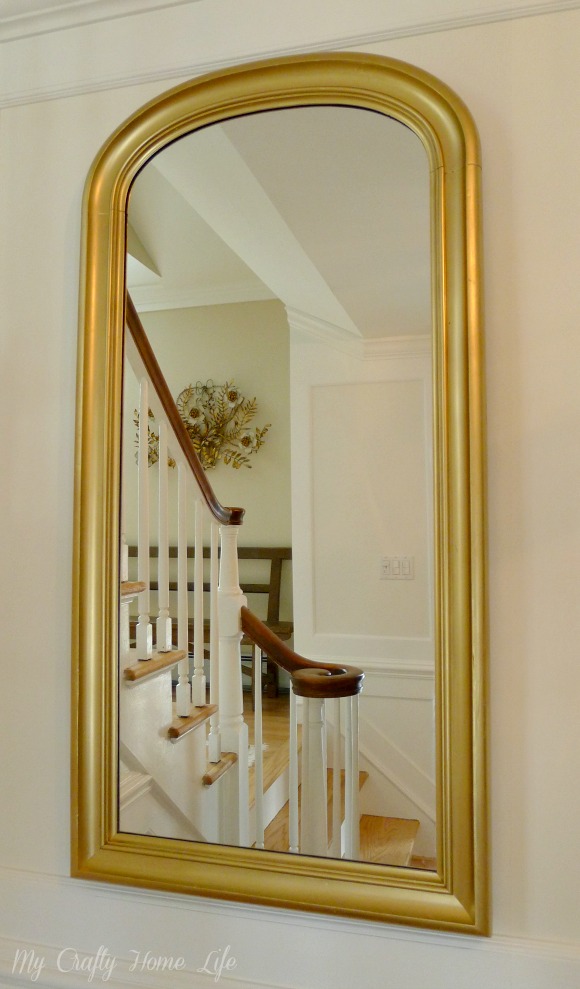
Up close, the finish really does look like brass. The dings in the wood frame look like vintage dented brass.
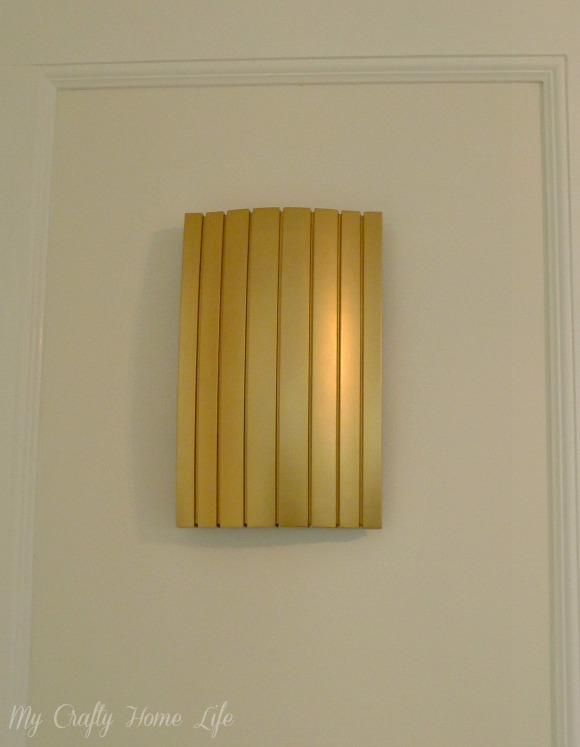
I was so happy with the look, I did my plastic doorbell cover, too.
I Have a Guest....Mimosa Lane
You know her, I know her, we all love her.....Albertina from Mimosa Lane is here. Does anyone else think of Champagne and Orange Juice when you hear her blog name? Just me?

Albertina has impeccable taste, a wonderful sense of style and her pillows are now available at Society Social....but, did you know that she designs her own fabric, too? What can't she do? Wait till you see the amazing ideas she has for us today.
 |
| Pink Mimosa Lane pillow via Society Social |
Hi there! I'm Albertina from Mimosa Lane and am just thrilled to be here at Linda's. I love this blog and am always in awe of how much I learn here. Linda has always been so sweet and supportive, so when she asked me to guest post I jumped at the opportunity.
If you have been following this installation of One Room Challenge you very well know the moldings Linda is putting in place. Boy are they fab! (see here). I love the look- it is so elegant. So, I started thinking about how to achieve a similar look for way less.....and of course the solution is 'faux' painted moldings. Painting 'faux' moldings is cheaper, faster, easier and looks pretty clever, wouldn't you say?
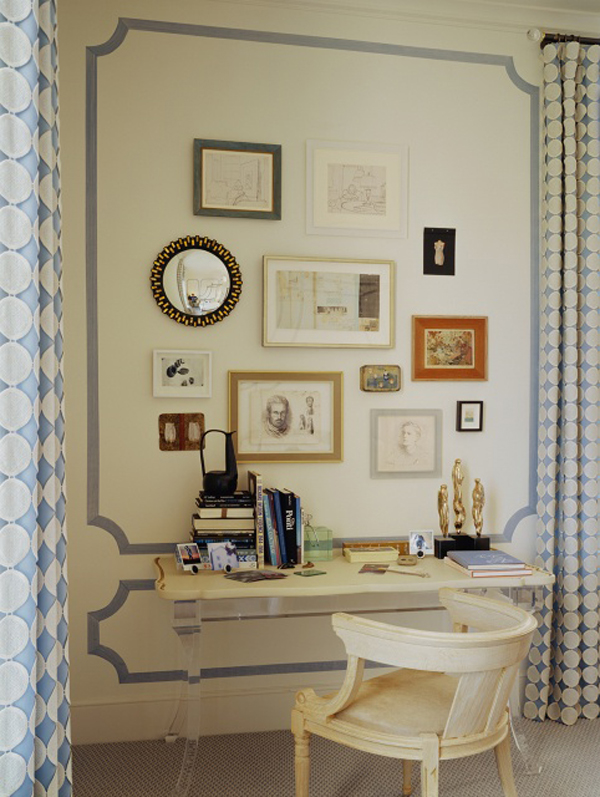
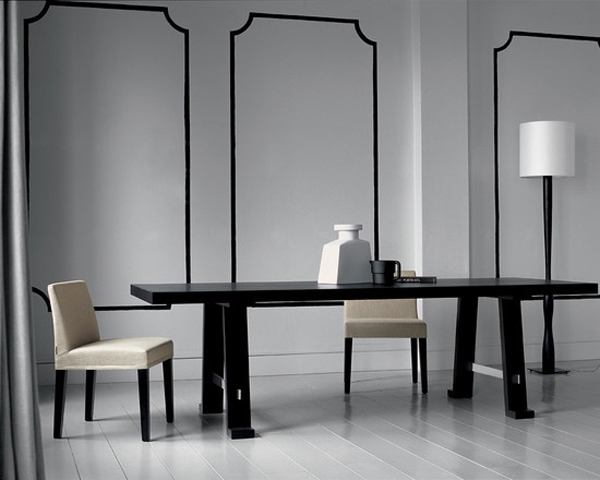
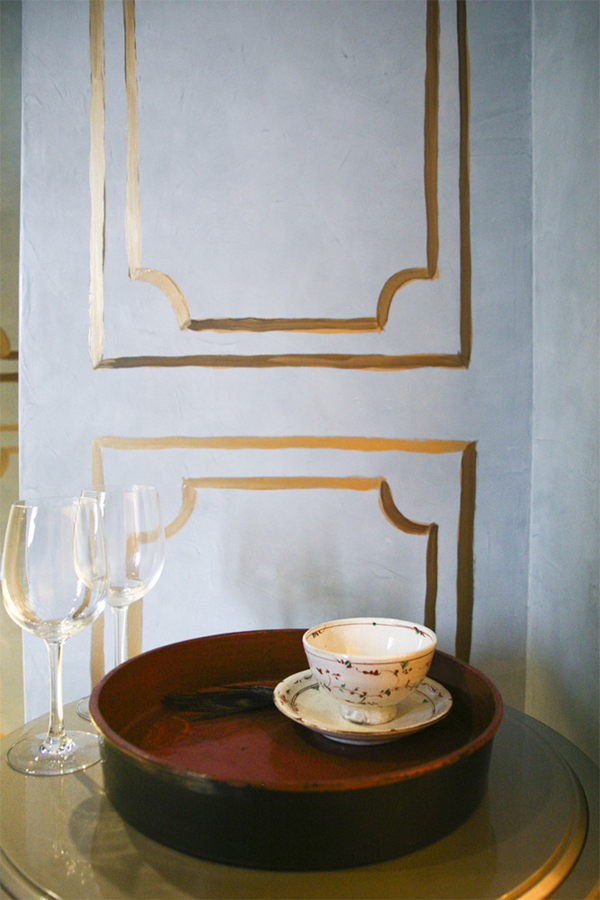
And how about using two colors for an added extra punch? I love the black and gold!
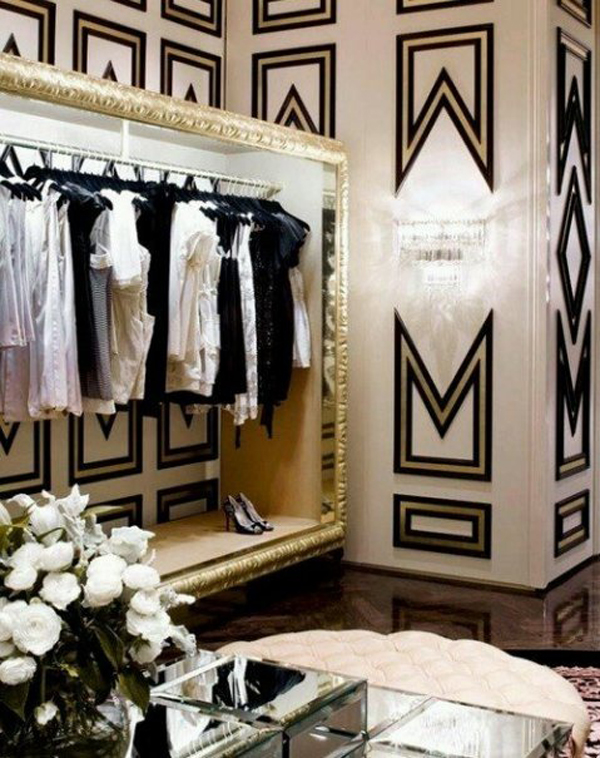
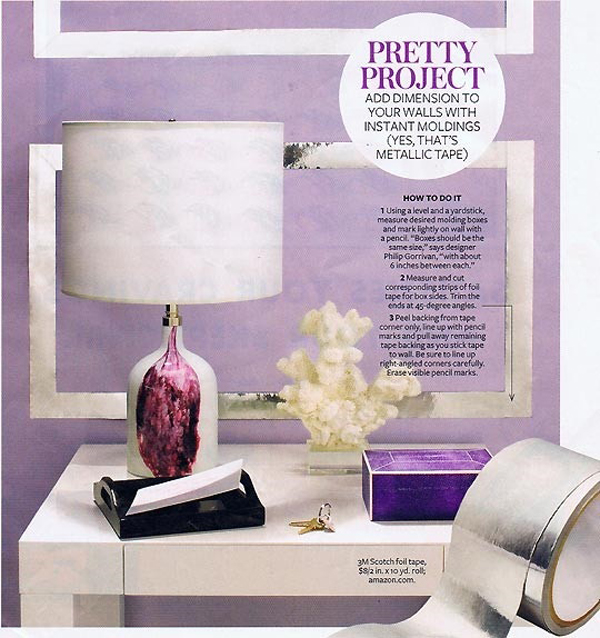
Or how about using foil tape for that silverish look? (you can get the tape here) Pretty, Pretty!
What do you think? Can 'faux' moldings carry you through? Or do you need the real thing?
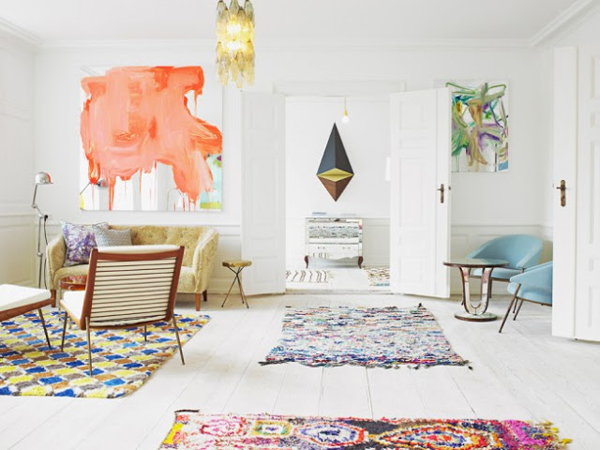
And I just saw this and nearly died because I found it to be such a great idea. It has nothing to do with moldings are you ready? See that orange splatter below? Its a painted mirror!!! Talk about a statement art piece. Totally doing this with my five year old. Ikea, here I come to get me a mirror!
Thanks Linda for having me and for entrusting your sweet readers to me :) Come say hi here.