
One Room Challenge, Week 5

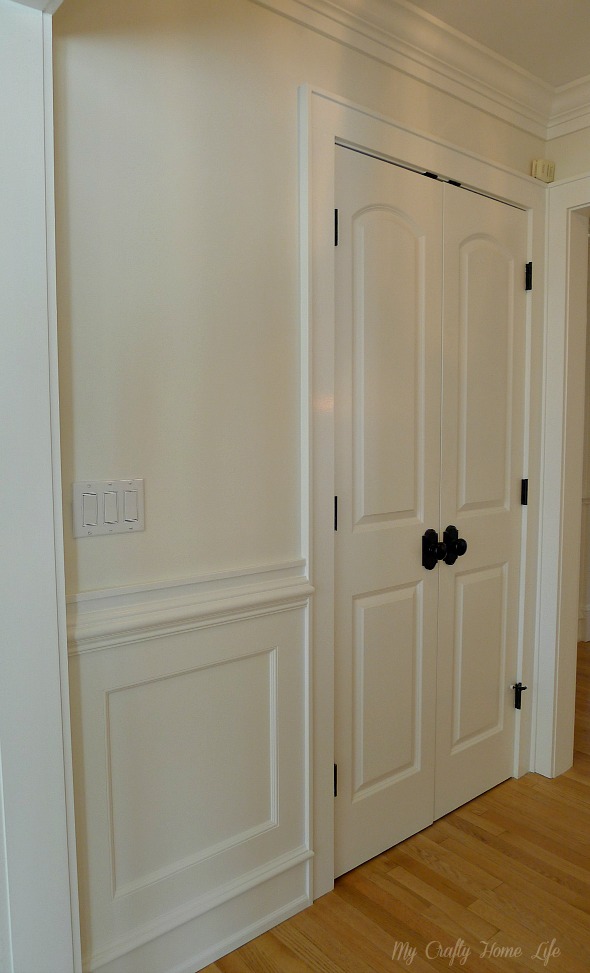
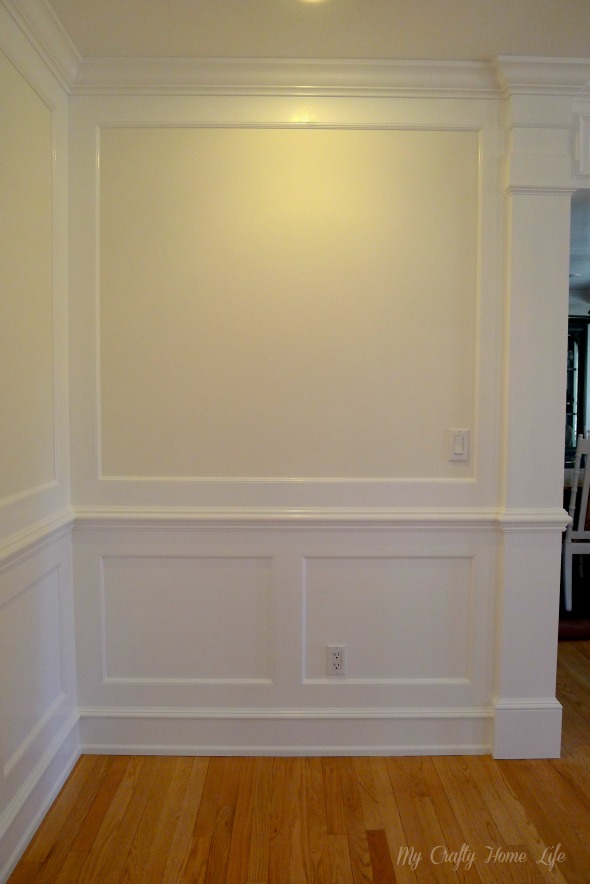
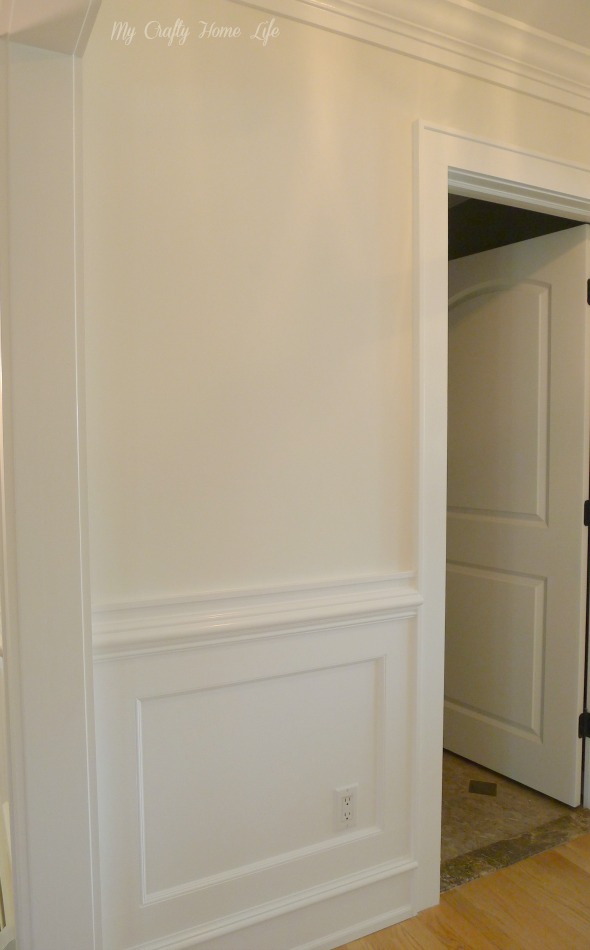
Section 1 & 3 have the framed wall treatment above the chair rail

In Section 2, the walls were too narrow to frame them above the chair rail. I gave them a mock cap on top to finish them off. I also modified the crown in section 2.

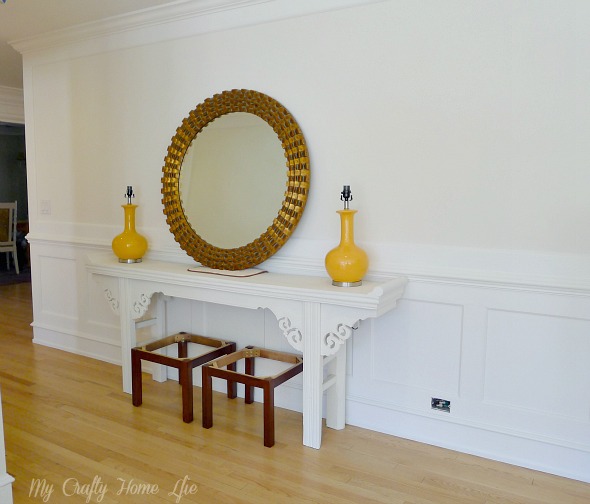
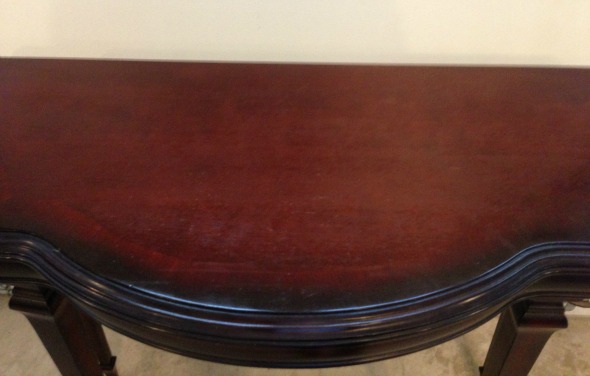
I picked up this mirror, that has a gash in the upper right corner.
You just can't get good quality for $15 any more.
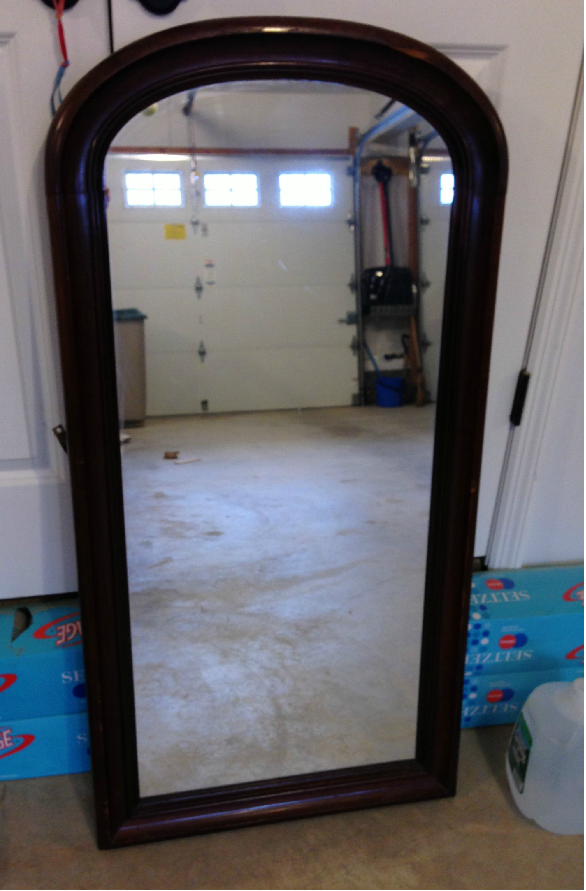
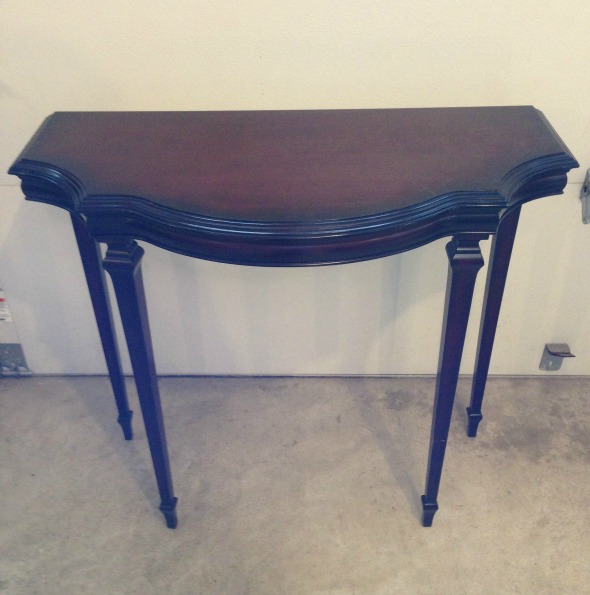
Once I fix the red tinted stain
There is one more week....and then the big Tah Dah!
Now let's go make the rounds.

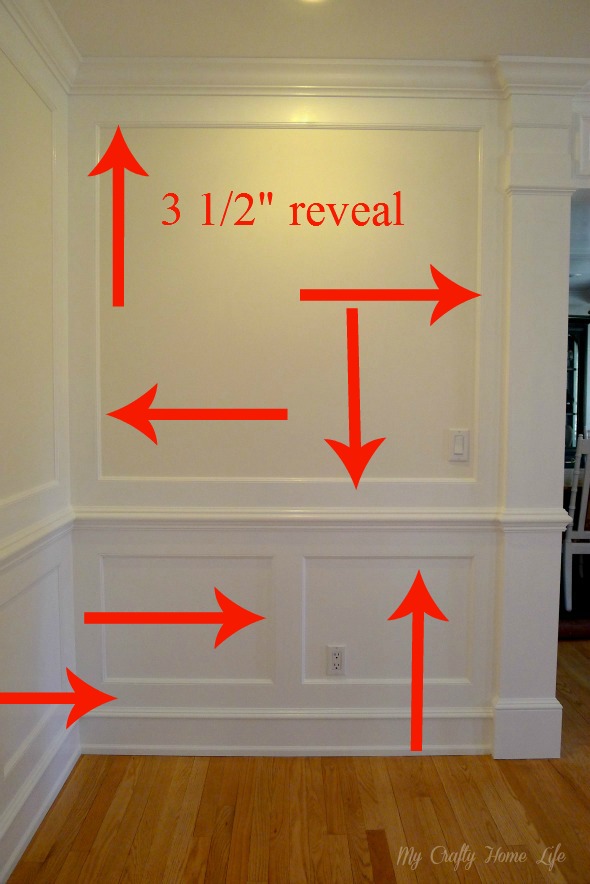
Wall Treatment Specs
This will show you why
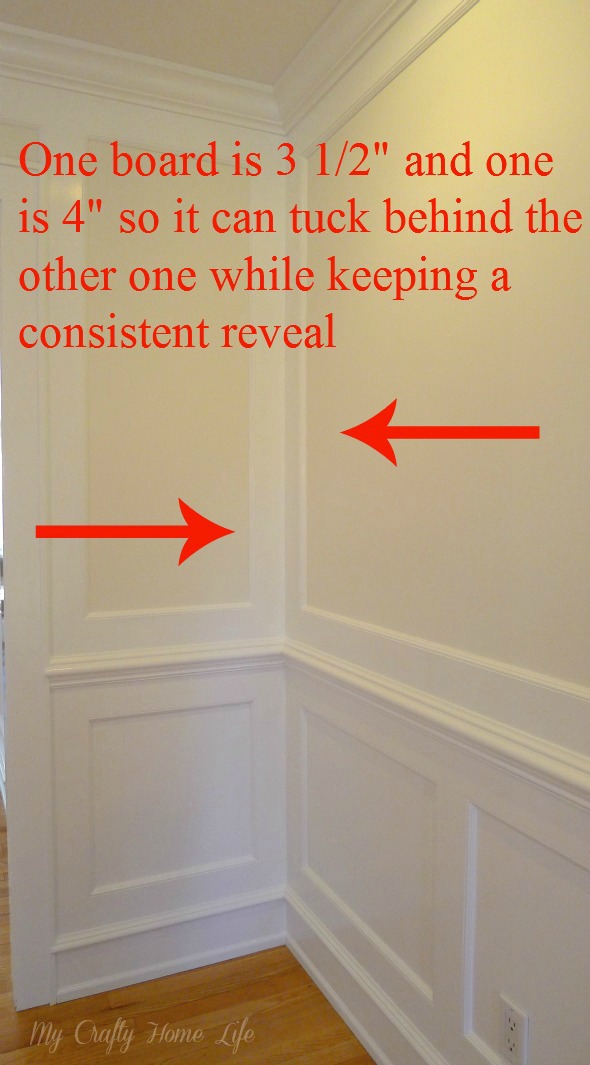
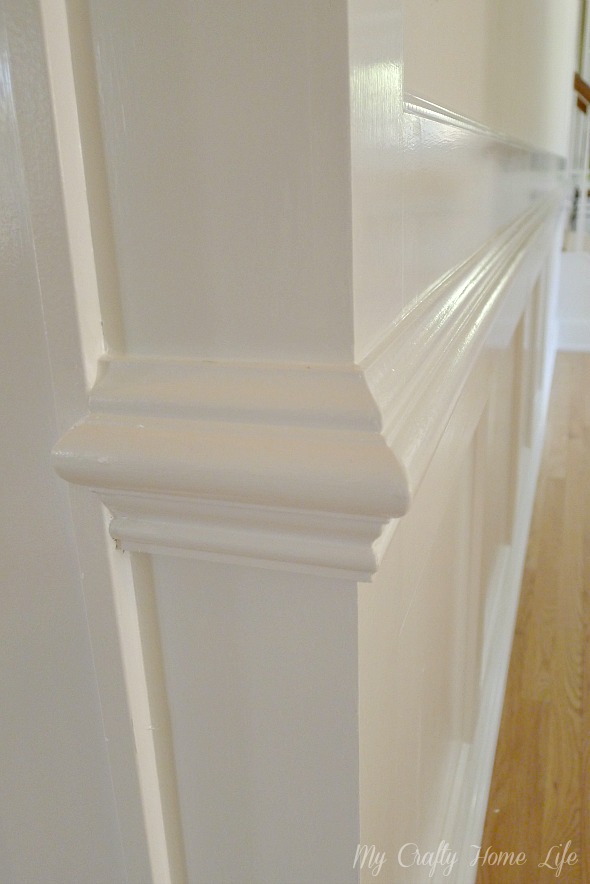
On an outside corner, you would need to take 1/2" off one of the boards.
As for the panel widths, I would suggest that you divide the wall into a size that you feel comfortable with. Since every one of my walls were a different length, they are similar to each other, but far from exact.
Furniture placement will camouflage a lot of this.
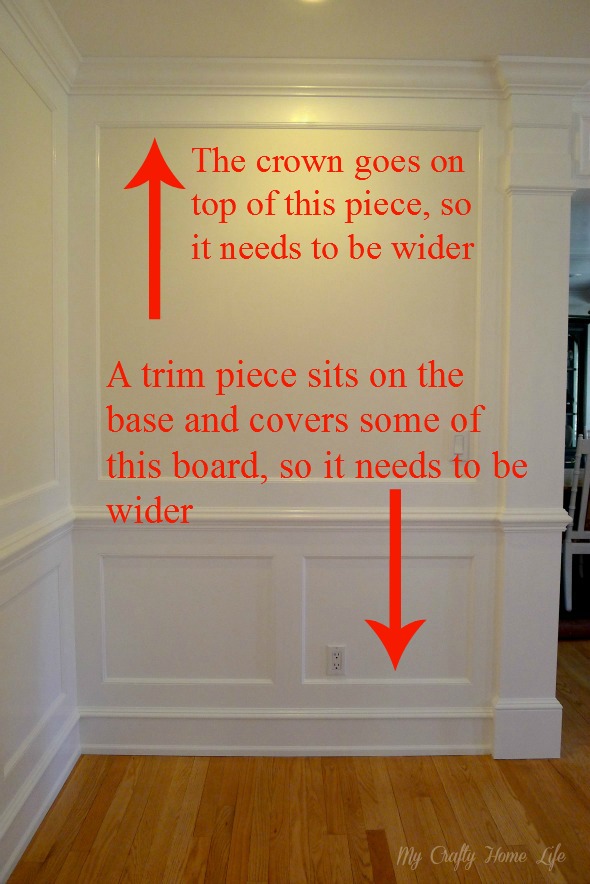
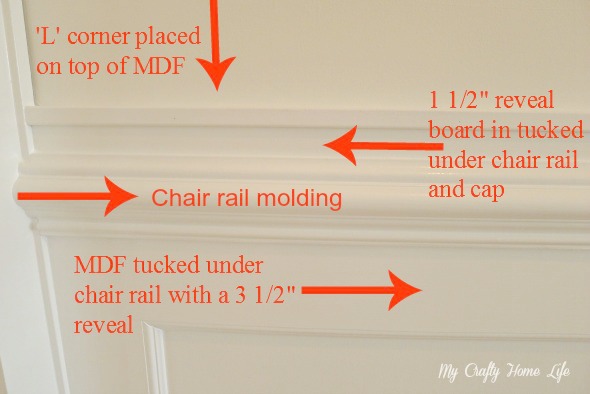
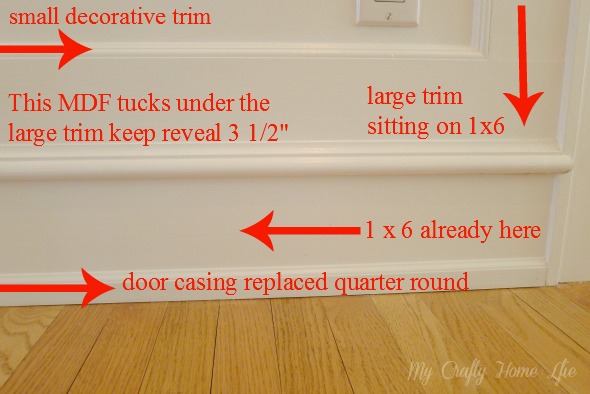
Here are the specs for the top of section 2
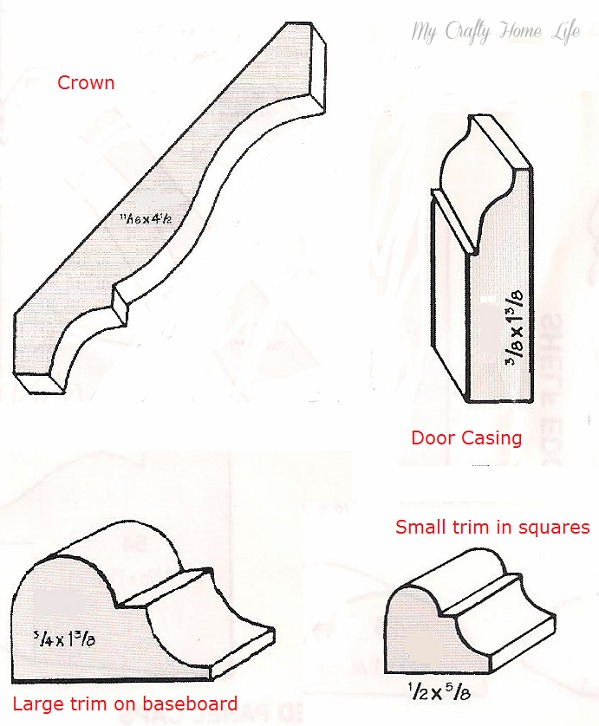
These are the trim pieces that I used
Some of the hard cuts that Joe and Mike did
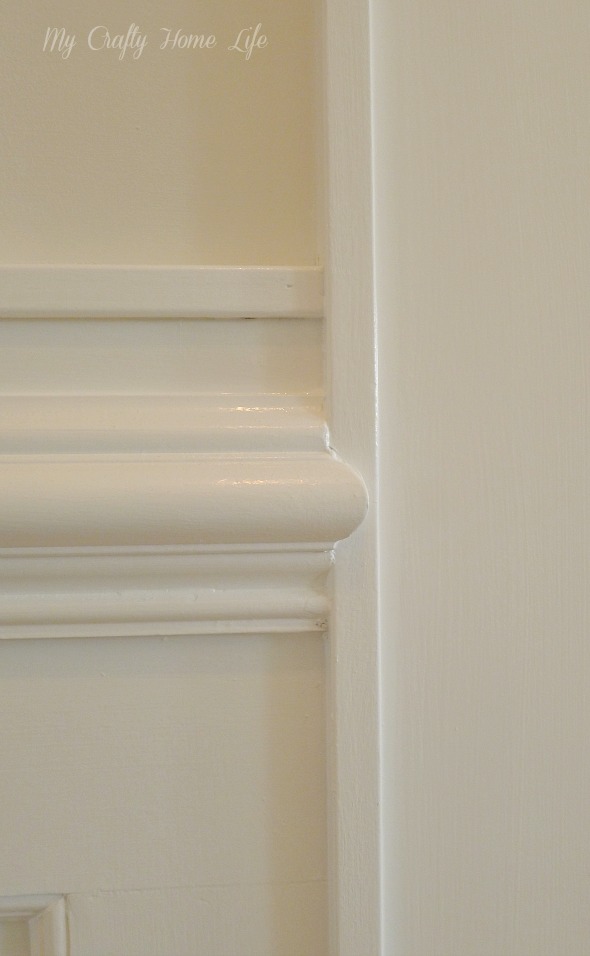
Wrapped the corners


What Size is My Blog?
Easy Savings


One Room Challenge...Week 4
Here is the finished millwork with primer on some of it.

Let me show you how I got here.
This one's for you DAP people....who follow me on Pinterest. For the record, I have not received anything from DAP....but totally would if they sent me some!
I really like the High Performance one on the right for all the joints where the boards meet. The one on the left (the pink kind) is great for small holes.

Once all the holes and joints are filled
(does this remind anyone else of the book Put Me In The Zoo?)

I used a sponge sander to smooth out the joints

Check the smoothness with your hand when you are done. Remember, if you can feel it, you will see it when it's painted.


Which one would you pick?
I Want to Try This
 |
| Via |
 |
| Via |
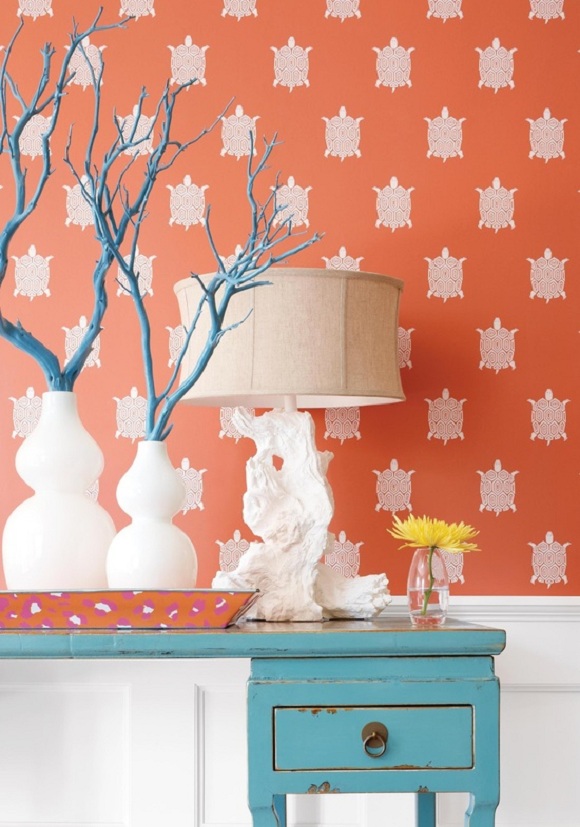
Fun colored branches...so easy, I feel stupid for pinning it.
 |
| Pinterest, could not find original source |
I just noticed that the wall panel detail is almost exactly like the one I am hacking away at.