
Decorator vs. DIY-er
In doing the One Room Challenge with 14 other amazing bloggers, I have begun to notice a contrast among the Decorators and the DIY-ers. I am not a decorator, and have never pretended to be one. Although, I do "play decorator" in my own home all the time. I am, however, a compulsive DIY-er. I am often called by one of my friends to fix things...case in point, my friends sofa. I don't usually blog about it. I think I will start doing more of that. I regret not blogging about how I built window boxes for another friend, it would have been great for you to see how easy it was.
Back to the Decorator vs. DIY-ers.....as you are probably aware, if you have followed and clicked around the challenge, some of the women are REAL decorators! Here are the noticeable differences
Decorator - Here is my room inspiration board
 |
| (A Lifestyle Thing) |

Decorator - Here is my room process (from Refreshing Designs)

-paint room-find industrial-look hanging lamp for above desk-find vintage lamp
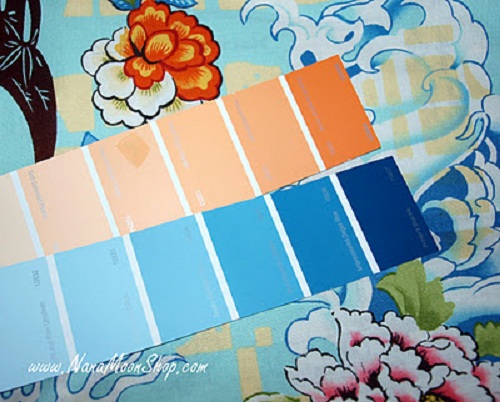
DIY-er - I hated that color, so I painted this one
I'll have more contrasts for you as the challenge goes on. My question to you is, are you a Decorator or a DIY-er?
To make sure I stay on track, I am going through the proper design process for this room makeover:
1. Figure out what style and mood I want to create and find inspiration pictures I swoon over.
2. Create a design board with colours, furniture elements, lighting, etc. This will keep me on track throughout the process when I get distracted by a great pillow that really doesn't work with the design.
3. Lay out a plan. Set a budget. Make a list of things to buy or DIY.
4. Proceed with accomplishing everything on the list and see the space come together. There is room for a little tweaking along the way.
So then, here is step #2: my design board.
And step #3: my to-do list (if crossed out they are complete!)
-order eames plastic armchair (reproduction)
-purchase file/storage unit
-DIY fabric headboard for daybed
-DIY wallpaper projects
-DIY art
-DIY pillow covers
-create magazine storage solution
-style and finish room

Professional Tip: Don’t mask off squares and paint on the wall… it leaves ridges around the edge and is more difficult to sand off and prep for your painter. INSTEAD, do a freehand test, Like I have below, and be sure to feather out the edges so you don’t have to sand out any nasty ridges.
 |
| Nicole Scott Design |
DIY-er - I hated that color, so I painted this one
 |
| Nana Moon Shop |
I'll have more contrasts for you as the challenge goes on. My question to you is, are you a Decorator or a DIY-er?
One Room Challenge (week 2)
Hello, and thanks for coming back. This is week 2 of the One Room Challenge. In case you are new here, you can start the challenge series here. This was a crazy busy week because it finally snowed in New Jersey. A total of 6 inches to be exact. That made running around slower than usual. Luckily, it snowed on Friday evening into Saturday...no snow-day. I managed to finish my china hutch. If you have not see it....check it out here. Onto my dining room...
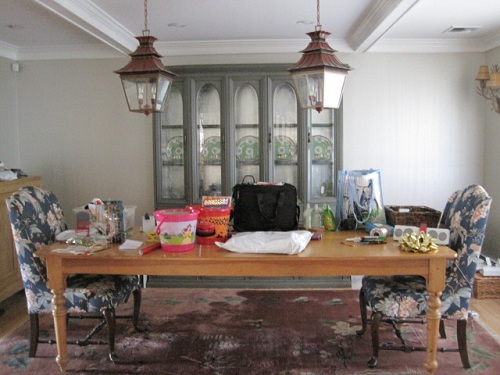
This is how you last saw it
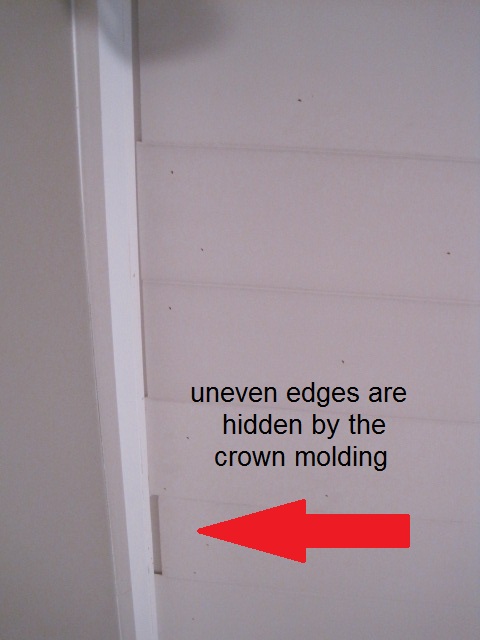
I started on the ceiling planks. First I took down the crown molding. As you can see in this picture, all of the uneven ends will be hidden under the crown once it goes back up
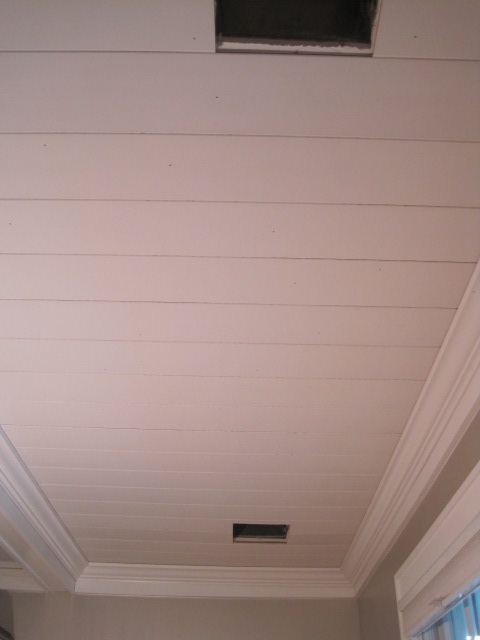
I did a tutorial for installing planks here. It is not hard, trust me...it just takes time. Here is a shot with the crown molding back up
I am curently working on the middle bay of the ceiling
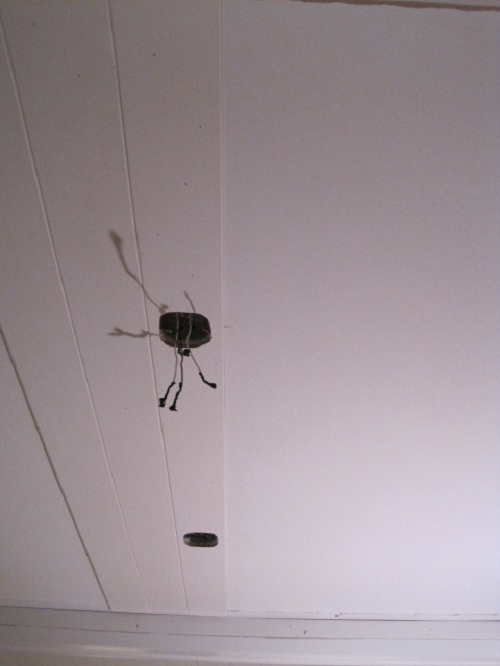
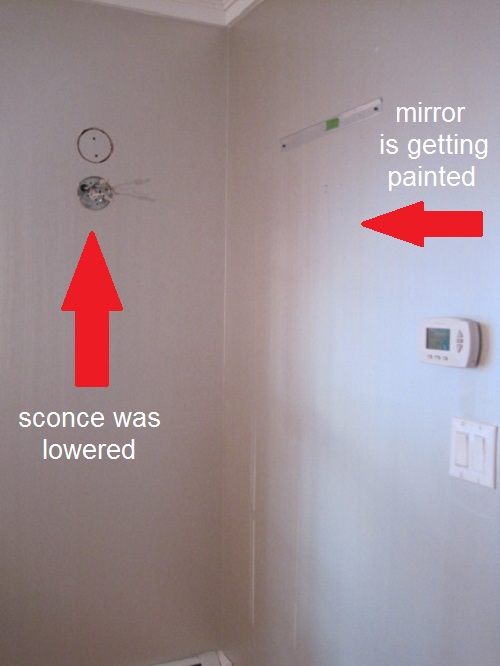
Next, I hired an electrician to lower the sconces....and while you are at it (my favorite phrase) ...I had him move the lanterns closer together. The mirrors are in the garage waiting to be painted
And now for the "keeping it real" shot. This is how my room looks as I write this.
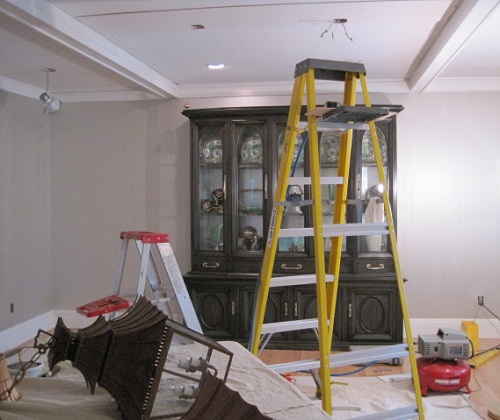
It always gets much worse before it gets better! If you have a second...go here and tell me which color to paint those lanterns. Be sure to check out the progress in all of the other awesome rooms...and I will see you next Wednesday. For week 3, go here
Saved By Suzy Nicole Scott Designs
Dutch.British.Love Kim Macumber Interiors
Trapped in North Jersey Rue de Emily
The Pink Pagoda refreshed designs
Nana Moon Shop Taylor Morgan
insideways House Four
Living Savvy (A Lifestyle Thing)
This is how you last saw it
I started on the ceiling planks. First I took down the crown molding. As you can see in this picture, all of the uneven ends will be hidden under the crown once it goes back up
I did a tutorial for installing planks here. It is not hard, trust me...it just takes time. Here is a shot with the crown molding back up
I am curently working on the middle bay of the ceiling
Next, I hired an electrician to lower the sconces....and while you are at it (my favorite phrase) ...I had him move the lanterns closer together. The mirrors are in the garage waiting to be painted
And now for the "keeping it real" shot. This is how my room looks as I write this.
It always gets much worse before it gets better! If you have a second...go here and tell me which color to paint those lanterns. Be sure to check out the progress in all of the other awesome rooms...and I will see you next Wednesday. For week 3, go here
Saved By Suzy Nicole Scott Designs
Dutch.British.Love Kim Macumber Interiors
Trapped in North Jersey Rue de Emily
The Pink Pagoda refreshed designs
Nana Moon Shop Taylor Morgan
insideways House Four
Living Savvy (A Lifestyle Thing)
Pagoda Time!
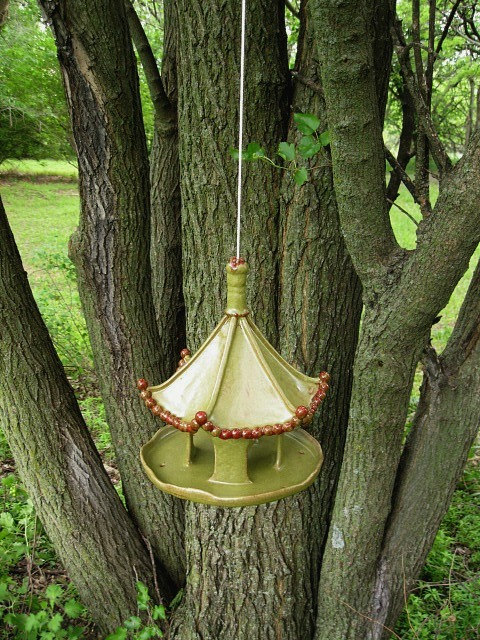
If you have not guessed by now...I love pagodas! To me, they say "happy chinoiserie". Pagodas add that extra touch of whimsy to a room. As my blogger friend Jessie, from the blog Mix and Chic, says...."the global eclectic look is so chic these days".
Here are some of my pagoda favorites from Etsy....of course!
 |
| Etsy TPP |
 |
| Etsy Seller |
 |
| Etsy Seller |
 |
| Etsy Seller |
 |
| Etsy Seller |
 |
| Etsy TPP |
By the way, The Pink Pagoda is having a giveaway! So pop on over and enter. I love my pink pagoda print. Are you embracing the global eclectic look in your home? What is your new "chic" inspiration?
China Hutch ...after
Not that long ago, I told you about Me & Mrs. Jones. I reached out to her, via e-mail, for help with my china hutch. This is my hutch. I painted it a medium gray and silverleafed the back. I was not happy with it. it needed more depth and interest.
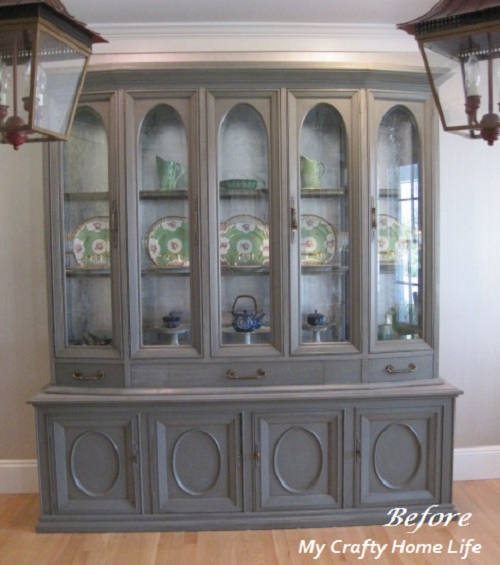
This is the real "before", long before I blogged.

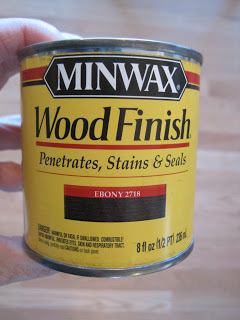
Stephanie (Me & Mrs. Jones) suggested the following...use this over the paint
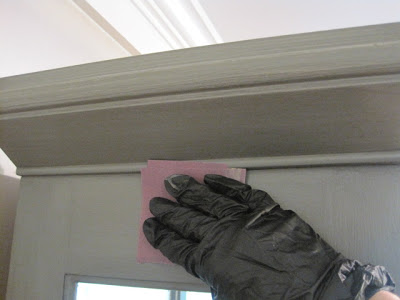
Here are the steps, first use 400 grit sandpaper to break the seal
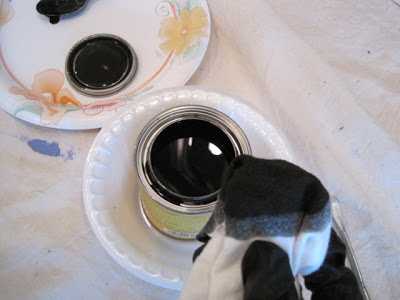
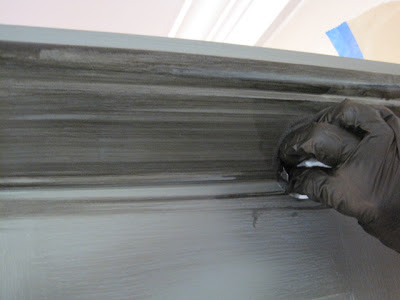
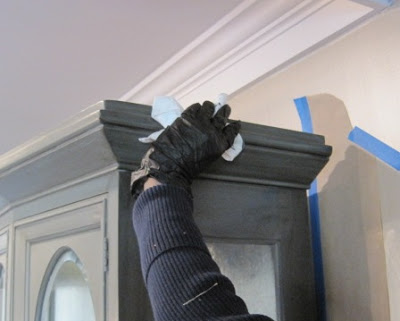
I repeated this one more time (2 coats total), and now I have this
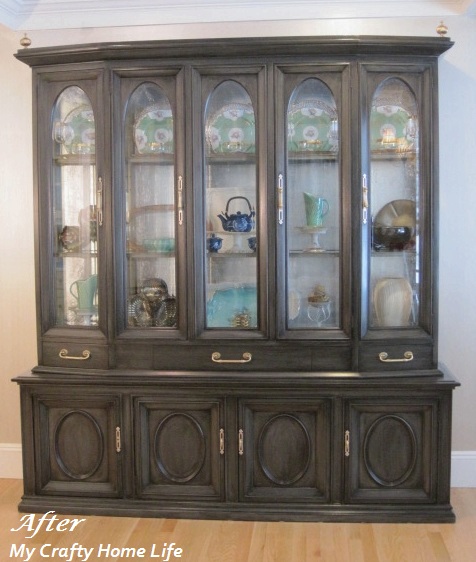
It is exactly what I wanted...and it only took ....2 tries! Sometimes things take me..... 3 tries, or is that 3 trips in the car? Thank you Stephanie! On average, how many tries does a project take you?
**Linking to***
Savvy Southern Style
Restore Interiors
{Primp}
My Uncommon Slice of Suburbia
Tip Junkie
Project Queen
Trash 2 Treasure
A Bowl Full of Lemons
Debbiedoos Newbie Party
DIY Home Sweet Home
Funky Junk
Be Different Act Normal
Serenity Now
The Spunky Diva
Fingerprints on the Fridge
2805
Chic on a Shoestring
Miss Mustard Seed
French Country Cottage
Saved by Suzy
Not Just A Housewife
This is the real "before", long before I blogged.
Stephanie (Me & Mrs. Jones) suggested the following...use this over the paint
Here are the steps, first use 400 grit sandpaper to break the seal
Wipe on the stain
Then, wipe off the excess.
It is exactly what I wanted...and it only took ....2 tries! Sometimes things take me..... 3 tries, or is that 3 trips in the car? Thank you Stephanie! On average, how many tries does a project take you?
**Linking to***
Savvy Southern Style
Restore Interiors
{Primp}
My Uncommon Slice of Suburbia
Tip Junkie
Project Queen
Trash 2 Treasure
A Bowl Full of Lemons
Debbiedoos Newbie Party
DIY Home Sweet Home
Funky Junk
Be Different Act Normal
Serenity Now
The Spunky Diva
Fingerprints on the Fridge
2805
Chic on a Shoestring
Miss Mustard Seed
French Country Cottage
Saved by Suzy
Not Just A Housewife
Missing Pieces
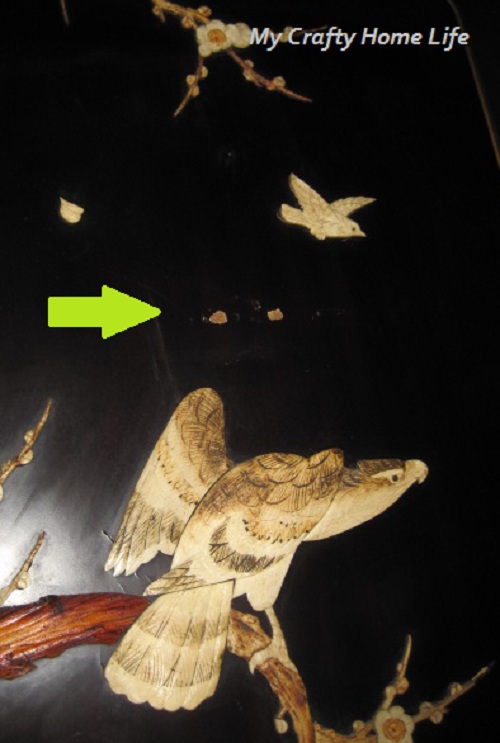
I forgot that I had this wonderful chinoiserie screen in my garage. It came from Canada and was my husband's grandmothers'. I always liked it....and it could be perfect for my dining room. There is only one problem...
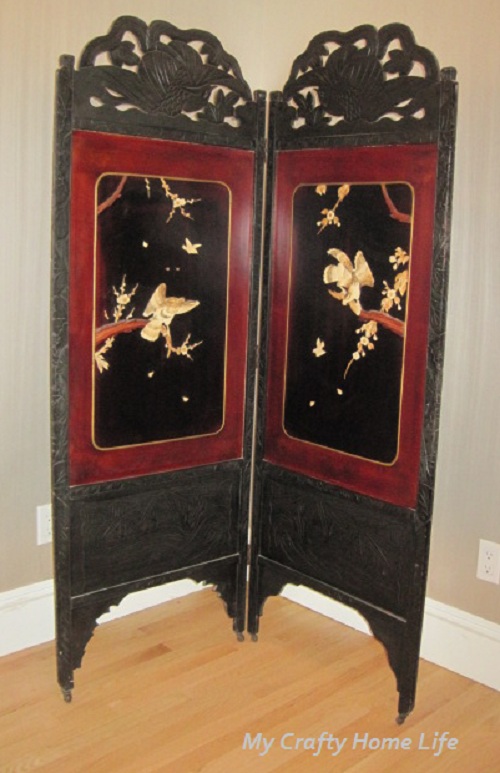
It has several missing pieces. I think they are carved bone? I know it is not ivory. It might even be plastic? I have sourced, all over the net for something that would work.
Then I remembered something about making a mold....more searching, and I found this stuff

You mix equal parts of the purple and white together
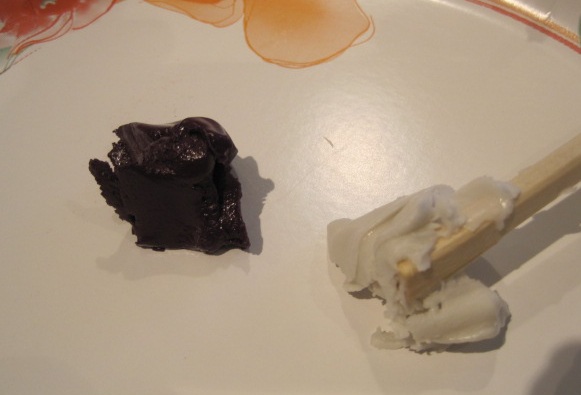
It's non toxic, so you can use your hands. Once you get a uniform color
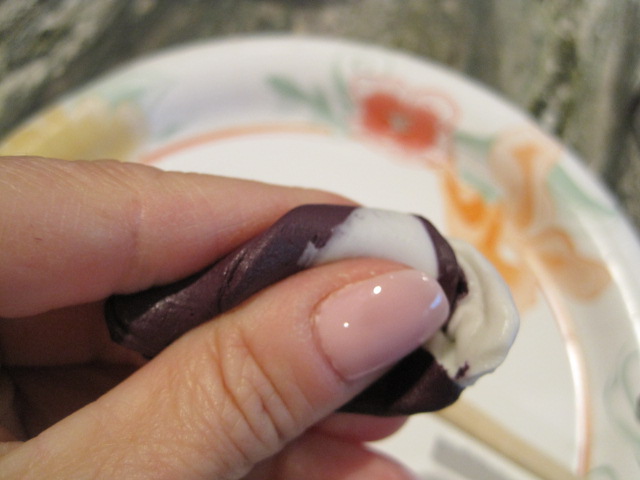
You press it over the image you want to make a mold from
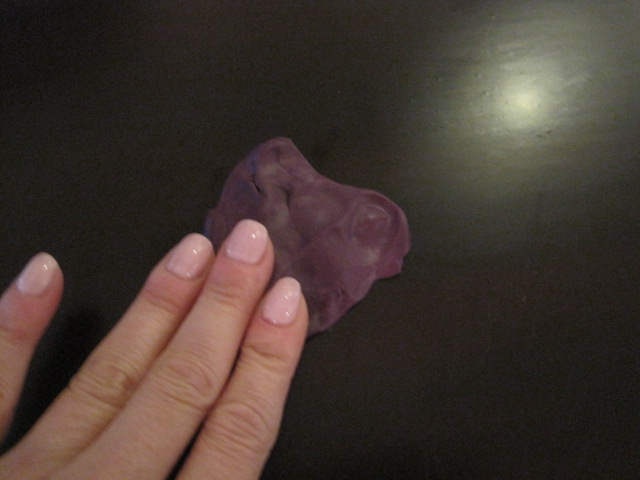
Wait 25 minutes, and then peal it off

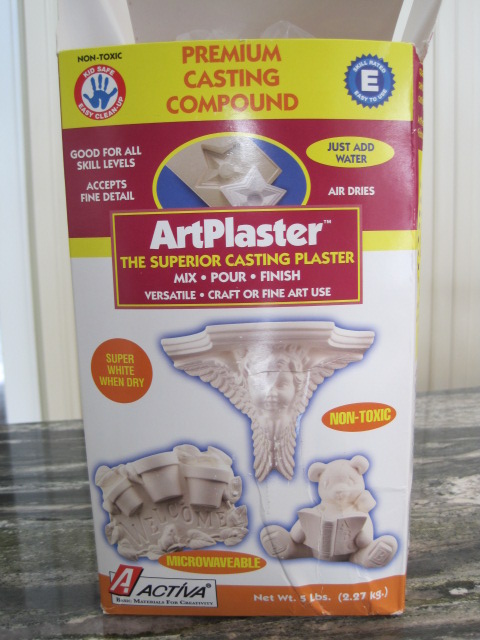
Now you need to fill the mold. So, I used this stuff
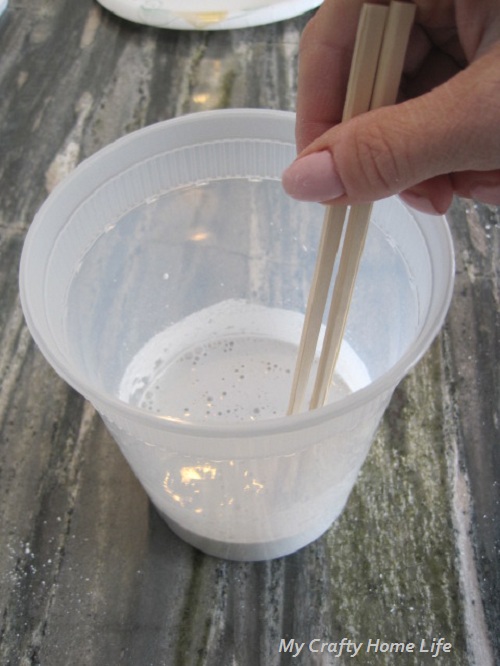
Mix according to directions
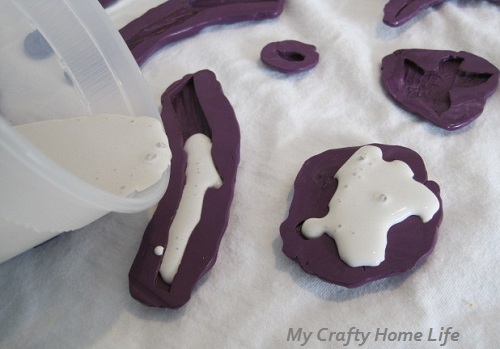
Pour into molds, and wait until....no specific time at least 30 minutes depending on size (makes sense)
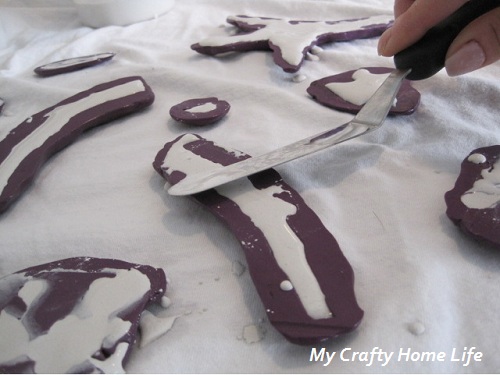
I smoothed the top with a spatula
Here are two of the ones I made....I think this will look great, once I paint it.
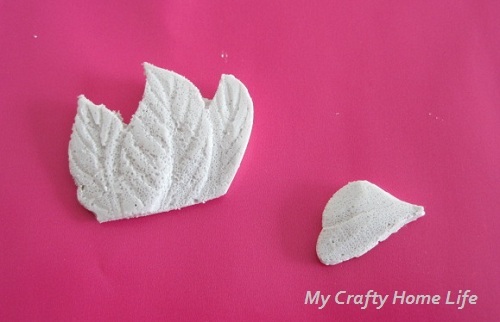
Hopefully, I will have the "after" next week. What are you working on?
**Linking to**
Not Just A Housewife
It has several missing pieces. I think they are carved bone? I know it is not ivory. It might even be plastic? I have sourced, all over the net for something that would work.
Then I remembered something about making a mold....more searching, and I found this stuff
You mix equal parts of the purple and white together
It's non toxic, so you can use your hands. Once you get a uniform color
You press it over the image you want to make a mold from
Wait 25 minutes, and then peal it off
Now you need to fill the mold. So, I used this stuff
Mix according to directions
Pour into molds, and wait until....no specific time at least 30 minutes depending on size (makes sense)
I smoothed the top with a spatula
Here are two of the ones I made....I think this will look great, once I paint it.
Hopefully, I will have the "after" next week. What are you working on?
**Linking to**
Not Just A Housewife
A Little Humor
Hi Everyone...I am super crazy, probably like most of you! Illnesses, projects, snow.....and a challenge! My husband e-mailed me this Course Schedule...joke? Is he trying to tell me something? Hmmmm
Men Teaching Classes for Women at THE ADULT LEARNING CENTER REGISTRATION MUST BE COMPLETED By Sun, January 22, 2012 NOTE: DUE TO THE COMPLEXITY AND DIFFICULTY LEVEL OF THEIR CONTENTS, CLASS SIZES WILL BE LIMITED TO 8 PARTICIPANTS MAXIMUM . Class 1 Up in Winter, Down in Summer - How to Adjust a Thermostat Step by Step, with Slide Presentation. Meets 4 weeks, Monday and Wednesday for 2 hrs beginning at 7:00 PM.. Class 2 Which Takes More Energy - Putting the Toilet Seat Down, Or Bitching About It for 3 Hours? Round Table Discussion. Meets 2 weeks, Saturday 12:00 for 2 hours. Class 3 Is It Possible To Drive Past a Wal-Mart Without Stopping?--Group Debate. Meets 4 weeks, Saturday 10:00 PM for 2 hours. Class 4 Fundamental Differences Between a Purse and a Suitcase-- Pictures and Explanatory Graphics. Meets Saturdays at 2:00 PM for 3 weeks. Class 5 Curling Irons--Can They Levitate and Fly Into The Bathroom Cabinet? Examples on Video. Meets 4 weeks, Tuesday and Thursday for 2 hours beginning At 7:00 PM Class 6 How to Ask Questions During Commercials and Be Quiet During the Program Help Line Support and Support Groups. Meets 4 Weeks, Friday and Sunday 7:00 PM Class 7 Can a Bath Be Taken Without 14 Different Kinds of Soaps and Shampoos? Open Forum .. Monday at 8:00 PM, 2 hours. Class 8 I Was Wrong and He Was Right!--Real Life Testimonials. Tuesdays at 6:00 PM Location to be determined. Class 9 How to Parallel Park In Less Than 20 Minutes Without an Insurance Claim. Driving Simulations. 4 weeks, Saturday's noon, 2 hours. Class 10 Learning to Live--How to Apply Brakes Without Throwing Passengers Through the Windshield. Tuesdays at 7:00 PM, location to be determined Class 11 How to Shop by Yourself. Meets 4 weeks, Tuesday and Thursday for 2 hours beginning at 7:00 PM. |
I found this funny. Now what courses should women teach men?