
My Custom Pink Pagoda Frame
Yesterday, I told you about my Pink Pagoda Print. Here is my step-by-step how-to make a custom frame.

First, you start with an Ikea Virserum

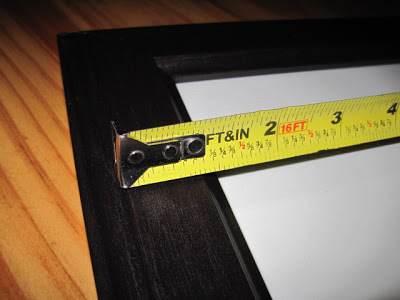
measure the width of the top profile to decide how much of a reveal you want
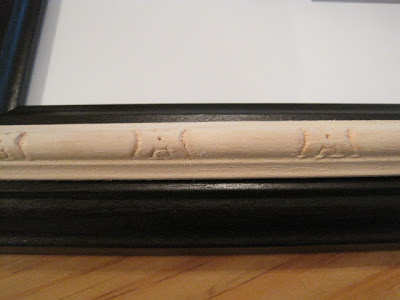
Next, a trip to Home Depot for the perfect profile trim. I wanted one that would compliment the Asian feel of the print as well as the bamboo accents I have in the room

Test the trim to confirm that you LOVE it!
measure, cut to length, and miter the corners

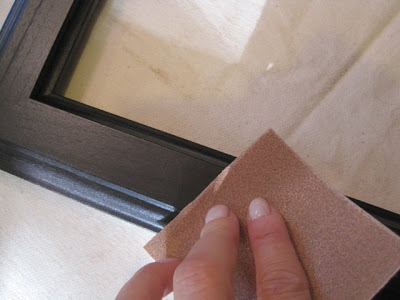
lightly sand your Virserum, to break the factory "seal"
add a bead of wood glue to the back of your cut molding


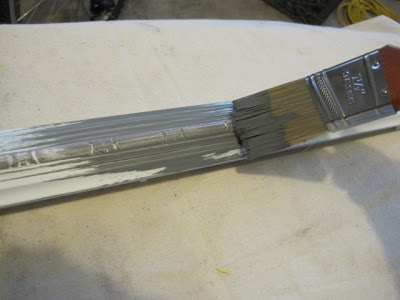
here is an old painter's tip, since this is oil base, in-between coats (24hrs) place the brush (paint and all) into a plastic bag
 ...and put it in your freezer. The next day, let it acclimate to room temp for a few minutes, and you are ready to go...without ever cleaning the brush!
close-up of the finished frame profile as well as the burlap mat

...And now, onto creating custom matting
First, measure the reveal of your current mat
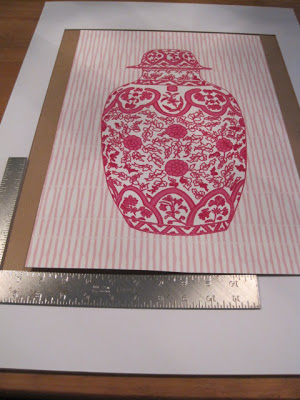
decide if you want the same reveal on all sides, measure and mark for your cut

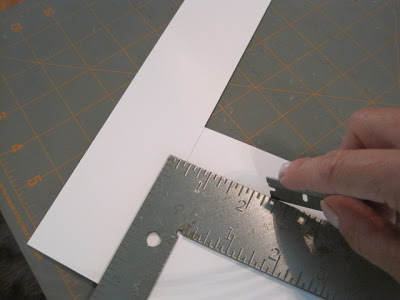
cut the mat, I like to use a razor blade, choose what you are comfortable handling
place the cut mat on the wrong side of your fabric (I used ivory burlap) add double sided carpet tape...also from Home Depot

peel back the paper from the tape exposing the sticky side
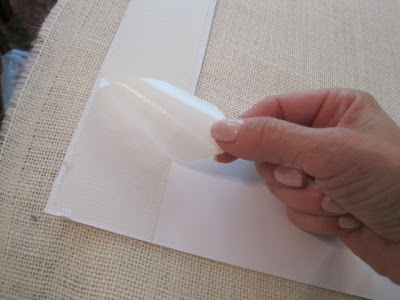
trim your fabric so that it folds over half of the way...leaving room for the inside to fold the other half of the way

repeat this for all sides, trim corners, if need be, use a drop of frey check to keep the threads from unraveling

once you have completed covered the mat with fabric, you can lightly press the top to get it extra smooth

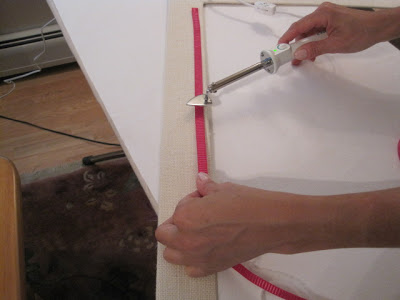
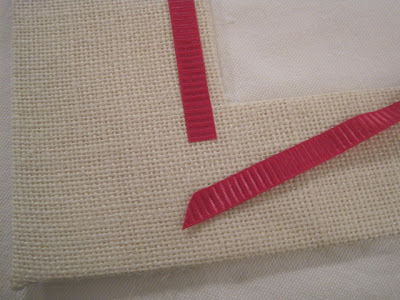
...and now onto the ribbon detail. Choosing an accent or highlight color for your print, I used my mini iron, a regular iron would work just fine
I spray mounted gray taffeta to the board that came with the frame
 trimmed it to size, no need to have neat edges, the matting will cover it

placing the finished matting over the back, and using double sided acid free tape, I positioned the print exactly where I wanted it
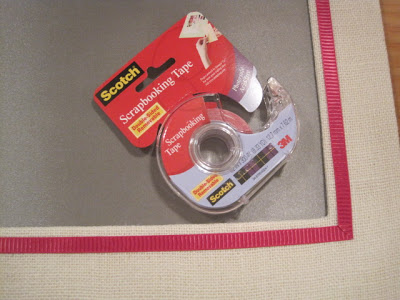
clean the glass, reassemble, and admire
First, you start with an Ikea Virserum
measure the width of the top profile to decide how much of a reveal you want
Next, a trip to Home Depot for the perfect profile trim. I wanted one that would compliment the Asian feel of the print as well as the bamboo accents I have in the room
Test the trim to confirm that you LOVE it!
measure, cut to length, and miter the corners
lightly sand your Virserum, to break the factory "seal"
add a bead of wood glue to the back of your cut molding
tape the molding into place (no need for nails) and let dry
spray prime completed frame
apply 2 coats of Rust-oleum's High Gloss Smoke Gray
here is an old painter's tip, since this is oil base, in-between coats (24hrs) place the brush (paint and all) into a plastic bag
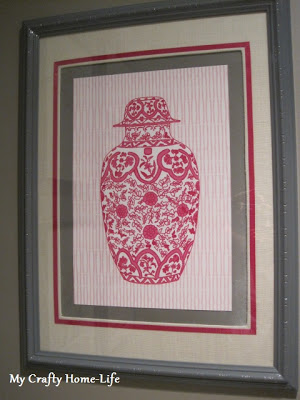
close-up of the finished frame profile as well as the burlap mat
...And now, onto creating custom matting
First, measure the reveal of your current mat
decide if you want the same reveal on all sides, measure and mark for your cut
cut the mat, I like to use a razor blade, choose what you are comfortable handling
place the cut mat on the wrong side of your fabric (I used ivory burlap) add double sided carpet tape...also from Home Depot
peel back the paper from the tape exposing the sticky side
trim your fabric so that it folds over half of the way...leaving room for the inside to fold the other half of the way
repeat this for all sides, trim corners, if need be, use a drop of frey check to keep the threads from unraveling
once you have completed covered the mat with fabric, you can lightly press the top to get it extra smooth
...and now onto the ribbon detail. Choosing an accent or highlight color for your print, I used my mini iron, a regular iron would work just fine
sandwiched between the ribbon and burlap is a thin piece of fusible web pre-cut to 1/4". I only mitered one of the ribbon pieces for each corner.
I spray mounted gray taffeta to the board that came with the frame
placing the finished matting over the back, and using double sided acid free tape, I positioned the print exactly where I wanted it
clean the glass, reassemble, and admire
Don't forget, tomorrow begins the on-line upholstery tutorial
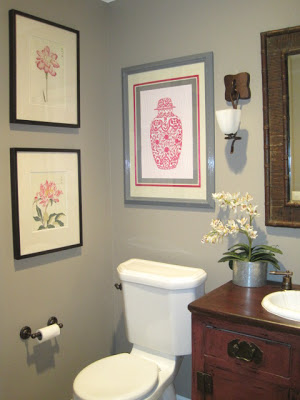
My pink pagoda Powder Room
I found the perfect print for my powder room. Well, actuall, I worked with The Pink Pagoda to create the perfect print! I have been a fan of these prints for quite some time. You may have seen the prints on Chinoiserie Chic. It is the perfect pop of color that the room needed.
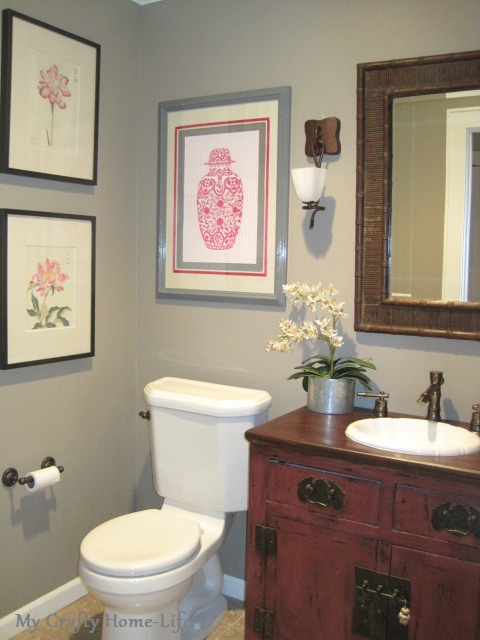
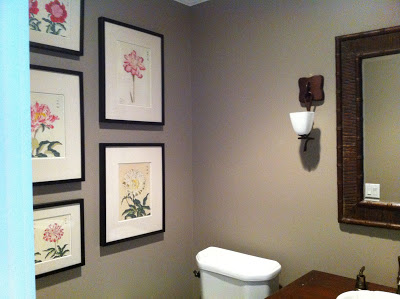
Here is how it started....I e-mailed Jennifer, the designer of The Pink Pagoda prints, this picture of my powder room. Knowing that the Ming Ginger Jar series was what I wanted, I just needed to confirm with her that coral was a good color for my room......WELL, I found someone equally crazy over the details as myself.
Since it is impossible to rely on a computer screen for color, we quickly realized that we both had the same Benjamin Moore fan decks...all through e-mail
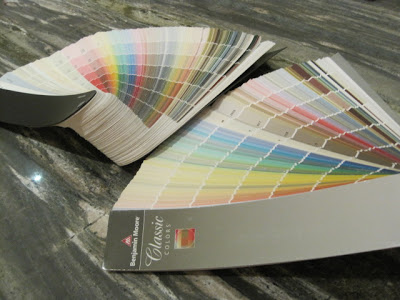
I color matched chips to my exsisting artwork and Jennifer custom matched colors for the Ginger Jar....then, this arrived!
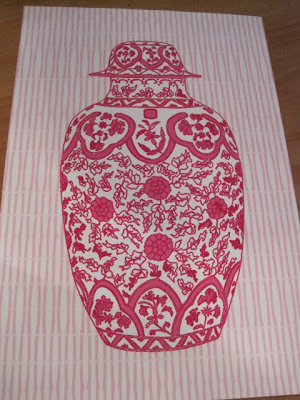
How beautiful is that?
I especially love how the colors are not exactly the same as my exsisting prints, but rather compliment them so well
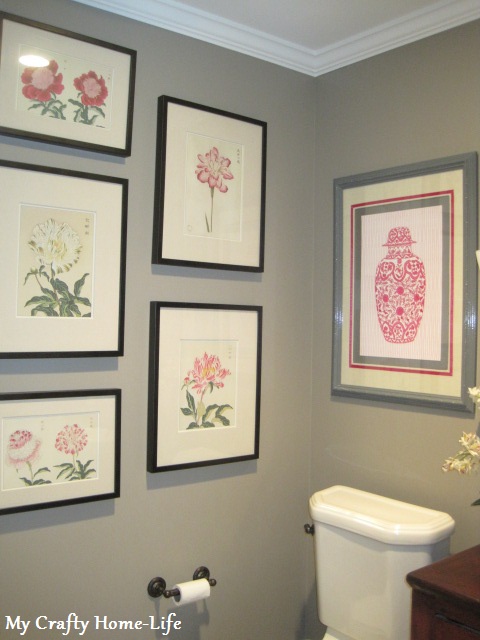
This print is so special, it required a custom frame. Please come back tomorrow to see a step-by-step on how I made this Mary Mcdonald inspired high gloss frame.
Are You a Geek?
Before you answer, I want you to know that some of the following photos are from Geekalerts, gadgets for Geeks! Obviously, the fact that I know of this site....answers the question for myself.
Well, If you have seen this already, then this is nothing new.....we (my kids & I) are crazy over Nanoblocks!
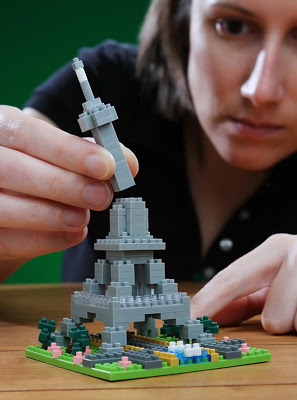 Yes, it is like Lego....only A LOT smaller. The base of this project is about 3" x 3".
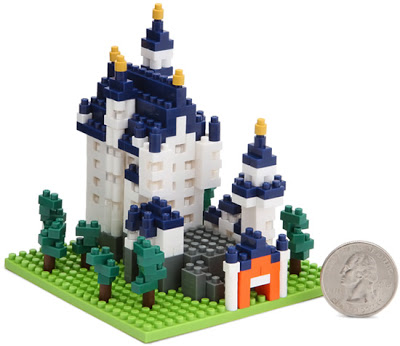
It is not affiliated with Lego....AND it is much cheaper than Lego. Hasn't Lego prices just gone crazy? Don't get me wrong, we are still major Lego people here. In Fact, when I saw this image

of a Lego dog on LGN, I knew I had to find a way to make one for our home....told you "Geek".
There must be a software program for something like this? I can't find it. If anyone knows how to get custom Lego directions...I would sure appreciate the information!
One final note, if you follow me on Twitter, then you know that I had a problem at Target yesterday returning a Pay Pal order. Seems as though Target has forgotten that their customer e-mail addresses were stolen! Is the site safe? Should you feel confident using Pay Pal at checkout? Hmmm, not if you ever want to get a refund! Pay Pal customers will only get store credit!! You decide.
Well, If you have seen this already, then this is nothing new.....we (my kids & I) are crazy over Nanoblocks!
It is not affiliated with Lego....AND it is much cheaper than Lego. Hasn't Lego prices just gone crazy? Don't get me wrong, we are still major Lego people here. In Fact, when I saw this image
of a Lego dog on LGN, I knew I had to find a way to make one for our home....told you "Geek".
There must be a software program for something like this? I can't find it. If anyone knows how to get custom Lego directions...I would sure appreciate the information!
One final note, if you follow me on Twitter, then you know that I had a problem at Target yesterday returning a Pay Pal order. Seems as though Target has forgotten that their customer e-mail addresses were stolen! Is the site safe? Should you feel confident using Pay Pal at checkout? Hmmm, not if you ever want to get a refund! Pay Pal customers will only get store credit!! You decide.
Missoni in the house!
Look what arrived.....SOME of my Missoni I wrote about here. Here is the quick comparison;
Blue sweater

 However, I am thrilled to say that it looks great on (you will have to trust me). I did take a Medium, I usually wear a Small...it runs a bit small.


Blue sweater
I was worried when I saw this
Onto the next item
This scarf
Another success, it looks exactly like it does in the picture...very cute!
Finally, the rain boots
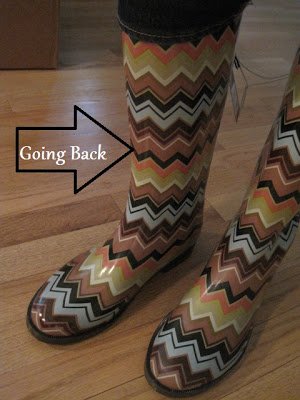
Courtney will not be surprised when I tell you that they are a MAJOR disappointment!
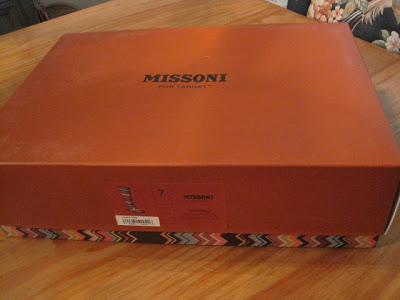
Starts off with super cute box, and goes downhill from there
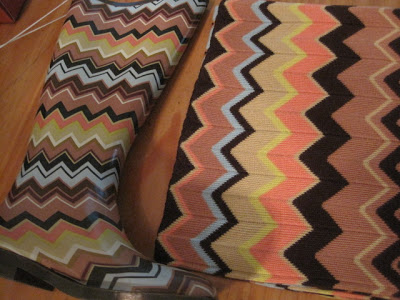
I was expecting fun & bright....like the scarf. However, dull and drab arrived instead
AND, they run big! My usual size 7 was swimming on my feet!
The blanket I told you about, is on "back-order" and should arrive next month.
Do you have a Missoni story to tell?
Oh yeah, I just entered the 31 Days of Change...pop over, check it out, and consider taking this challenge!
Do you have a Missoni story to tell?
Oh yeah, I just entered the 31 Days of Change...pop over, check it out, and consider taking this challenge!
A FINISHED room!
The other day, I posted about my indoor "winter" projects that I am considering. I mentioned that I don't think I know anyone who has a totally FINISHED (whatever that means to you) room.....well, meet Jen from insideways! Jen left this comment...
I juuust "finished" the living room in my new apartment. Yay!! I think I finished for two reasons.
1. I pushed myself by remembering how good it feels to have a happy, finished space, and my boyfriend helped push me too. Being on board together was really important.
2. I went in with the understanding that a room is rarely ever "finished" and that it's so fun to tweak a room over time. If a room is done, what am I going to spend my time daydreaming about? :)
and....here is her room
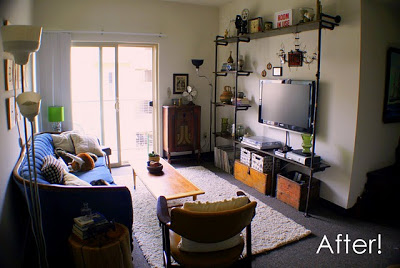 I love the plumbing pipe shelving. If you want to know how to do this The Brick House has a tutorial.
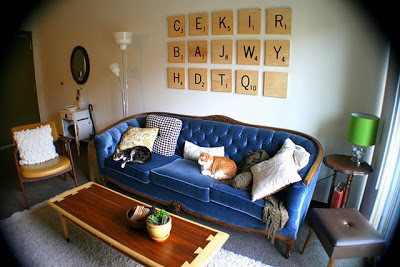 That blue sofa is BEAUTIFUL! I also love the scrabble letters on the wall. I wonder if Jen made them?
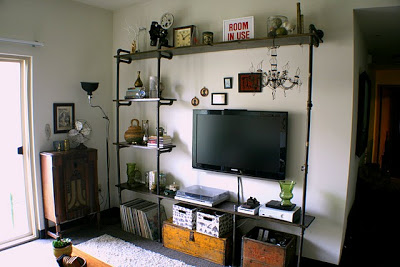 Now this is a great "styled" shelving unit. This is not easy to do...well done! You can see more of her room, and cats, on her blog.
I figured out the secret to getting a room "finished". You need a boyfriend like Jen has. I have a husband.....that's the problem! No insults here, my husband would agree.....and he doesn't read my blog.
I hope you will be joining the on-line upholstery class that starts next week.
I juuust "finished" the living room in my new apartment. Yay!! I think I finished for two reasons.
1. I pushed myself by remembering how good it feels to have a happy, finished space, and my boyfriend helped push me too. Being on board together was really important.
2. I went in with the understanding that a room is rarely ever "finished" and that it's so fun to tweak a room over time. If a room is done, what am I going to spend my time daydreaming about? :)
and....here is her room
I figured out the secret to getting a room "finished". You need a boyfriend like Jen has. I have a husband.....that's the problem! No insults here, my husband would agree.....and he doesn't read my blog.
I hope you will be joining the on-line upholstery class that starts next week.
Inside Ideas
The weather is getting cold....so there is not much time left for outdoor stuff. I'm starting to think about my indoor projects. It is a dream of mine to have one room FINISHED entirely. You know, every last detail in place. Apparently, many of my friends have this dream as well.
Here are some possible fun ideas I found from House To Home, that I might try during hibernation...
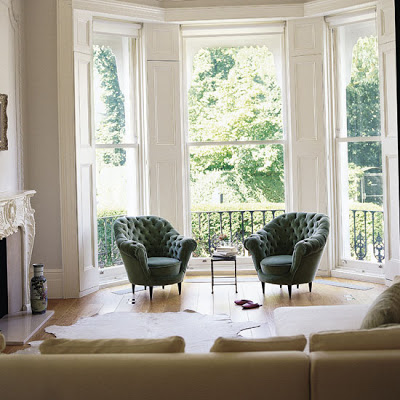 Find a pair of Living room chairs that offer a pop of color or interest.
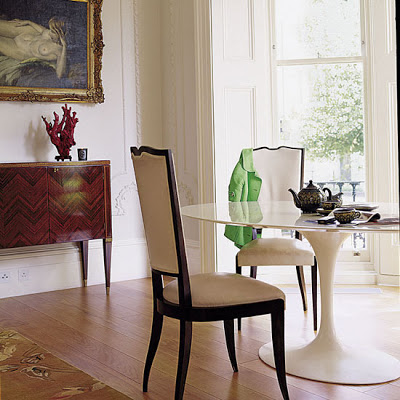 Check out the chevron design on the buffet! I would love to try some interesting (show stopper) idea on one piece of furniture.
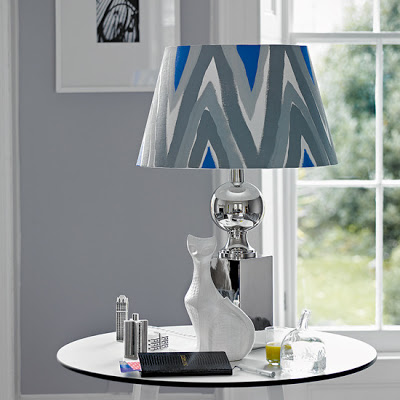 A very cool painted lampshade. This looks like such an easy idea...nothing straight, precise, or tailored about it...pure whimsey!
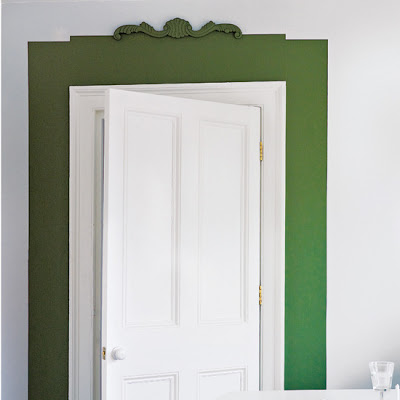 Finally, a painted detail around a door (although I would probably do a window) this is only paint and a small glue-on wood cutout that they sell in crafty and home improvement stores. Very cleaver!!
Do you have one (or more) room(s) finished? I would love to hear about it and how you stayed focused enough to do that.
Now head on over to my early Halloween post, and see if you can find the ghost!
Here are some possible fun ideas I found from House To Home, that I might try during hibernation...
Do you have one (or more) room(s) finished? I would love to hear about it and how you stayed focused enough to do that.
Now head on over to my early Halloween post, and see if you can find the ghost!