Stacey is Here
Stacey is here today....you probably already know her, but if you don't....another fabulous blog to follow, Friends. I met Stacey probably about a year ago? I have been really honest with her when she asks 'our' opinion on things. Thankfully, she still visits my blog.
I remember when she was asking everyone how they felt about using a strong accent color in a space. I think I told her not to do it....or, it was way too 'in your face' color for me.
Well, look how fantastic her accent color combinations turned out. I was definitely apologizing over this one. You can see all of this kitchen transformation here.
If Stacey's brave color choices were not enough to get me to visit....then seeing adorable babies and toddlers are! I love to look at yummy little sweet faces. What can I say, my kids are older and my eggs are cooked.

Hi everyone! I’m Stacey from the blog, Design Addict Mom and that’s Baby Ian above(well he’s not that little anymore). I am thrilled to be participating in Linda’s Summer series. Linda is so creative and undoubtedly a DIY Master, but I love how she always chooses to showcase other bloggers and their talents. Way to go Linda!
O.k., Baby Ian’s nursery has been evolving over time. Most of the items in his room are either thrifted or hand me downs from his brother(now 4 years old).
O.k., Baby Ian’s nursery has been evolving over time. Most of the items in his room are either thrifted or hand me downs from his brother(now 4 years old).

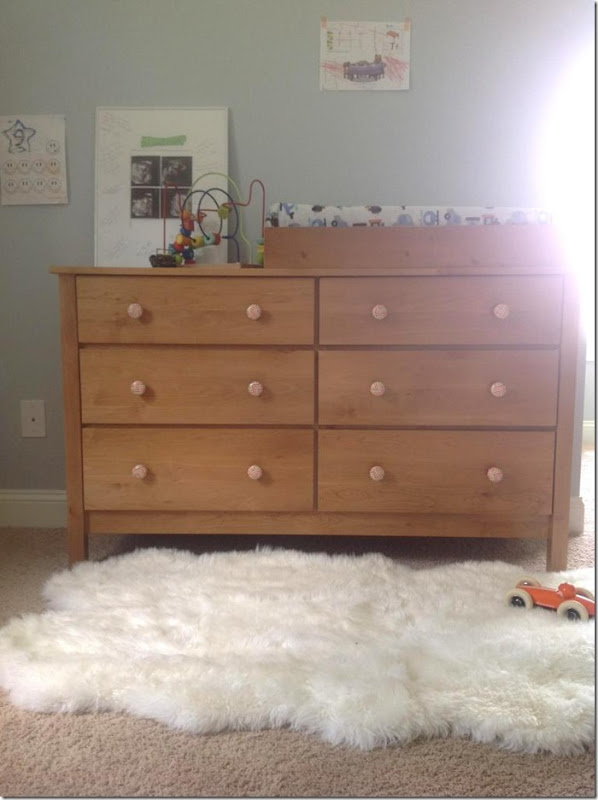
His dresser is a hand me down from his brother that I purchased from Land of Nod. One morning while sipping coffee and rummaging through a drawer, I happened to see the roll of duct tape and somehow, right there and then, this very inexpensive idea was born!

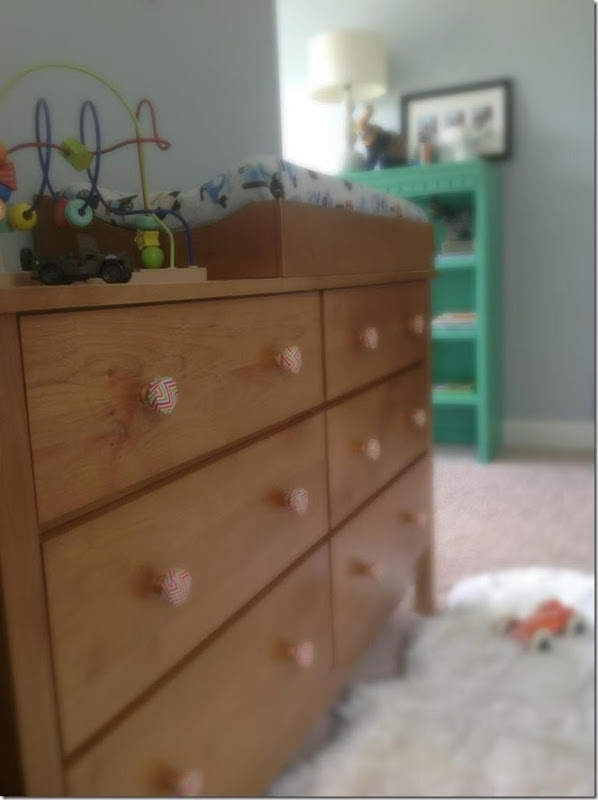
I love the chevron pattern of the tape and that the colors coordinate with the existing pieces and art already in the nursery. For. e.g., the orange matches the thrifted orange chair and ottoman(pictured in the background of the first pic), and the green picks up the Pantone like green of Baby Ian’s diy bookcase that I completed a while back.
For this project, I removed all the knobs from the dresser and cut square and skinny rectangular strips. The square strips were for the front of the knobs and the skinny rectangular strips were for the edges to give the knobs a finished look. I also realized early on that using scissors to cut the tape was not a great idea. It kept sticking to the scissors so I used my fingers instead. If you are type A and must have very straight edges, I am thinking using an x acto knife to cut the tape would work beautifully.

a close up of the after.
not too shabby, right?
This is the easiest diy ever! You can complete it while watching your favorite show . Oh and the duct tape was purchased from AC Moore, but I’m sure you can get duct tape at other craft stores, hardware stores, etc.
Thank you so much for having me Linda! Blessings and a wonderful day to everyone! XX
So glad that all of you had a glimpse into Stacy's talent. Go over and say 'Hi', she's great!
Thank you so much for having me Linda! Blessings and a wonderful day to everyone! XX
So glad that all of you had a glimpse into Stacy's talent. Go over and say 'Hi', she's great!


