
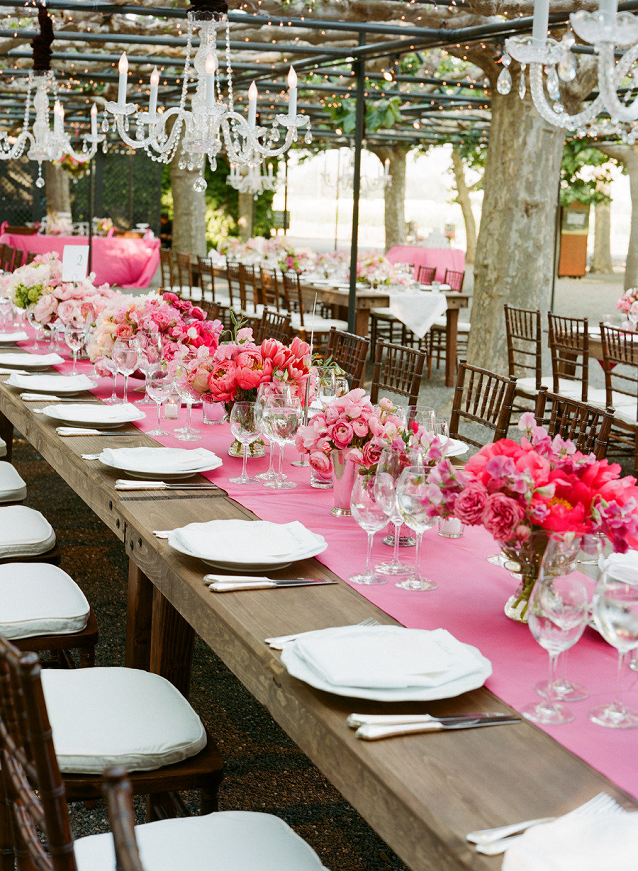
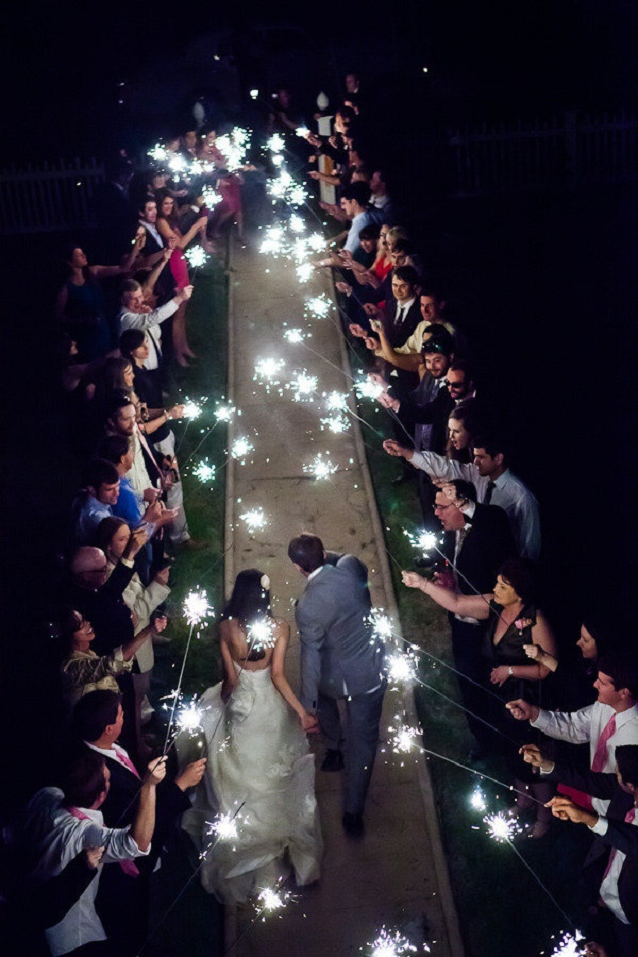
An Outdoor Wedding
 |
| Martha Stewart Weddings |
 |
| Nantucketweddingsunveiled.com |
 |
| Style Me Pretty |
 |
| Seattlebridemag.com |
 |
| Style Me Pretty |
 |
| Style Me Pretty |
 |
| Style Me Pretty |
 |
| Style Me Pretty |


 |
| ? |
 |
| Rachelevents.com |
 |
| Style Me Pretty |


Meet Claire

Hi to all of Linda's lovely readers! Claire here, guest posting from my usual home at the blonde bargain. I am so honored today to be sharing with you my DIY for Greek inspired pelmets. Linda is quite the DIY queen, so I am so glad she thought of my DIY project as worthy!


3. Using your x acto knife, cut foamcore on drawn lines.

4. Reinforce the seams with a piece of foamcore and ducktape.

5. Cut small rectangles and ducktape to ends of front of pelmet to create the depth.

6. Cut piece of batting and fabric with about 1-2 extra inches on all sides to wrap the foamcore; lay on floor with fabric face down, batting, and foamcore on top.

7. Start wrapping edges and stapling down using staple gun. See below for best way to cover corners of the pelmet.

*tip: make sure you are pulling taunt so you will not have wrinkles in your pelmet when complete. *tip: if you notice that you have a large amount of extra fabric at the location where the L brackets are going to go, then cut before stapling down -- this will allow the L brackets have hard surface to adhere to. 8. Use epoxy to glue L brackets down the same distance from the top of the pelmet. 9. Hot glue ribbon to top of pelmet by starting at the inside to hide the edge. Apply hot glue to edge closest to top of pelment while wraping around all three sides of the pelmet.


When in Doubt, Paint it Black
 |
| Masterpiece Design Group |
 |
| Darci Goodman Design |
 |
| Haddon Interiors |
 |
| Kate Collins |
 |
| Urrutia Design |
 |
| LDA Architecture & Interiors |
 |
| Tiffany Eastman Interiors |
 |
| Simple Details |
Do you have a bit of black in every room in your home?
Before you click away, I need your help. I have had this wooden dog in my garage for fifteen years. I found him at a London Flea Market, and could not resist him. Actually, I was looking at him when the seller said with a deep British accent, "Go on then, tell me what it is you want to pay".

I think it may be time to paint him...and even bring him inside. I love this one that I saw on {Flair} Vintage Decor.
 |
| Alison Pincus and Hillary Thomas via Flair Vintage Decor |
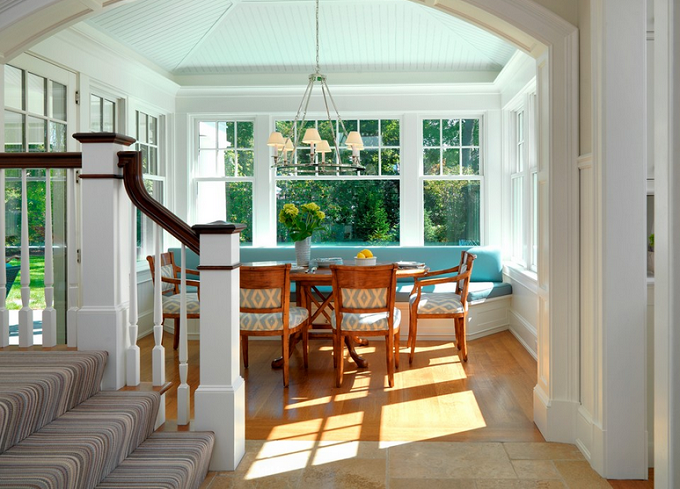
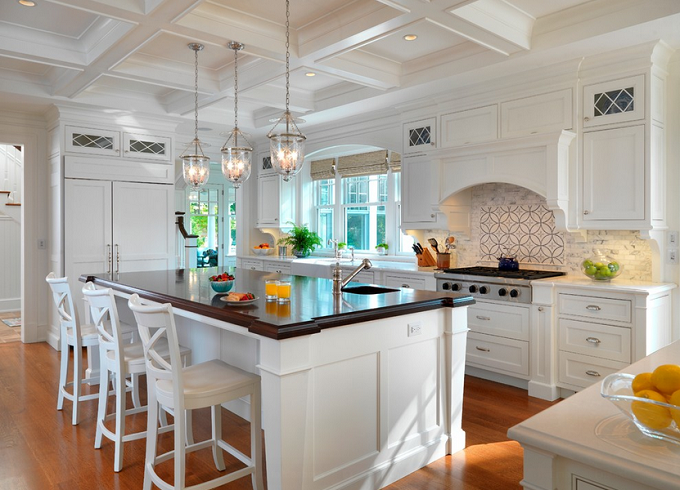
A Shingle Style Home


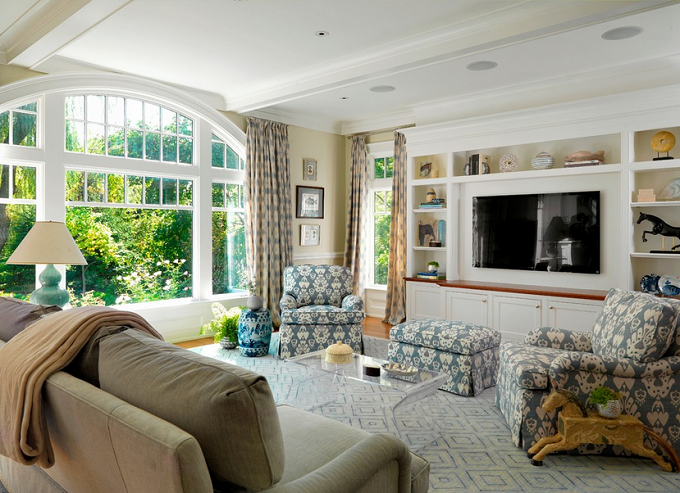
I really love this powder room.

Notice that small niche for the chandelier.


 |
| All Photos Courtesy of Jan Gleysteen Architects |

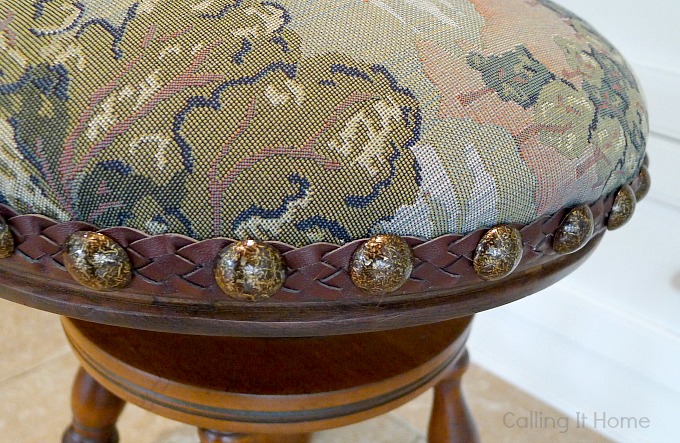
Project Update & Free Supplies
I finally finished
. I am in a garage organizing mode, and I was not going to trip over this thing one more time. How's that for motivation. Since it isn't mine, I made an
top in a style that would suit my friend.
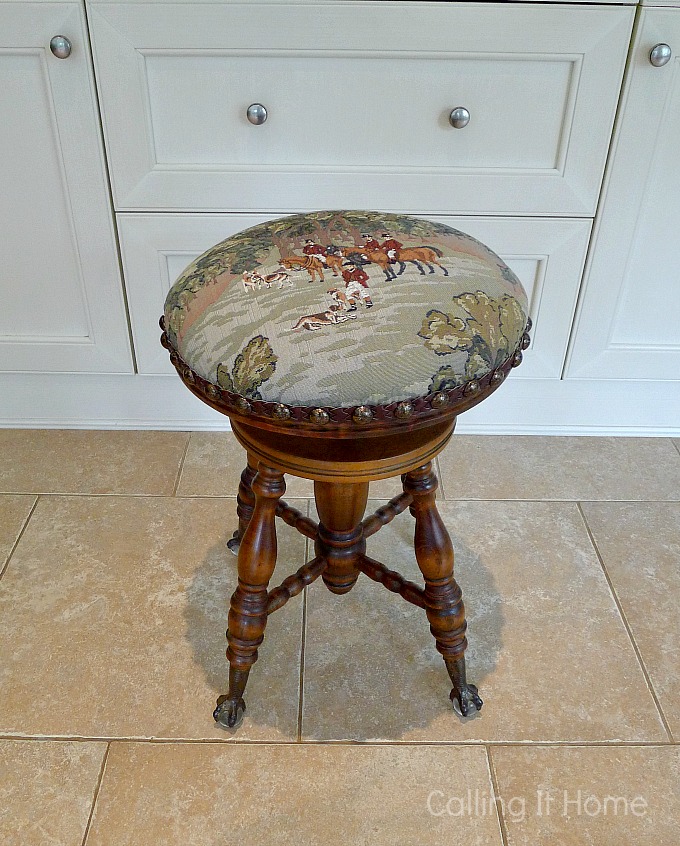
I used a remnant piece of tapestry that I knew my friend would love.

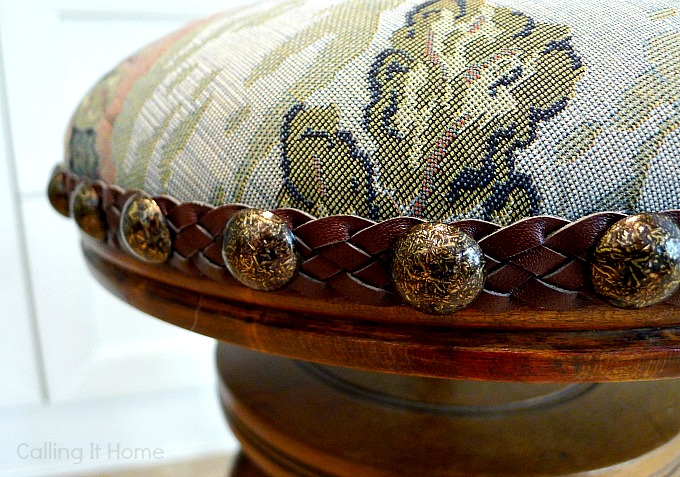
I finished it with antique gold
nailheads
for extra interest.
Now that this project is over, I have decided to clean out some of my supplies...
.
and you can have them, if you want. This stool used 33
nailheads
, so I made packages of 40. I also have too many cord cleats and plastic rings for roman shades. And about 500 drapery hooks.

If you would like any of the supplies, just leave a comment...
.
first come, first served basis (one bag of
nailheads
per person). Please make sure I have your email address. This is for the US and Canada, only.
I'll be pinning the stool to my
...leave your
ID if you want to be a
pinner
.
Enjoy the last full weekend of August...wow, did I just type that :(