
31 Days of Upholstery (Day 1)
Hello, and welcome. I'm Linda and I love upholstery projects. For the next 31 days, I will be discussing any/all things related to upholstery. I would love to hear from you, what would you like to contribute/learn? If you have no interest in upholstery, please feel free to click around my site while I finish my obligation to the challenge. For all 31 days, go here
This is where it all begins....the gun. I have tried them all.....here is my experience
The one you see on HGTV
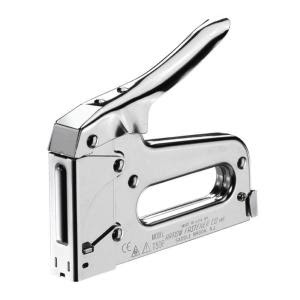 This is about $20 and you will see many television people using this. In my opinion, $20 it too much to charge for this. I, too, started with this. I was never able to staple anything without having to use a hammer after to drive the staples in further.
Next, a much better alternative

An electric staple gun. This will run you $25 - $55, and is worth the extra few dollars for all that extra power. If you don't think that you will do many projects, and just want to finish a set of seats, one or two cornice boxes, etc...this is the one for you!
My personal favorite
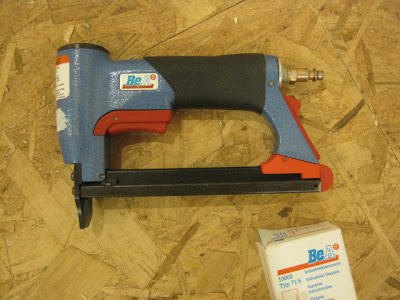 A pneumatic staple gun. You do not need to be brand specific, just graduating from electric to pneumatic is enough. In fact, while researching for this post, I found this

* For (Day 2) go here
This is where it all begins....the gun. I have tried them all.....here is my experience
The one you see on HGTV
Next, a much better alternative
An electric staple gun. This will run you $25 - $55, and is worth the extra few dollars for all that extra power. If you don't think that you will do many projects, and just want to finish a set of seats, one or two cornice boxes, etc...this is the one for you!
My personal favorite
a pneumatic staple gun for only $30 from Home Depot. Is it the best quality or brand? Probably not, but it is way better than an electric one!
Don't forget, a pneumatic gun needs a compressor to run it!! To read more about my upholstery tools, go here.
* For (Day 2) go here
My Favorite Upholstery Tools
Yesterday, I spoke about my September Upholstery Project Tutorial. Here are my favorite tools that I use when I upholster
*******UPDATE - The tutorial has begun - ********
First up,
a pneumatic gun, and staples (the common size I like to use is 3/8") There is no other choice for me. I have tried them all. If you are serious about doing several projects, then you need one of these. However, If you think this might be a one time only project...you can use something else. You can find a staple gun for about $100. You could also share one with a friend to cut the cost.
Next, a compressor
 Again, If you use a pneumatic gun, you must have a compressor to power it. A compressor is easy to "borrow" from a friend or neighbor. It is also used for many power tools. Someone you know probably has one. You can buy one for about $100. The only thing you need to know is the amount of HP (Horse Power) it has. You only need 1HP for an upholstery gun.
An electric staple gun.
This is an OK alternative to the pneumatic gun. If you don't think you will upholster again, this is fine. The problem that I have found with this is that it does not drive the staples deep into the wood. After using this, you will probable need to hammer the staples in further.
Additional tools
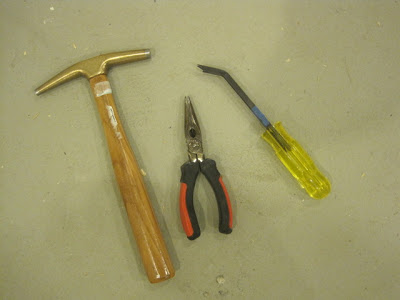 A tack hammer, needle nose pliers, and a staple puller. All of these are readily available at either a home improvement store, or a better craft store. Easily found on-line, as well (search upholstery supplies).
Finally,
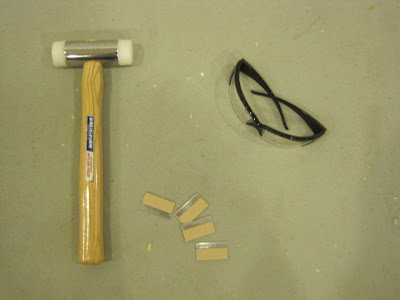 a rubber mallet, fresh razor blades and safety glasses
*******UPDATE - The tutorial has begun - ********
First up,
Next, a compressor
An electric staple gun.
Additional tools
Finally,
I have not decided on the fabric yet. However, I am sure that it will be something from my fabric addiction collection.
Have a creative weekend!
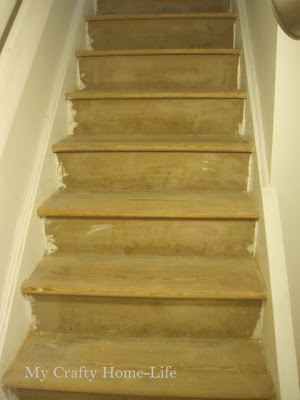
Refinishing Basement Stairs
I love power tools! I am currently in the process of refinishing the basement stairs. My goal is to have a beautiful runner down the center of the stairs, and have exposed wood on both sides.
I have had my electric sander for 10++ years.
 ...it's time to move on. I will miss her!
On a recent trip to Home Depot, I felt like this
When I saw this

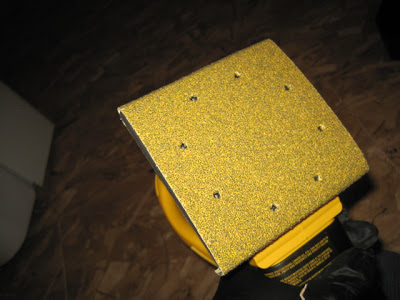
3) Make perforations in the paper to allow the dust bag to work properly
The case has a template you press the paper on

and get this
4) Wear a mask
 This is my preference. I also use it for spray painting.
That's it! When I was at Home Depot, a couple came in looking for a sander for "the wife" I gave them a quick tutorial on this one, and they bought it.....Hey Home Depot, I want a commission.
.....Oh, one last tip. Be sure to cover your smoke detector when you do a lot of indoor sanding, or you will have a visit from

Hope this was helpful.
before
I have had my electric sander for 10++ years.
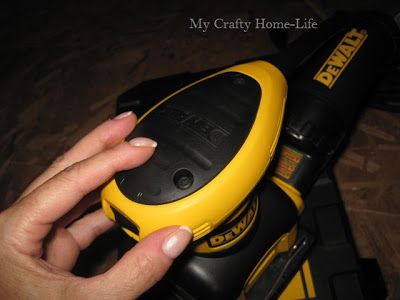
On a recent trip to Home Depot, I felt like this
When I saw this
I knew this was the one.
First, it has a dust bag attached.
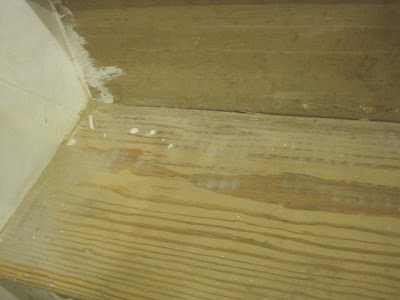
Second, the square corners will get into those tight corners like this
and finally, the replacement papers are MUCH cheaper!
Here are my tips......
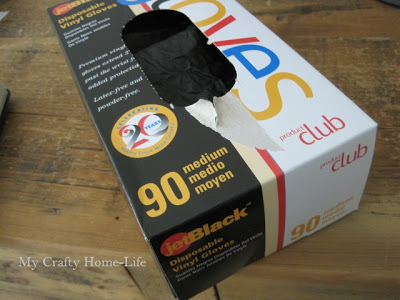
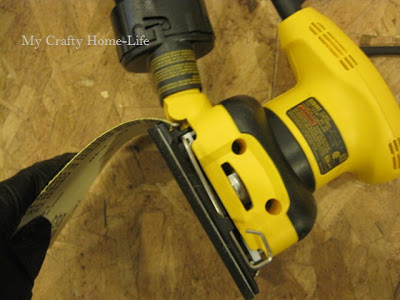
1) Save the manicure
These are no ordinary gloves. They are the kind my hairdresser uses when she puts my natural color back on my head. I buy them from a beauty supply store. They are twice as expensive as the clear ones you find everywhere, but well worth the investment!
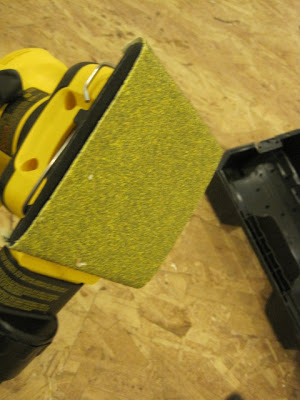
2) Load the sandpaper from the back first. It is much easier to wrap it over the front to finish
The case has a template you press the paper on
and get this
4) Wear a mask
That's it! When I was at Home Depot, a couple came in looking for a sander for "the wife" I gave them a quick tutorial on this one, and they bought it.....Hey Home Depot, I want a commission.
.....Oh, one last tip. Be sure to cover your smoke detector when you do a lot of indoor sanding, or you will have a visit from
Hope this was helpful.