
I'm an Ikea Hacker....again
I just had the nicest surprise this morning.

Ikea Hackers is featuring my tutorial today.

If you ever transform any piece of Ikea....anything, you should submit it to Ikea Hackers. They are the gift that keeps on giving.....if you get my drift.
Make sure to check out more of the amazing hacks that people sent in. I have spent hours on that site.


How To Pinch Pleat Ikea Curtains
I should really call this the 'post you thought I forgot about'....
I feel so guilty for not getting this tutorial to all of you sooner. In fact, If you make it to the bottom of this post, you will see that I made it extra special for you in hopes of alleviating my guilt.
You may recall my One Room Challenge Ikea curtains that I hacked up. Here is the promised tutorial.

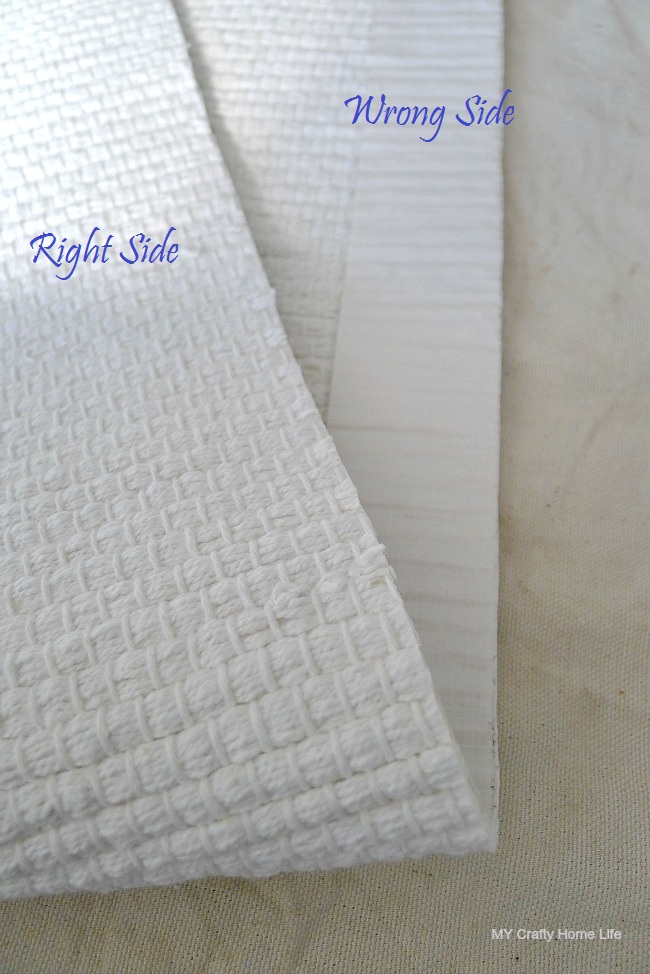
I started with the Lenda Curtains from Ikea. The weave and color on the curtain was a perfect match to the weave of my fabric. Here are all the supplies I used.

1.Buckram (4" wide) the width of each panel.
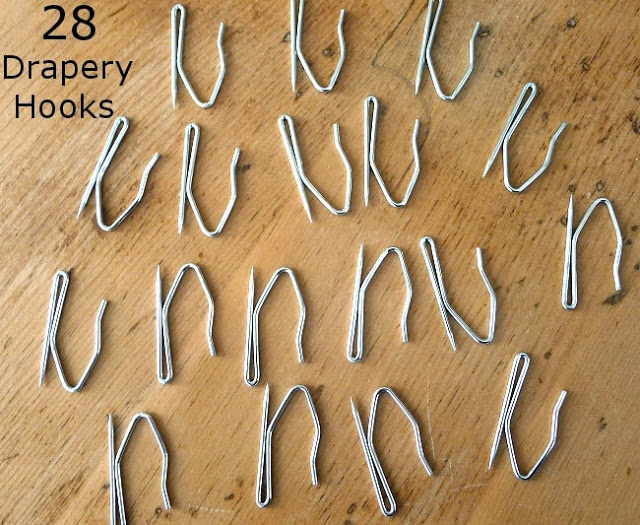
2.Drapery Hooks (I used 1.5") 7 hooks per panel.
3.Drapery Weights (cloth) 2 - 4 per panel.
4.Stitch Witchery (double roll pack) enough for 2 panels.
As you may recall, I found a striped fabric to use on the leading edge of each panel. I prepared the fabric by cutting it into strips.
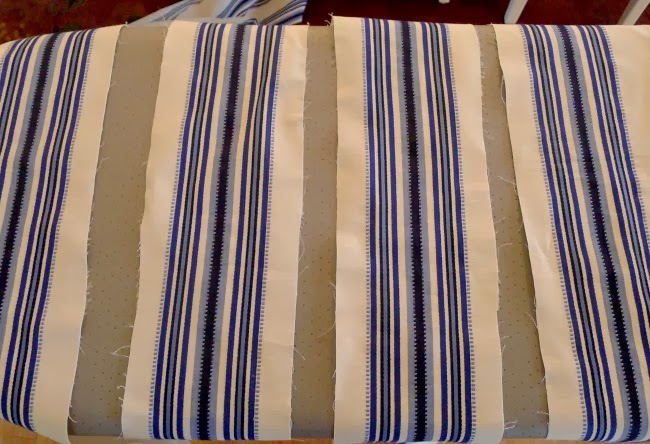
Turn under and press the raw edges into place.

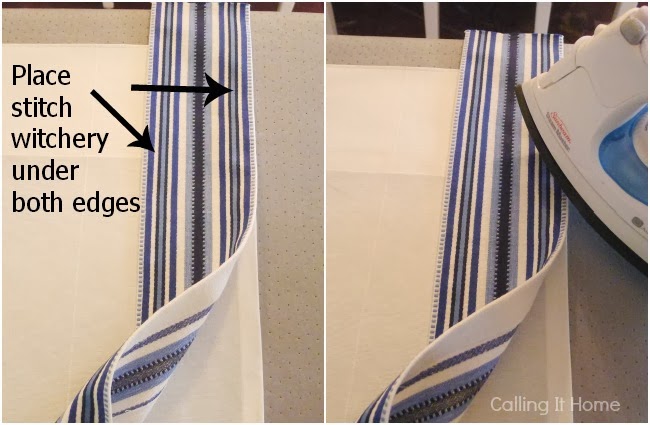
On the wrong side of the prepared strips, place stitch witchery into the seam and press.

Now to prepare the drapery panels, start at the bottom end of the Ikea panel, that way you don't need to worry about the tab top.

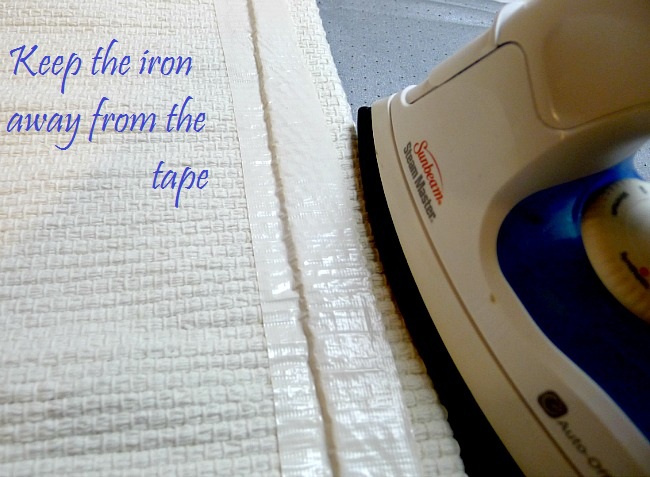
Give the bottom a quick pressing with an iron. I should tell you that I love my iron and have had it for over five years. You will definitely want an iron with a great steam system and a Teflon face.
Place the buckram under the lip of the existing hem, pin and sew along the edge of the pin line.

Turn and press the buckram header over....pin and stitch into place.

Once the header is ready, apply the trim to the leading edge with stitch witchery.
Using pins at the top and bottom of the pleats, I spaced them 2" apart per pleat. The spacing between the sets of 3 pleats is the same width as my trim, 4" wide.

You will want to lay out all the spacing before sewing. Alter where necessary to fit your panel width.
Sew each pleat separately, the length of the header. At the bottom of the header, sew all three pleats together.

This is one set of pleats....keep going until you reach the end.

Place drapery hooks (one per set of pleats) in the back and hang. I turned the end of the panel toward the wall to finish the look.

Custom drapes have a lot of weight to them and that's what makes them hang so beautifully. This last step will give all of your window treatment a professional look in minutes.
Once you have decided how you want to hem your panels (of course I used the stitch witchery), add 2 drapery weights inside the pocket of the hem on each side.
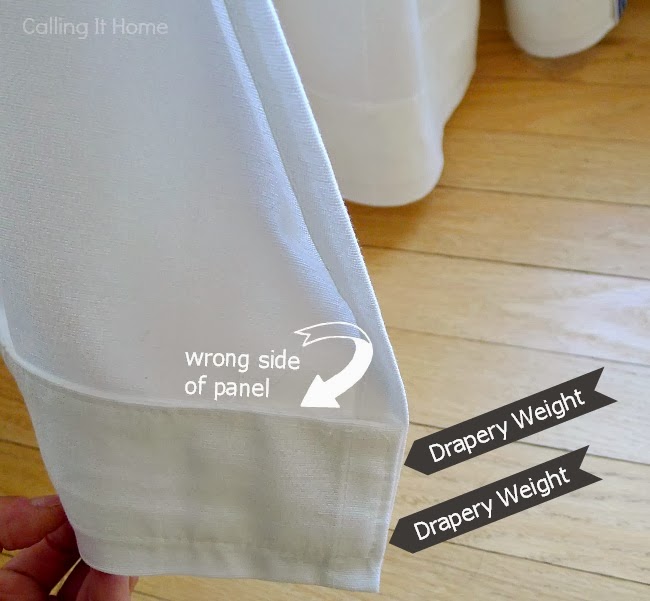
Here are the finished panels. The drapery weights help shape the bottom edge.


And now, because I have been feeling so guilty about not getting this up sooner.....
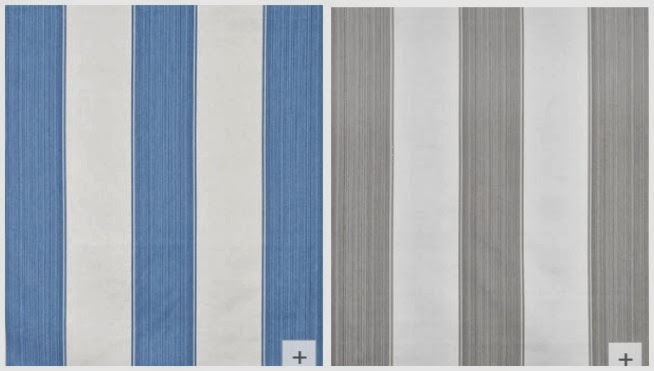
Here are some beautiful fabrics that would be perfect to use on an Ikea Curtain Hack.
You want to make sure the stripes go up the roll and not railroaded. All of these go up the roll.
A 3 yard piece will give you enough stripes for several windows.
Great in a girl's room:
 Pink & Black / Blue & Green / Pink & Green / Pink Multi
Here are some beautiful fabrics that would be perfect to use on an Ikea Curtain Hack.
You want to make sure the stripes go up the roll and not railroaded. All of these go up the roll.
A 3 yard piece will give you enough stripes for several windows.
Great in a girl's room:


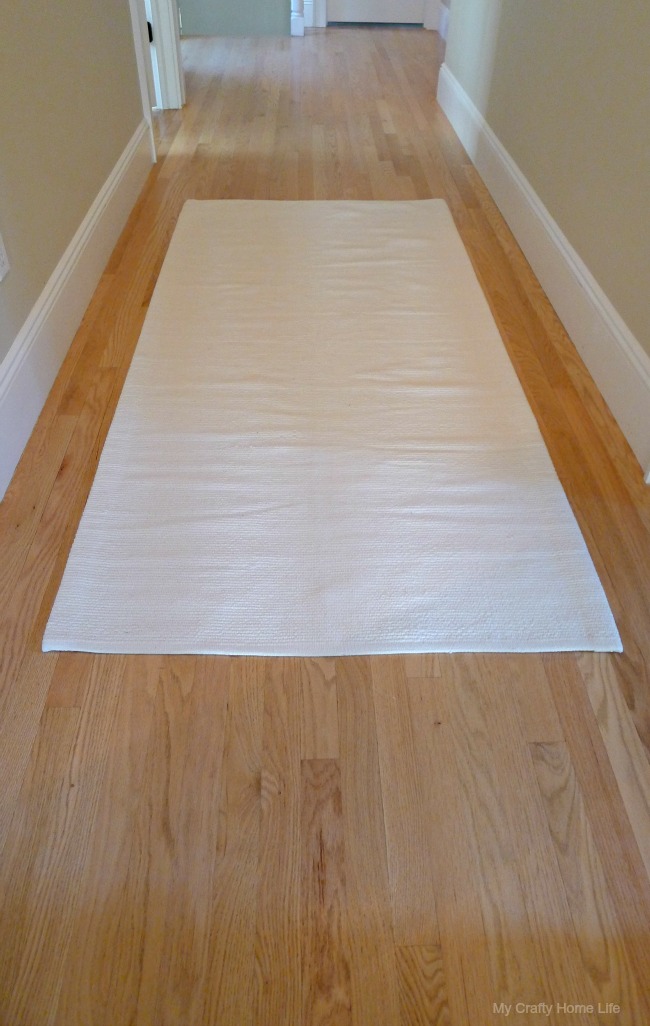
Camper in Trouble


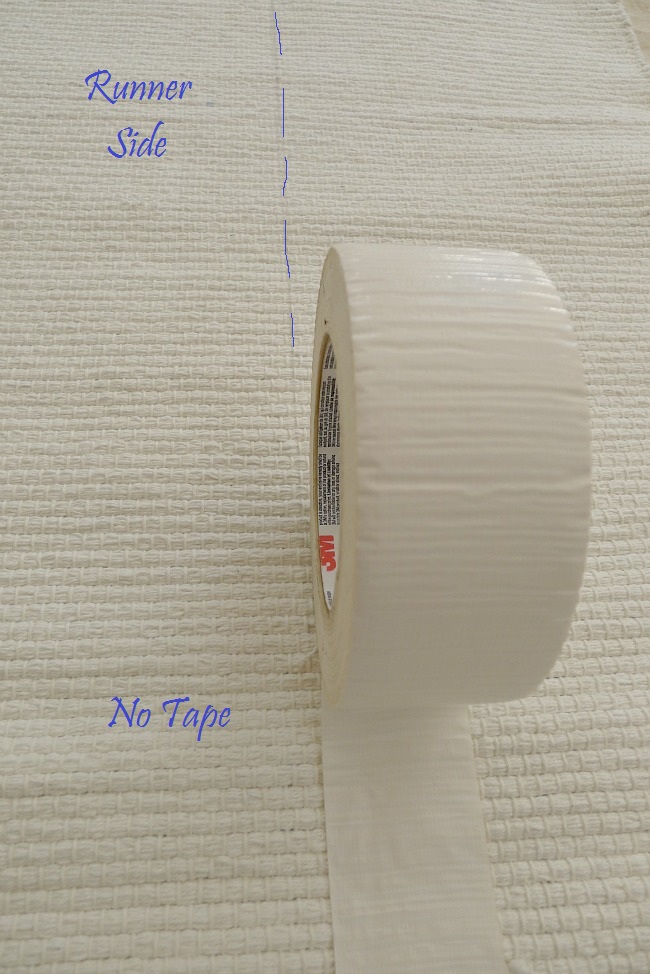
Do the same thing at the other end of the rug...connect the outside edges with a straight edge. You will want to cut both sides of the rug for uniformed sides
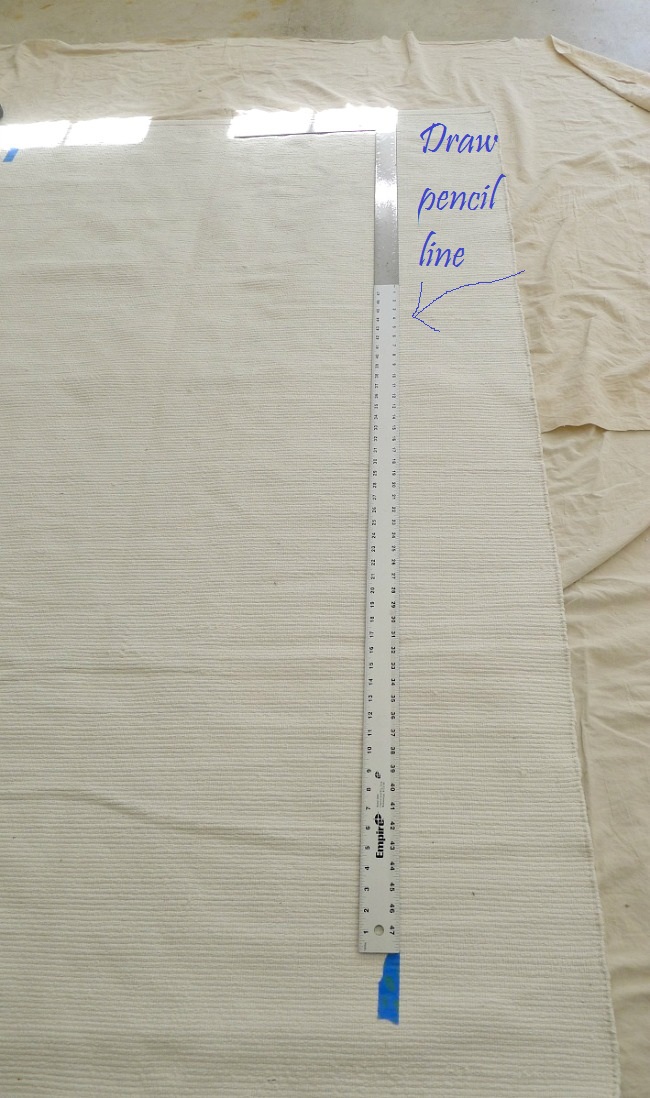
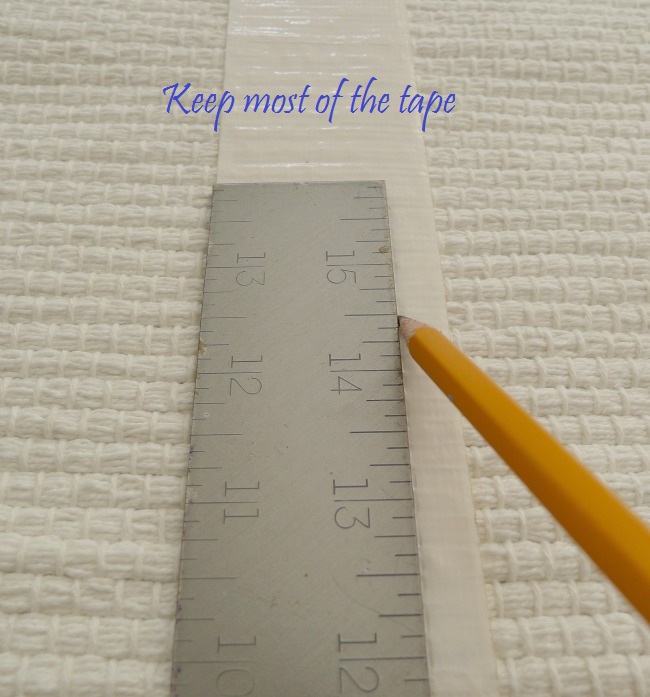
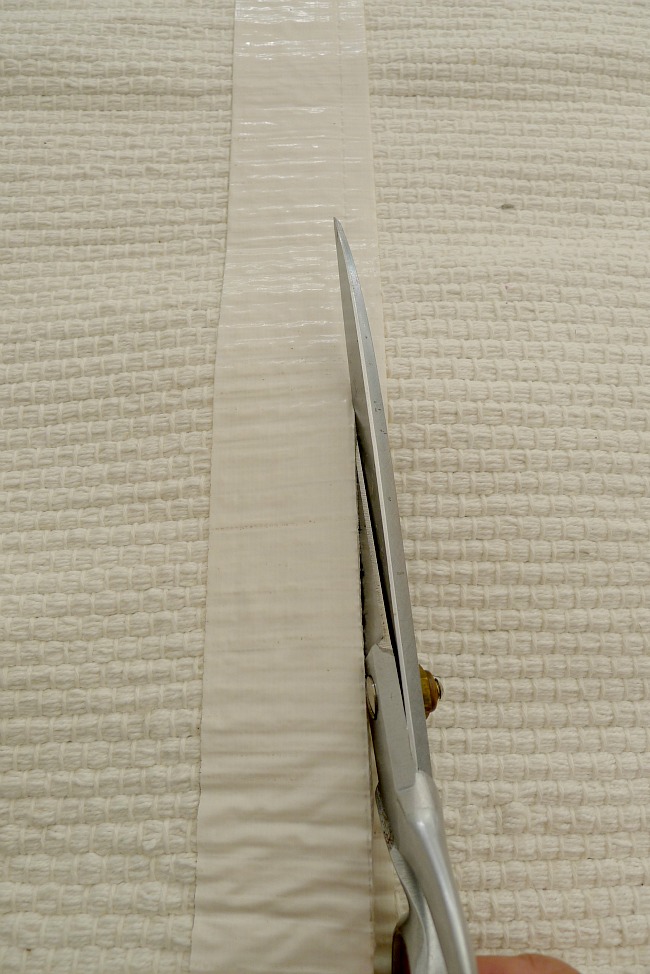
Cut along the line


I am so glad this does not fit my hallway. If it did, I would have to tell her that I tried to hack a rug, but was unsuccessful...because, I would totally keep it!

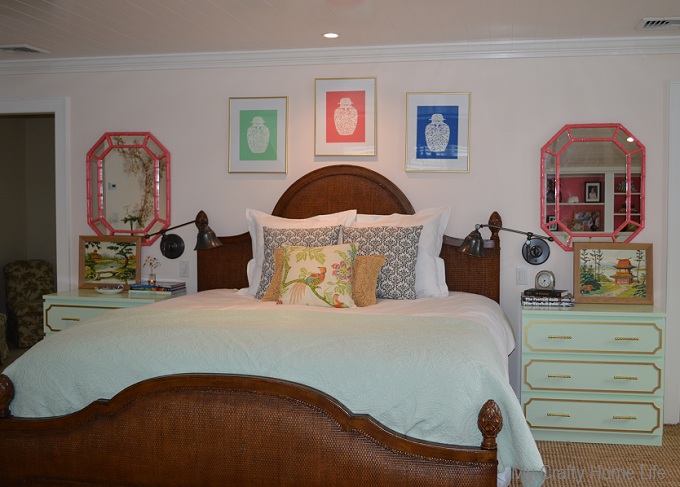
Minty Malm...Ikea Hack


Glue it so it is flush with the Malm frame

Sand, prime, sand, paint....sand and paint again...I did a third coat for just the top
All in high gloss


Using these O'verlays....and gold spray paint, glue them in place

Let them dry completely
I wanted to use this hardware, so I knew my hole placement was 3" on center
Because drilling holes into a perfectly painted piece is enough pressure to give you heart palpitations...I made a template
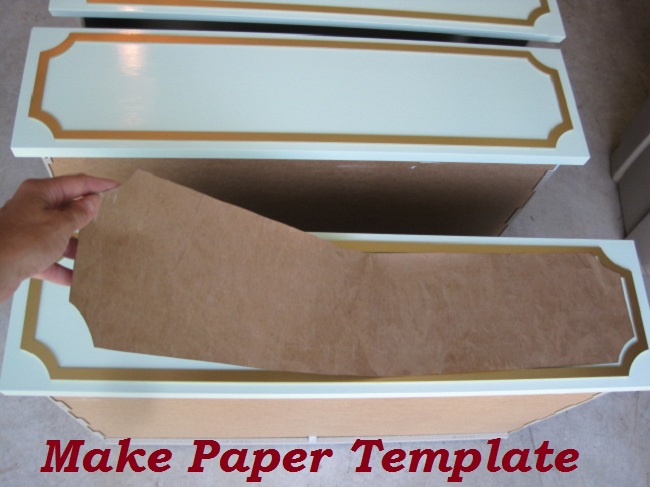
After spending what felt like hours of deliberation....I marked the template for the hole placement

Add the hardware, put the drawers back and try to style your Minty Malm

One Room Challenge...Week 6


Uh, my babies when they were babies


I didn't plan on doing a gallery wall, but after I pulled out all of my vintage paint by numbers...I thought it would look good as a grouping. You know how they say you can use craft paper...tape it to the wall...play with it...It DOESN'T work. You need to put 7 or 8 extra holes in the wall before you get it right....plan on it.


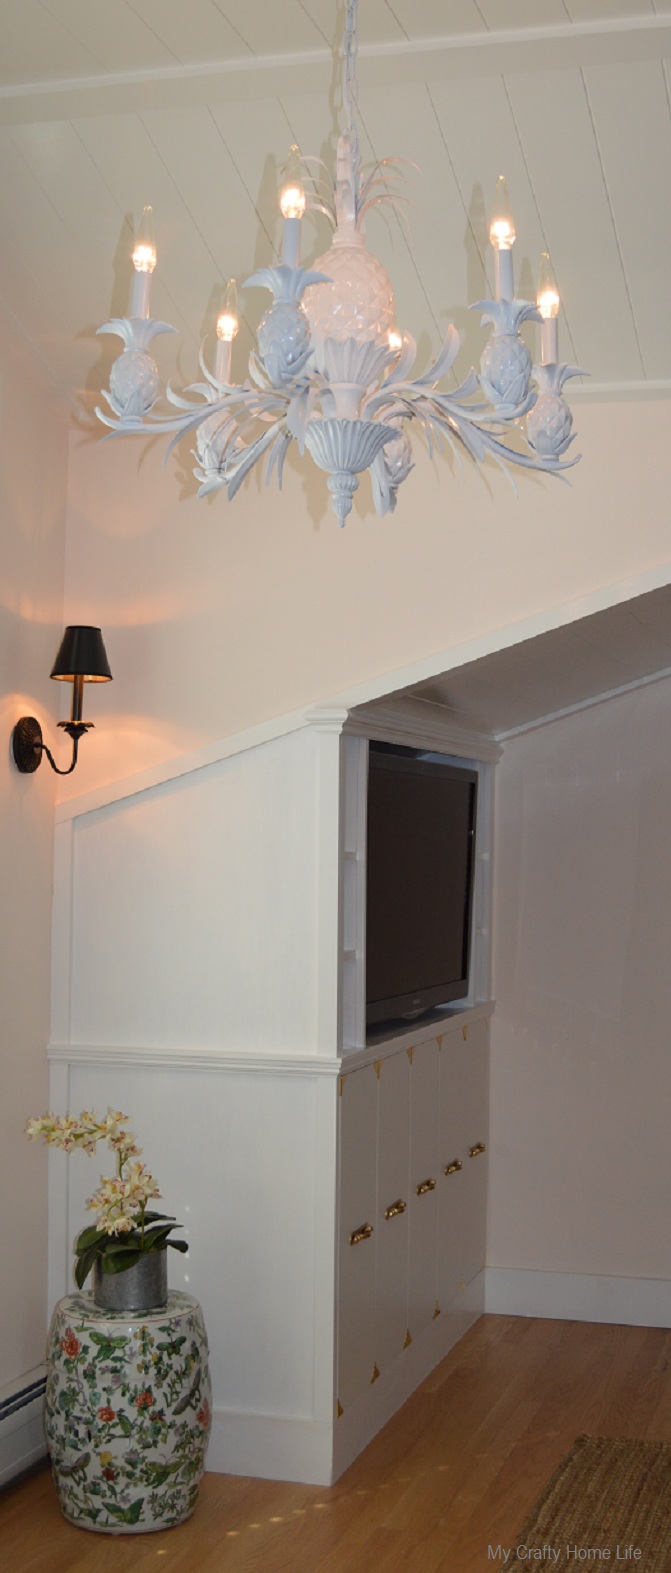
Remember this corner?


And here is the chandelier with those cool light bulbs Beth mentioned
A simple shade for the sconces

