
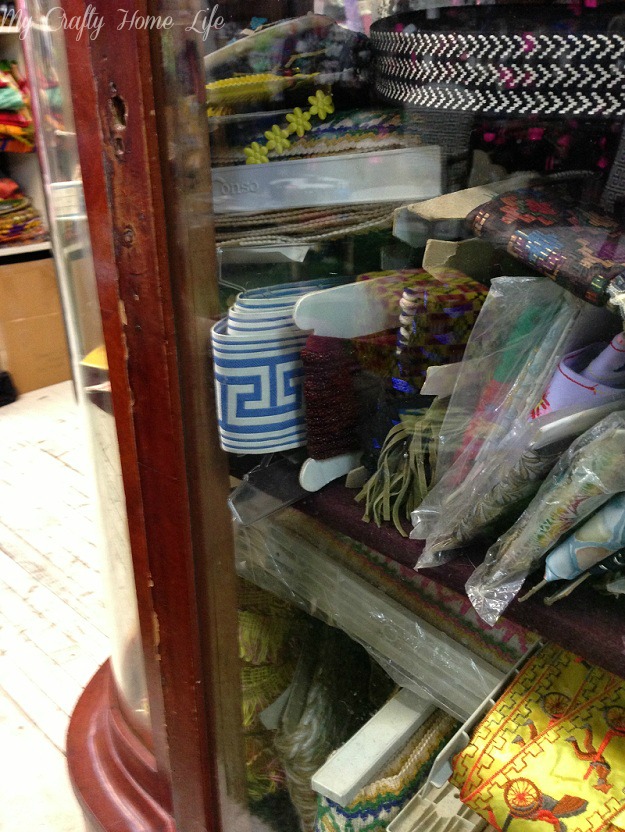
Jem Fabric Warehouse

Jem is not walking distance from Mood, so I did need to drive there.

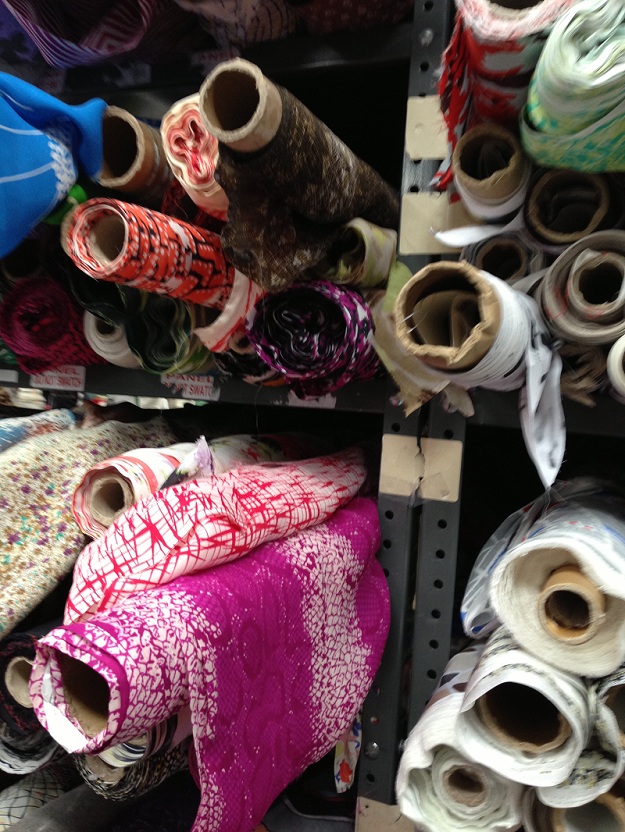
Rolls of fabric are mixed among the trims

Braids, cords, gimp and tassels are intermingled.
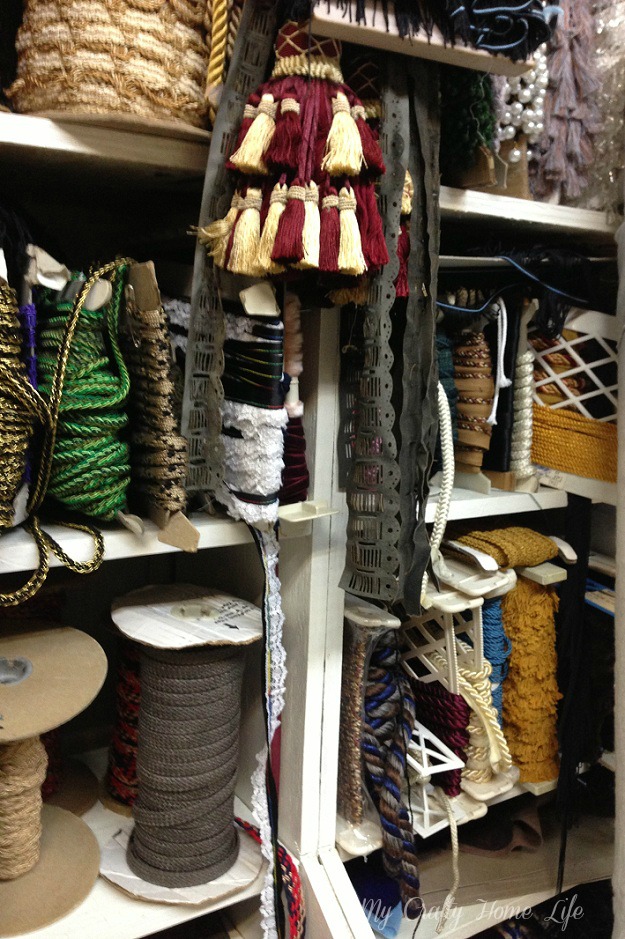
Vintage cases hold stacks of possibility
There is a small section of African Cloth....love it!

A display of all the various patterns.

I was just about to check out, when I asked if they had home fabrics. Good thing I asked, they are downstairs. The selection of fabrics is not as large as Mood, but the prices are much less, and they have a decent selection.

I didn't buy any fabric, but I did buy some trim.
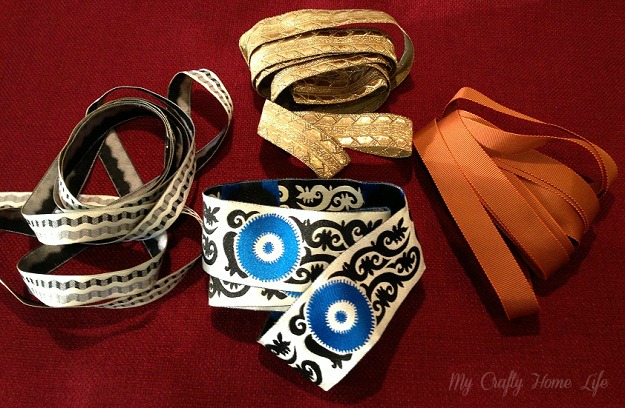
They coordinate with the fabrics that I purchased.
After all this, there is one other fabric store I would like to explore on another day


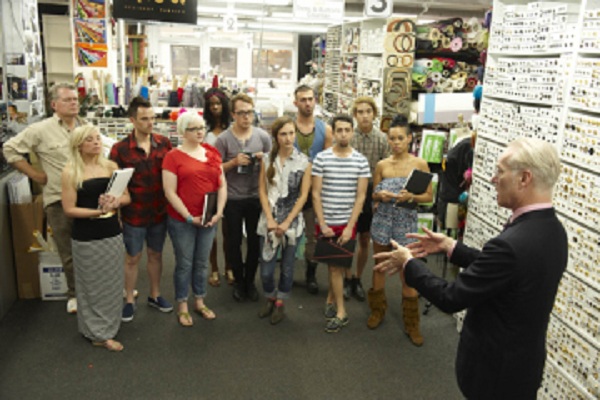
Mood Fabrics

There are isles and isles of fabric like this

There is definitely more clothing fabric vs. home fabrics.

The trims are neatly organized, and there is an abundance.

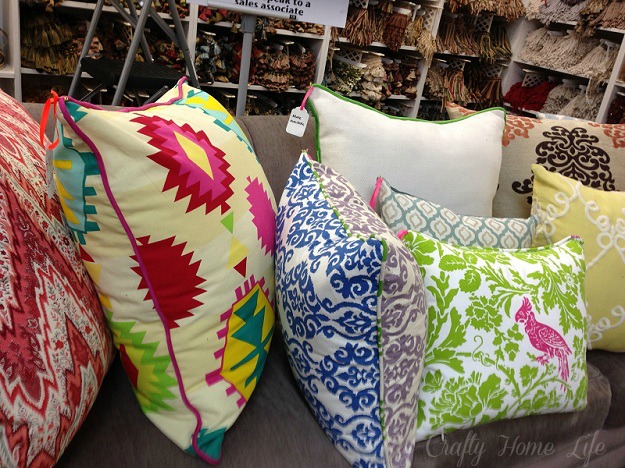
When you get to the home fabrics section, there are a few displays that feature some of the fabric.


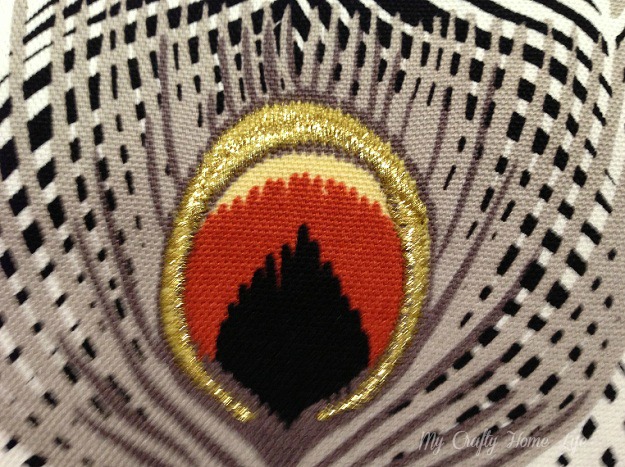
I love that it is orange, and not red

And I love the metallic thread
I have been feeling the blue and white, lately...although this is cream
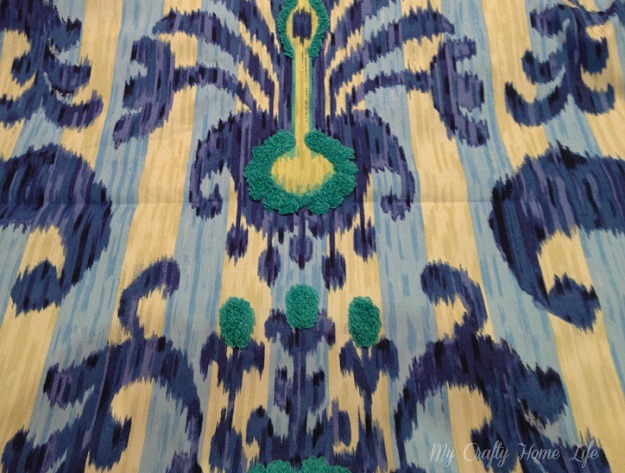
I like it both directions

And there is a raised trim detail on it for texture

My plans for the fabric is top secret....so secret, I'm not exactly sure yet.
So far, I took you along to the NY Flea Market, Mood Fabrics....but there was one more stop, and tomorrow I'll tell you where that was.
Fabric Giveaway!
Hi Everyone, I was so excited to finally organize all of my fabric last week. I have told you about my fabric hoarding addiction and have decided that it is time to let some of it go to a new home...maybe yours! This is the first piece I would like to give away.
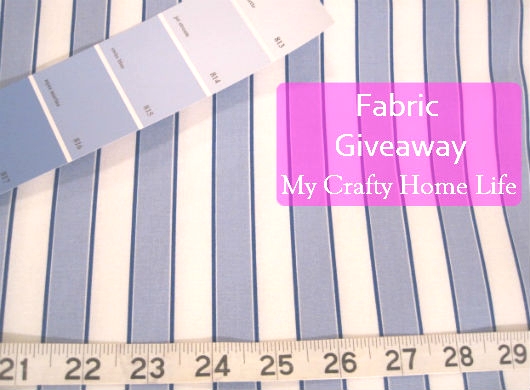
It is a crisp blue and white 100% cotton fabric from Laura Ashley. It is 48" wide and 5 yards long. The stripes are railroaded (run the length of the fabric).


It could be used for so many lovely things.....
 |
| PB Kids |
 |
| Victoria Hagan |
 |
| Source |
 |
| PB |
Since color on a monitor can be deceiving, the main blue is in the color range of BM Aqua Marina
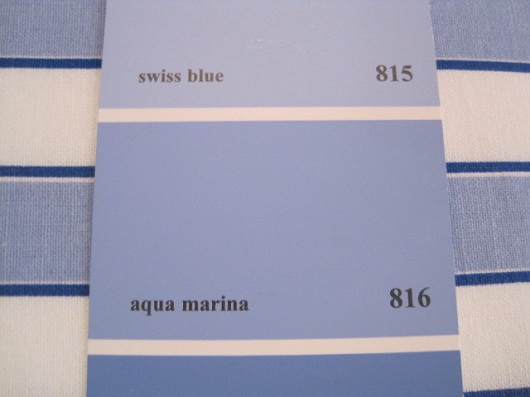
The stripes can easily be matched up to form a miter


Here are the 4 (per person) easy ways to enter this giveaway:
1. Follow this blog on Google Friend Connect (leave a comment)
2. Follow My Crafty Home Life on Pinterest (leave another comment)
3. Pin the "Fabric Giveaway" image from above (leave another comment)
4. Become a follower on Bloglovin (leave another comment)
The winner will be announced next Monday....Good Luck!
A Few Great Gals!
Like many of you, I often wonder what to write about. Will you find it interesting, inspiring, or entertaining? Will you come back tomorrow? My counter tells me you came...but does "no comment" mean no interest? I know we have all felt this. I am so lucky to have an amazing group of ladies in the One Room Challenge. I know I can count on several visits from them, and that is enough.
Now I would like to tell you about a few gals who are not in the challenge. These bloggers don't need to check in with my blog on a consistent basis. They don't need to come back at all...BUT THEY DO. They come here almost every day. They always leave a comment. They are fun, bright and have super terrific blogs! I could go on and on, instead...I would like you to meet my newer bloggie friends (in no particular order).
First up, Mimi from First Come Flowers.

Mimi has lovely tips and ideas on how to add flowers to your everyday life.
Next up, Kerry at Design du Monde. Kerry is an interior designer who is not afraid of a little DIY. She also designs fabric. I love this one of hers

Kerry has a real practical way about her with an eye for high-end.
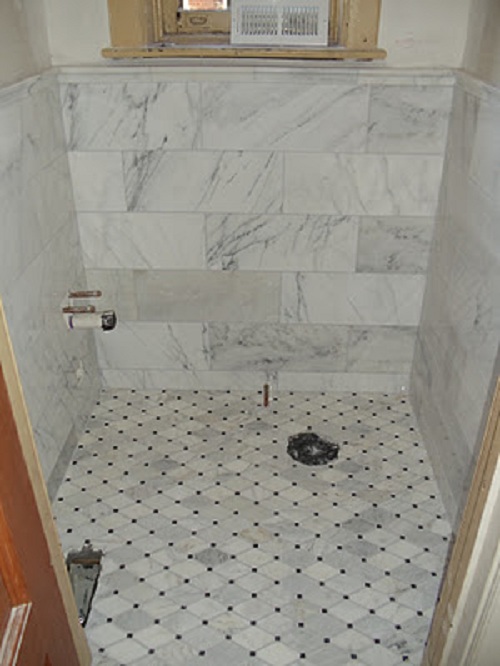
Finally, there is Tiffany from Worthwhile Domicile. Tiffany and her husband are renovating their home. She has amazing taste, and is quite witty. Just look at the tile she chose for her powder room.
My favorite part of her blog, is that she really wants to know what you think....and I tell her!
Thank you, Ladies, your kind comments make my day! If you are not familiar with these blogs, I encourage you to stop by and check them out. I promise that you will have a warm welcome from them. Who are your most loyal viewers? Have you thanked them?
Upholstery 101 (week 10)
Hello, and welcome back...in case you are new here...this is an on-going upholstery series. To start at the beginning, go here.
Today will NOT be the last post....I don't know what I am doing I was not sure how to handle the arms, so this week was a lot of trial, and luckily not too many errors!
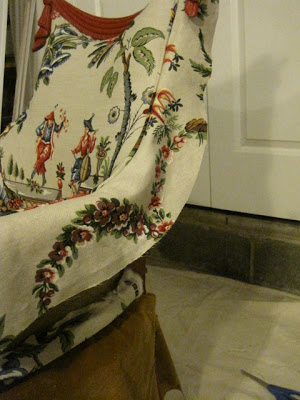
I decided to use Mackenzie-Childs as my upholstery influence for this chair. On the seat, and probably the back, I am using a camel colored velvet I had in my hoarding collection. Velvet fabric has a nap (a specific texture), and working with it is not hard, you just need to take the an extra step or two when you cut it. For more information on cutting fabrics with a nap, go here.
Jumping in...I placed a piece of the fabric loosely over the seat, tucking all around and making cuts like the lining

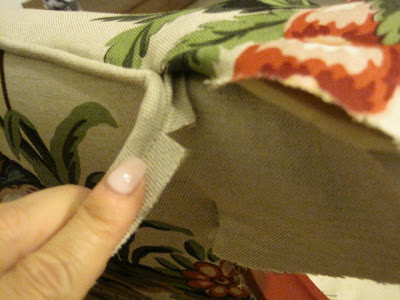
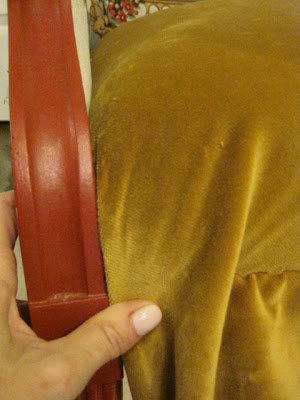
Using the piping that I made (now this is the part that I am experimenting...not sure how to finish the arms), I decided to staple it along the top inside edge of the chair. I started at the inside portion where the side fabric would also get stapled to the front side...
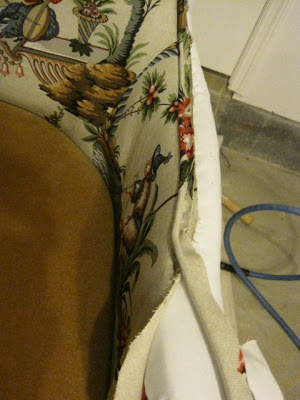

The staples do not need to be close together, this is only for holding the piping into position
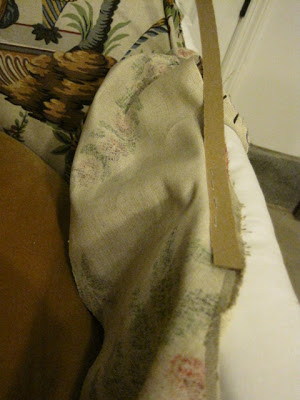
Here goes the next part of my experiment, I placed the arm piece long that same edge, folding it over (right sides together) along the inside arm. It is how you would put the pieces together with the piping sandwiched between if you could magically sew them while on the chair
Using cardboard stripping (a common upholstery supply)
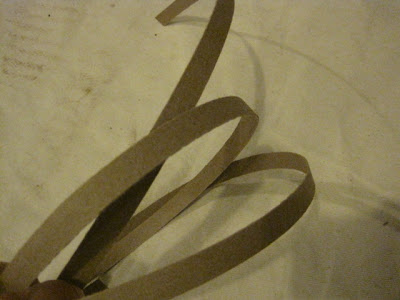
I placed the tack stripping along that seam (this is the magical sewing..only using staples) and stapled
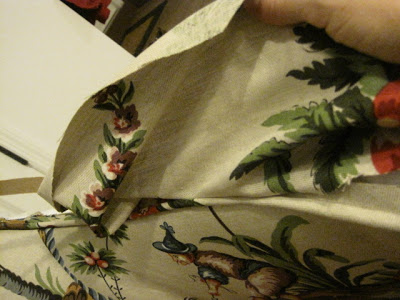
...making sure that the staples are close together, like stitches. When the fabric is folded back over, it looks like this
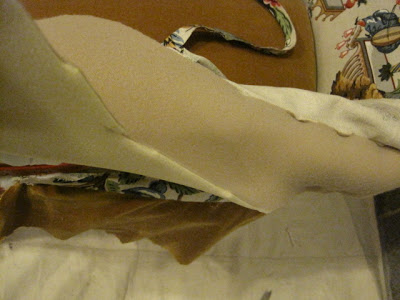
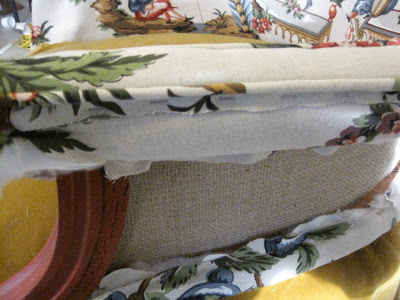
Once I folded the fabric over, I felt it could use a thin layer of foam/fabric (sold at most craft stores). I lightly tacked it in place (maybe a staple every 3" very close to the edge). I trimmed it while it was on the chair
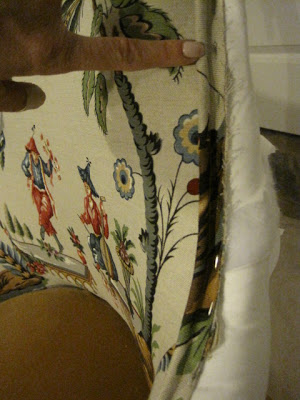
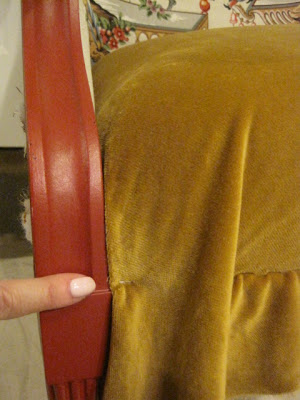
Now, back to the experiment...the rest of the arm. I could not keep applying the piping all the way around the arm in the same fashion....each piece covers the edges of the next piece...until you finish it with a gimp, double-welting, or fancy trim.
So I made a slit in the piping (careful not to cut into the finished roll) where the inside arm starts around the circle of the arm...I also slit the fabric at the same place
Now I am stapling the fabric and piping down the onto the side of the arm (no longer under).

When you examine these photos, you can see that it would not have been possible to tuck it all under, the way the inside piece was done
Also, note that the piping was tacked along the edge. Again, this is to hold it in place...more staples to come. Moving onto the seat....you have seen me do this many times....just like the seat in the Tobi Fairley chair...and then cutting when you are done

A few staples in the front to hold it
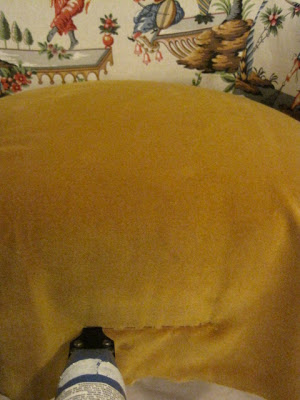
CORNERS ON THE FRONT.... This is the difficult part....I promise you will get better with practice!!! Remembering that the staples you put in may need to be re-positioned from time to time....working from the front center out....pull the fabric at a downward angle toward the arm....
At the arm, tuck under and trim off unseen bulky fabric and fold and tuck until you have a fold that you are happy with...I like this fold, and can adjust the rest of the front
So I tacked it into position

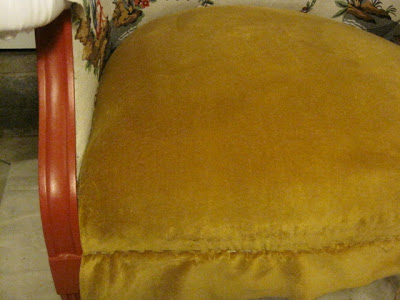
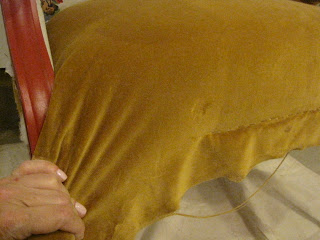
This is where you can see the nap of the fabric, it needs to be brushed out...the marks are not permanent. Here is the chair with a finished corner...you can predict how the other corner will get worked, and maybe re-worked!
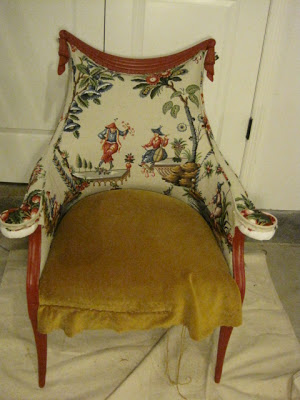
I want to point out that the circular ends of the arms are charming, and commanding for your attention....I tried to cut the fabric for the arms with this in mind. I wanted both circles to have red berries and similar patterns on them. If you have a project that has a prominent feature, try to cut out your fabric with that feature in mind.
Hope to see you next Wednesday for what MUST be the Finale! Is anyone trying this at home?
Today will NOT be the last post....
I decided to use Mackenzie-Childs as my upholstery influence for this chair. On the seat, and probably the back, I am using a camel colored velvet I had in my
Jumping in...I placed a piece of the fabric loosely over the seat, tucking all around and making cuts like the lining
Using the piping that I made (now this is the part that I am experimenting...not sure how to finish the arms), I decided to staple it along the top inside edge of the chair. I started at the inside portion where the side fabric would also get stapled to the front side...
...I stopped at the top tassel
Here goes the next part of my experiment, I placed the arm piece long that same edge, folding it over (right sides together) along the inside arm. It is how you would put the pieces together with the piping sandwiched between if you could magically sew them while on the chair
Using cardboard stripping (a common upholstery supply)
I placed the tack stripping along that seam (this is the magical sewing..only using staples) and stapled
...making sure that the staples are close together, like stitches. When the fabric is folded back over, it looks like this
Once I folded the fabric over, I felt it could use a thin layer of foam/fabric (sold at most craft stores). I lightly tacked it in place (maybe a staple every 3" very close to the edge). I trimmed it while it was on the chair
Now, back to the experiment...the rest of the arm. I could not keep applying the piping all the way around the arm in the same fashion....each piece covers the edges of the next piece...until you finish it with a gimp, double-welting, or fancy trim.
So I made a slit in the piping (careful not to cut into the finished roll) where the inside arm starts around the circle of the arm...I also slit the fabric at the same place
Now I am stapling the fabric and piping down the onto the side of the arm (no longer under).
When you examine these photos, you can see that it would not have been possible to tuck it all under, the way the inside piece was done
Also, note that the piping was tacked along the edge. Again, this is to hold it in place...more staples to come. Moving onto the seat....you have seen me do this many times....just like the seat in the Tobi Fairley chair...and then cutting when you are done
CORNERS ON THE FRONT.... This is the difficult part....I promise you will get better with practice!!! Remembering that the staples you put in may need to be re-positioned from time to time....working from the front center out....pull the fabric at a downward angle toward the arm....
At the arm, tuck under and trim off unseen bulky fabric and fold and tuck until you have a fold that you are happy with...I like this fold, and can adjust the rest of the front
So I tacked it into position
Going back and removing (be careful not to scratch that painted frame) some of the previous staples, re-position and pull the fabric in the opposite direction to work out any wrinkles until it is smooth.
This is where you can see the nap of the fabric, it needs to be brushed out...the marks are not permanent. Here is the chair with a finished corner...you can predict how the other corner will get worked, and maybe re-worked!
I want to point out that the circular ends of the arms are charming, and commanding for your attention....I tried to cut the fabric for the arms with this in mind. I wanted both circles to have red berries and similar patterns on them. If you have a project that has a prominent feature, try to cut out your fabric with that feature in mind.
Hope to see you next Wednesday for what MUST be the Finale! Is anyone trying this at home?
Got Paint?
......continuing on with the challenge, this is day 29 of 31.....for all 31, go here
The easiest way to transform a room is with paint. Well, now that might be true with upholstery, too.
Imagine if your white sofa had a permanant stain, you could do this
I think it takes a "pop of color" to a whole new level
I have never tried painting on fabric....but my friend has....
Danylle over at Nana Moon Shop did this great tutorial with fabric medium. She shows you how to turn this
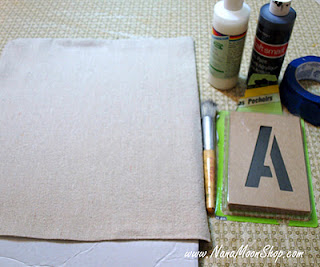
into this
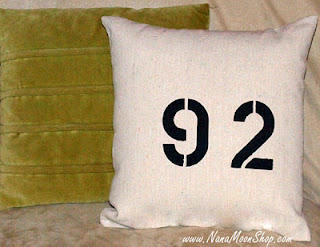
...and if you learn how to do that....then, you could do this
The easiest way to transform a room is with paint. Well, now that might be true with upholstery, too.
Imagine if your white sofa had a permanant stain, you could do this
 |
| Source |
I think it takes a "pop of color" to a whole new level
 |
| Source |
I have never tried painting on fabric....but my friend has....
Danylle over at Nana Moon Shop did this great tutorial with fabric medium. She shows you how to turn this
into this
...and if you learn how to do that....then, you could do this
 |
| Source |
Hop on over to check out this great tutorial. She would love to know what you think!
Although there are only two day remaining for the challenge, my upholstery tutorial will continue on Wednesdays. Thanks for stopping by