
Upholstery 101 (week 10)
Hello, and welcome back...in case you are new here...this is an on-going upholstery series. To start at the beginning, go here.
Today will NOT be the last post....I don't know what I am doing I was not sure how to handle the arms, so this week was a lot of trial, and luckily not too many errors!
I decided to use Mackenzie-Childs as my upholstery influence for this chair. On the seat, and probably the back, I am using a camel colored velvet I had in my hoarding collection. Velvet fabric has a nap (a specific texture), and working with it is not hard, you just need to take the an extra step or two when you cut it. For more information on cutting fabrics with a nap, go here.
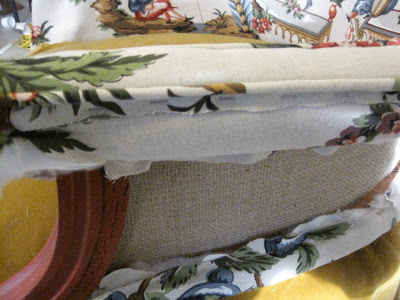
Jumping in...I placed a piece of the fabric loosely over the seat, tucking all around and making cuts like the lining

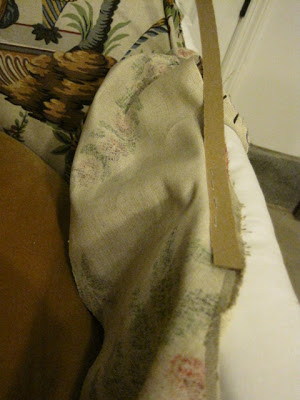
Using the piping that I made (now this is the part that I am experimenting...not sure how to finish the arms), I decided to staple it along the top inside edge of the chair. I started at the inside portion where the side fabric would also get stapled to the front side...
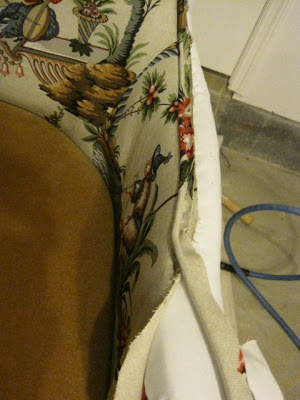

The staples do not need to be close together, this is only for holding the piping into position
Here goes the next part of my experiment, I placed the arm piece long that same edge, folding it over (right sides together) along the inside arm. It is how you would put the pieces together with the piping sandwiched between if you could magically sew them while on the chair
Using cardboard stripping (a common upholstery supply)
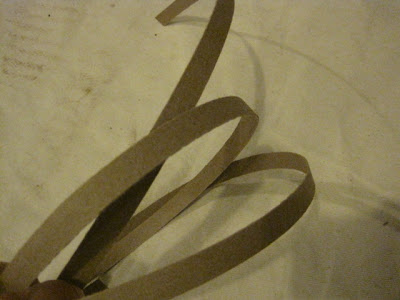
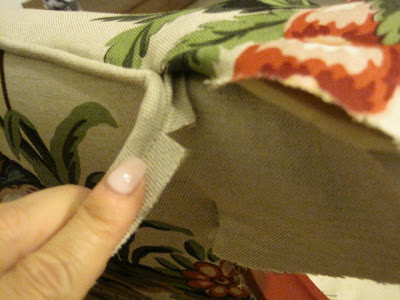
I placed the tack stripping along that seam (this is the magical sewing..only using staples) and stapled
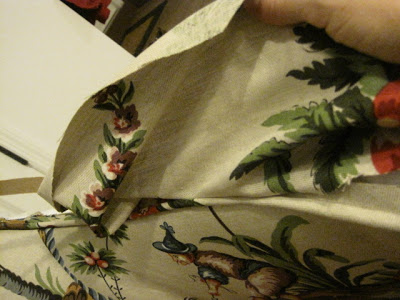
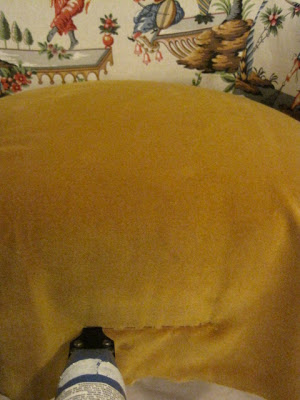
...making sure that the staples are close together, like stitches. When the fabric is folded back over, it looks like this
Once I folded the fabric over, I felt it could use a thin layer of foam/fabric (sold at most craft stores). I lightly tacked it in place (maybe a staple every 3" very close to the edge). I trimmed it while it was on the chair
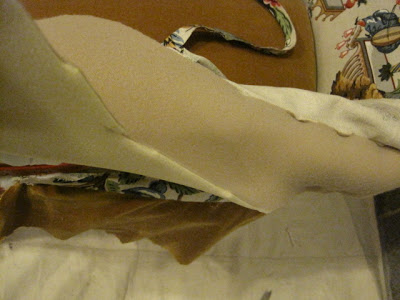
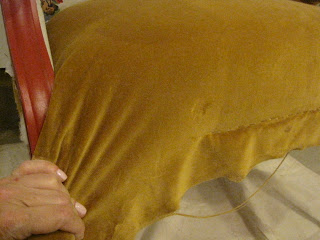
Now, back to the experiment...the rest of the arm. I could not keep applying the piping all the way around the arm in the same fashion....each piece covers the edges of the next piece...until you finish it with a gimp, double-welting, or fancy trim.
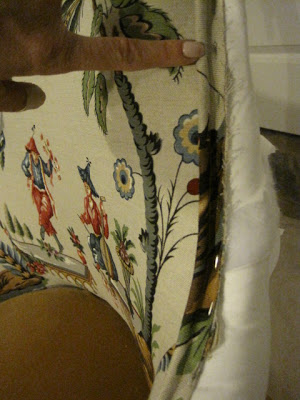
So I made a slit in the piping (careful not to cut into the finished roll) where the inside arm starts around the circle of the arm...I also slit the fabric at the same place
Now I am stapling the fabric and piping down the onto the side of the arm (no longer under).

When you examine these photos, you can see that it would not have been possible to tuck it all under, the way the inside piece was done
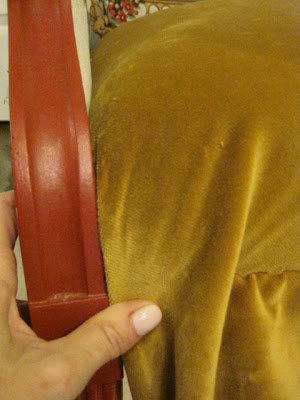
Also, note that the piping was tacked along the edge. Again, this is to hold it in place...more staples to come. Moving onto the seat....you have seen me do this many times....just like the seat in the Tobi Fairley chair...and then cutting when you are done

A few staples in the front to hold it
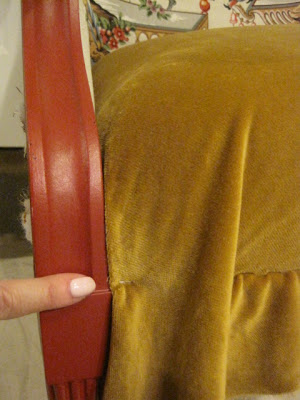
CORNERS ON THE FRONT.... This is the difficult part....I promise you will get better with practice!!! Remembering that the staples you put in may need to be re-positioned from time to time....working from the front center out....pull the fabric at a downward angle toward the arm....
At the arm, tuck under and trim off unseen bulky fabric and fold and tuck until you have a fold that you are happy with...I like this fold, and can adjust the rest of the front
So I tacked it into position

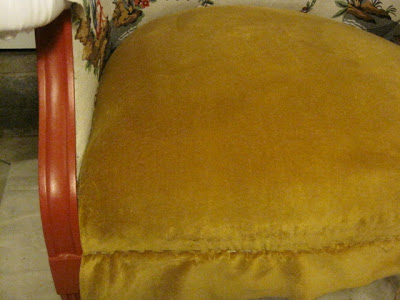
This is where you can see the nap of the fabric, it needs to be brushed out...the marks are not permanent. Here is the chair with a finished corner...you can predict how the other corner will get worked, and maybe re-worked!
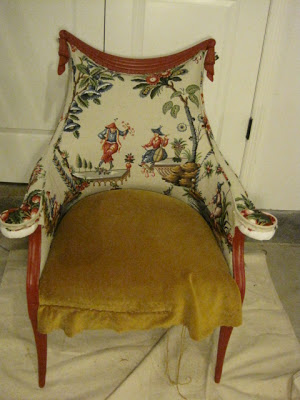
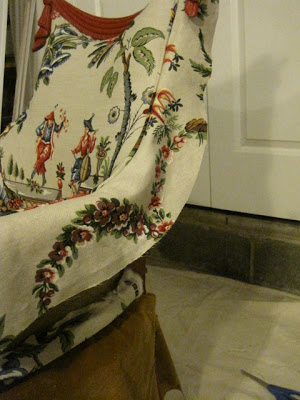
I want to point out that the circular ends of the arms are charming, and commanding for your attention....I tried to cut the fabric for the arms with this in mind. I wanted both circles to have red berries and similar patterns on them. If you have a project that has a prominent feature, try to cut out your fabric with that feature in mind.
Hope to see you next Wednesday for what MUST be the Finale! Is anyone trying this at home?
Today will NOT be the last post....
I decided to use Mackenzie-Childs as my upholstery influence for this chair. On the seat, and probably the back, I am using a camel colored velvet I had in my
Jumping in...I placed a piece of the fabric loosely over the seat, tucking all around and making cuts like the lining
Using the piping that I made (now this is the part that I am experimenting...not sure how to finish the arms), I decided to staple it along the top inside edge of the chair. I started at the inside portion where the side fabric would also get stapled to the front side...
...I stopped at the top tassel
Here goes the next part of my experiment, I placed the arm piece long that same edge, folding it over (right sides together) along the inside arm. It is how you would put the pieces together with the piping sandwiched between if you could magically sew them while on the chair
Using cardboard stripping (a common upholstery supply)
I placed the tack stripping along that seam (this is the magical sewing..only using staples) and stapled
...making sure that the staples are close together, like stitches. When the fabric is folded back over, it looks like this
Once I folded the fabric over, I felt it could use a thin layer of foam/fabric (sold at most craft stores). I lightly tacked it in place (maybe a staple every 3" very close to the edge). I trimmed it while it was on the chair
Now, back to the experiment...the rest of the arm. I could not keep applying the piping all the way around the arm in the same fashion....each piece covers the edges of the next piece...until you finish it with a gimp, double-welting, or fancy trim.
So I made a slit in the piping (careful not to cut into the finished roll) where the inside arm starts around the circle of the arm...I also slit the fabric at the same place
Now I am stapling the fabric and piping down the onto the side of the arm (no longer under).
When you examine these photos, you can see that it would not have been possible to tuck it all under, the way the inside piece was done
Also, note that the piping was tacked along the edge. Again, this is to hold it in place...more staples to come. Moving onto the seat....you have seen me do this many times....just like the seat in the Tobi Fairley chair...and then cutting when you are done
CORNERS ON THE FRONT.... This is the difficult part....I promise you will get better with practice!!! Remembering that the staples you put in may need to be re-positioned from time to time....working from the front center out....pull the fabric at a downward angle toward the arm....
At the arm, tuck under and trim off unseen bulky fabric and fold and tuck until you have a fold that you are happy with...I like this fold, and can adjust the rest of the front
So I tacked it into position
Going back and removing (be careful not to scratch that painted frame) some of the previous staples, re-position and pull the fabric in the opposite direction to work out any wrinkles until it is smooth.
This is where you can see the nap of the fabric, it needs to be brushed out...the marks are not permanent. Here is the chair with a finished corner...you can predict how the other corner will get worked, and maybe re-worked!
I want to point out that the circular ends of the arms are charming, and commanding for your attention....I tried to cut the fabric for the arms with this in mind. I wanted both circles to have red berries and similar patterns on them. If you have a project that has a prominent feature, try to cut out your fabric with that feature in mind.
Hope to see you next Wednesday for what MUST be the Finale! Is anyone trying this at home?