
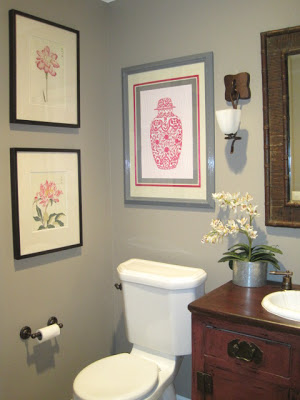
My Custom Pink Pagoda Frame
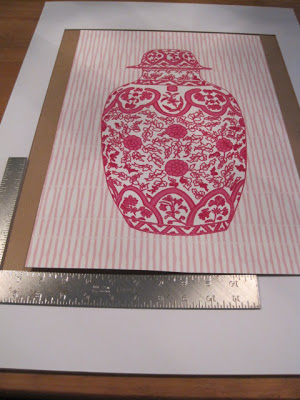
Yesterday, I told you about my Pink Pagoda Print. Here is my step-by-step how-to make a custom frame.

First, you start with an Ikea Virserum

measure the width of the top profile to decide how much of a reveal you want

Next, a trip to Home Depot for the perfect profile trim. I wanted one that would compliment the Asian feel of the print as well as the bamboo accents I have in the room

Test the trim to confirm that you LOVE it!
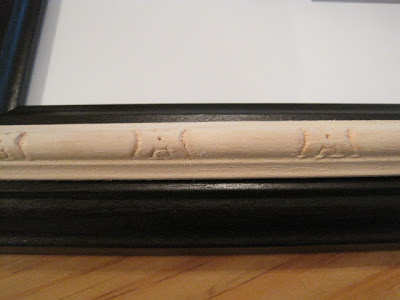
measure, cut to length, and miter the corners

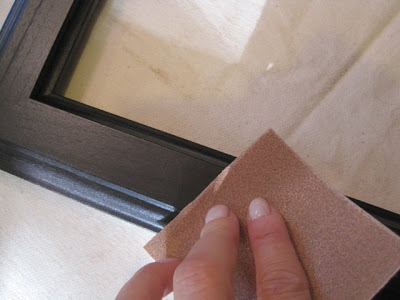
lightly sand your Virserum, to break the factory "seal"
add a bead of wood glue to the back of your cut molding


here is an old painter's tip, since this is oil base, in-between coats (24hrs) place the brush (paint and all) into a plastic bag
 ...and put it in your freezer. The next day, let it acclimate to room temp for a few minutes, and you are ready to go...without ever cleaning the brush!
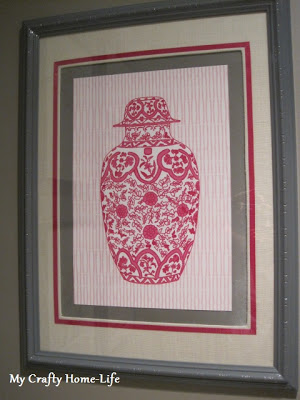
close-up of the finished frame profile as well as the burlap mat

...And now, onto creating custom matting
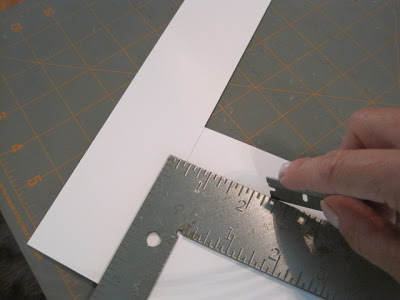
First, measure the reveal of your current mat
decide if you want the same reveal on all sides, measure and mark for your cut

cut the mat, I like to use a razor blade, choose what you are comfortable handling
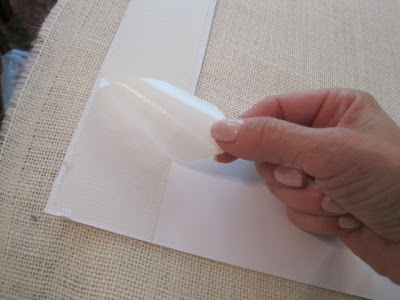
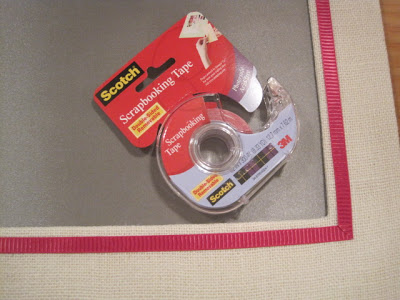
place the cut mat on the wrong side of your fabric (I used ivory burlap) add double sided carpet tape...also from Home Depot

peel back the paper from the tape exposing the sticky side
trim your fabric so that it folds over half of the way...leaving room for the inside to fold the other half of the way

repeat this for all sides, trim corners, if need be, use a drop of frey check to keep the threads from unraveling

once you have completed covered the mat with fabric, you can lightly press the top to get it extra smooth

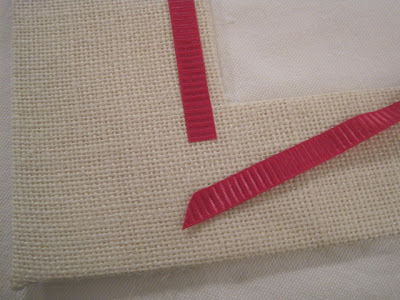
...and now onto the ribbon detail. Choosing an accent or highlight color for your print, I used my mini iron, a regular iron would work just fine

I spray mounted gray taffeta to the board that came with the frame
 trimmed it to size, no need to have neat edges, the matting will cover it

placing the finished matting over the back, and using double sided acid free tape, I positioned the print exactly where I wanted it
clean the glass, reassemble, and admire
First, you start with an Ikea Virserum
measure the width of the top profile to decide how much of a reveal you want
Next, a trip to Home Depot for the perfect profile trim. I wanted one that would compliment the Asian feel of the print as well as the bamboo accents I have in the room
Test the trim to confirm that you LOVE it!
measure, cut to length, and miter the corners
lightly sand your Virserum, to break the factory "seal"
add a bead of wood glue to the back of your cut molding
tape the molding into place (no need for nails) and let dry
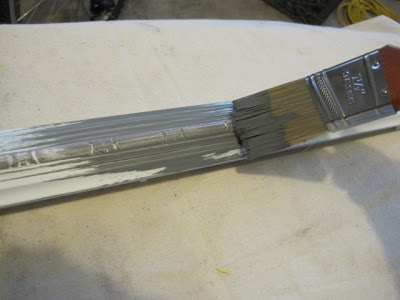
spray prime completed frame
apply 2 coats of Rust-oleum's High Gloss Smoke Gray
here is an old painter's tip, since this is oil base, in-between coats (24hrs) place the brush (paint and all) into a plastic bag
close-up of the finished frame profile as well as the burlap mat
...And now, onto creating custom matting
First, measure the reveal of your current mat
decide if you want the same reveal on all sides, measure and mark for your cut
cut the mat, I like to use a razor blade, choose what you are comfortable handling
place the cut mat on the wrong side of your fabric (I used ivory burlap) add double sided carpet tape...also from Home Depot
peel back the paper from the tape exposing the sticky side
trim your fabric so that it folds over half of the way...leaving room for the inside to fold the other half of the way
repeat this for all sides, trim corners, if need be, use a drop of frey check to keep the threads from unraveling
once you have completed covered the mat with fabric, you can lightly press the top to get it extra smooth
...and now onto the ribbon detail. Choosing an accent or highlight color for your print, I used my mini iron, a regular iron would work just fine
sandwiched between the ribbon and burlap is a thin piece of fusible web pre-cut to 1/4". I only mitered one of the ribbon pieces for each corner.
I spray mounted gray taffeta to the board that came with the frame
placing the finished matting over the back, and using double sided acid free tape, I positioned the print exactly where I wanted it
clean the glass, reassemble, and admire
Don't forget, tomorrow begins the on-line upholstery tutorial